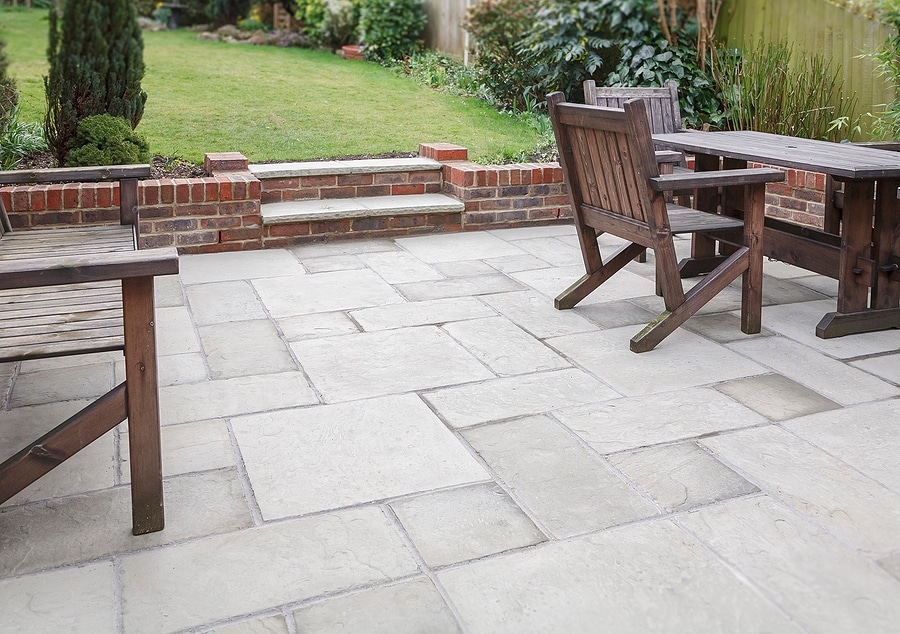
Natural stone pavers offer timeless elegance and durability to any outdoor space—whether you’re designing a patio, pathway, or poolside retreat. But when it comes to installation, especially for first-timers or DIY enthusiasts, one question often comes up: Where to start when laying pavers?
The answer lies in good planning and a methodical approach. Here’s everything you need to know to kick off your natural stone paving project the right way.
1. Begin With a Clear Plan
Before you even pick up a stone, take time to plan:
-
Measure the Area: Know your dimensions to calculate how many pavers you’ll need.
-
Choose the Right Stone: Opt for materials suited to your climate and intended use. Sandstone, limestone, and bluestone are popular natural choices.
-
Sketch Your Layout: Use graph paper or a design tool to visualize the space and decide on your pattern—random, coursed, or geometric.
👉 Tip: With natural stone, irregularities are part of the charm. Don’t expect perfect symmetry.
2. Identify Your Starting Point
Where you start laying pavers can influence the entire look and function of your space:
-
Start from a Straight Edge or Corner: This could be the edge of a house, patio, or another defined border. It helps keep alignment consistent.
-
Work Away from Structures: This avoids trapping yourself in tight spaces later and makes cutting and fitting easier.
-
Prioritize Drainage: Always begin at the highest elevation and work downward to support proper water flow.
3. Prepare a Solid Foundation
Your pavers are only as stable as the base beneath them:
-
Excavate the Area: Remove soil to the necessary depth (typically 4–8 inches depending on load and soil type).
-
Add a Crushed Stone Base: Compact 4–6 inches of crushed rock to support drainage and prevent shifting.
-
Apply Bedding Sand or Mortar: A 1-inch layer of bedding sand creates a smooth, even surface. For mortared installs, use a suitable bonding layer.
👉 Pro Tip: Use a plate compactor to achieve a stable and level base.
4. Dry Lay First
Lay your stones in place without adhesive or mortar to:
-
Test the layout
-
Make adjustments
-
Mix stones from different pallets for color variation
Dry laying helps you visualize the final look and ensures a good mix of shapes and shades.
5. Lay and Level One Stone at a Time
-
Set Stones Firmly in Place: Press each stone into the bedding layer, tapping gently with a rubber mallet.
-
Check Levels Often: Use a spirit level to ensure each stone is flat and flush with surrounding ones.
-
Maintain Joint Gaps: With irregular stones, gaps will vary—just keep them consistent and visually balanced.
6. Cut and Fit Last
Save intricate cuts and edge-fitting for the final step. Use a wet saw with a diamond blade or a hammer and chisel for softer stones. Take your time—precision here gives the installation a professional finish.
7. Finish Strong
-
Fill Joints: Sweep in polymeric sand or grout depending on the style and use. This locks the stones and deters weed growth.
-
Compact Again: Run the plate compactor over a protective mat to settle everything in place.
-
Seal the Surface (Optional): Enhances color, adds protection, and makes cleaning easier.
Final Thoughts – Where to start when laying pavers
Starting your natural stone paver project on the right foot makes all the difference. Begin at a defined edge, prepare a solid base, and lay with care and consistency. While it may take time and patience, the result—a beautiful, enduring surface—will be well worth the effort.
Whether you’re building a rustic flagstone patio or a sleek bluestone walkway, starting smart is the first step toward outdoor excellence.