
What Makes Quartzite a Reliable Material
When homeowners choose a surface for their kitchen or bathroom, reliability matters just as much as appearance. A beautiful material that doesn’t hold up to daily use quickly becomes a source of frustration. Quartzite stands out because it consistently delivers strength, stability, and long-term performance.
But what actually makes quartzite so reliable?
Here’s what sets quartzite apart from other countertop materials—and why it continues to earn homeowners’ trust.
Formed Under Extreme Natural Conditions
Quartzite begins as sandstone that is transformed under intense heat and pressure deep within the earth. This natural process produces a stone that is:
-
Extremely dense
-
Structurally stable
-
Resistant to wear
That natural formation gives quartzite its exceptional strength and long-term reliability.
High Hardness and Scratch Resistance
Quartzite ranks high on the Mohs hardness scale, making it one of the hardest natural stones commonly used in homes.
In everyday use, this means:
-
Scratches are uncommon
-
The surface holds its integrity
-
Normal kitchen activity doesn’t leave lasting marks
This hardness is a major reason quartzite performs so well over time.
Excellent Heat Resistance
Quartzite handles heat better than many engineered materials.
You can expect:
-
Stability around cooktops
-
Resistance to hot cookware
-
No heat-related discoloration
While trivets are always recommended, quartzite is forgiving in real-world kitchens.
Structural Integrity Over Time
When fabricated and installed correctly, quartzite maintains its structure year after year.
Long-term reliability includes:
-
Stable seams
-
Strong edges and cutouts
-
No shifting or settling
-
Minimal chipping
Quartzite doesn’t degrade or weaken with normal use.
Natural Color and Pattern Stability
Quartzite’s color and veining are completely natural—not added with dyes or resins.
As a result:
-
Colors don’t fade
-
Whites don’t yellow
-
Patterns remain crisp
Even years later, quartzite looks much the same as it did when installed.
Predictable Maintenance Requirements
Reliable materials shouldn’t require constant attention.
Quartzite maintenance is:
-
Simple
-
Consistent
-
Easy to plan for
Periodic sealing and gentle cleaning are typically all that’s needed to keep the stone performing well.
Ages Gracefully Instead of Wearing Out
Rather than showing obvious wear, quartzite develops a subtle, even patina over time.
This means:
-
Minor marks blend naturally
-
The surface looks lived-in, not damaged
-
The stone continues to look refined
This graceful aging contributes to quartzite’s reputation as a long-term material.
Performs Well in Real Homes
Quartzite isn’t just reliable in theory—it performs in everyday environments.
It handles:
-
Busy family kitchens
-
Frequent entertaining
-
Moisture in bathrooms
-
Daily cleaning routines
This real-world reliability is why so many homeowners choose quartzite again.
Why Fabrication Matters for Reliability
Even the strongest stone won’t perform well if handled poorly.
Professional fabrication ensures:
-
Proper slab selection
-
Strategic seam placement
-
Reinforced cutouts
-
Stress-free installation
When quartzite is fabricated correctly, its natural reliability shines.
Quartzite vs Other Materials
| Material | Reliability Over Time |
|---|---|
| Quartzite | ⭐⭐⭐⭐⭐ Consistent and durable |
| Granite | ⭐⭐⭐⭐ Durable, may dull |
| Marble | ⭐⭐ Prone to wear |
| Quartz | ⭐⭐⭐ Heat-sensitive |
| Laminate | ⭐ Short lifespan |
Quartzite consistently ranks among the most dependable options.
Final Takeaway – What Makes Quartzite a Reliable Material
Quartzite is reliable because it:
✨ Forms naturally under extreme conditions
✨ Resists scratches and heat
✨ Maintains structure and color
✨ Ages gracefully
✨ Requires predictable maintenance
When chosen carefully and fabricated correctly, quartzite delivers exactly what homeowners want from a surface—confidence, durability, and long-term performance.
Quartzite doesn’t just look strong.
It is strong—and that’s what makes it reliable.
Quartzite Myths That Cause Expensive Mistakes
Quartzite has become one of the most sought-after natural stones—but it’s also one of the most misunderstood. A handful of common myths lead homeowners to make decisions that cost them money, time, and unnecessary frustration later.
The stone isn’t the problem. The misinformation is.
Here are the most common quartzite myths—and how believing them can lead to expensive mistakes.
Myth #1: All Quartzite Is the Same
This is one of the most costly assumptions.
Reality:
-
Quartzite varies widely in density, structure, and performance
-
Two slabs with the same name can behave very differently
-
Appearance alone doesn’t determine quality
Choosing quartzite by name or sample instead of inspecting the actual slab often leads to unexpected maintenance or performance issues.
Myth #2: Quartzite Is Maintenance-Free
Quartzite is durable—but it isn’t maintenance-free.
Reality:
-
Quartzite needs sealing
-
Cleaning products matter
-
Habits affect long-term performance
Assuming no maintenance is required leads to staining, blotchiness, and premature wear that could have been easily avoided.
Myth #3: Quartzite Is the Same as Quartz
Despite the similar names, these materials are completely different.
Reality:
-
Quartzite is a natural stone
-
Quartz is an engineered product
-
Quartzite handles heat better
-
Quartzite reacts differently to water and sealing
Confusing the two often leads to unrealistic expectations about care and performance.
Myth #4: If It Cracks, the Stone Was Bad
Cracks are rarely caused by “bad stone.”
Reality:
-
Most cracks come from installation stress
-
Unlevel cabinets cause long-term pressure
-
Poor seam placement weakens the surface
-
Forcing stone during install creates failure points
Blaming the stone overlooks the real cause—and prevents the problem from being fixed correctly.
Myth #5: More Dramatic Quartzite Is Always Better
Bold quartzite is beautiful—but it isn’t always the best choice.
Reality:
-
Highly fractured patterns may require extra reinforcement
-
Busy veining can overwhelm smaller spaces
-
Statement stone requires careful planning
Choosing bold quartzite without considering layout and usage can lead to visual regret or structural challenges.
Myth #6: Sealing Once Is Enough
Sealing isn’t a one-time task.
Reality:
-
Sealers wear down over time
-
Water exposure affects longevity
-
Resealing is part of ownership
Skipping resealing increases absorption and staining risk—often years before homeowners realize what’s happening.
Myth #7: Quartzite Can Be Treated Like Granite
Quartzite is harder—but that doesn’t make it simpler.
Reality:
-
Quartzite requires different cutting techniques
-
Reinforcement matters more
-
It’s less forgiving of shortcuts
Fabricating quartzite like granite is one of the fastest ways to create long-term problems.
Myth #8: Any Installer Can Handle Quartzite
Quartzite demands experience.
Reality:
-
It can’t be forced into place
-
It requires careful planning and execution
-
Mistakes often show up months later
Choosing an installer without quartzite-specific experience is one of the most expensive mistakes homeowners make.
Myth #9: Water Darkening Means the Stone Is Failing
Temporary water darkening is normal for some quartzites.
Reality:
-
Color returns as the stone dries
-
Proper sealing minimizes this
-
It doesn’t indicate damage
Misinterpreting this behavior often leads to unnecessary panic—or worse, unnecessary replacement.
The Real Cost of These Myths
Believing these myths often results in:
-
Costly repairs
-
Premature replacement
-
Frustration with a material that should perform beautifully
Most of these issues are preventable with proper education and professional guidance.
How We Prevent These Mistakes
We prevent costly quartzite mistakes by:
✔ Evaluating slabs before fabrication
✔ Setting realistic expectations upfront
✔ Planning seams and reinforcement intentionally
✔ Installing without stress or shortcuts
✔ Educating homeowners on proper care
The goal isn’t just a good install—it’s long-term success.
Final Takeaway – Quartzite Myths That Cause Expensive Mistakes
Quartzite isn’t risky—the myths surrounding it are.
When homeowners understand what quartzite really is, how it behaves, and what it requires, it becomes one of the most reliable and rewarding materials available.
Expensive quartzite mistakes don’t come from the stone.
They come from misinformation.

How Quartzite Reacts to Real Life Use
Quartzite looks stunning in a showroom—but what most homeowners really want to know is how it behaves once life happens. Cooking, cleaning, spills, kids, guests, and daily wear all put countertops to the test.
The good news? Quartzite holds up exceptionally well to real-life use when fabricators select, shape, and maintain it correctly.
Here’s what to expect once quartzite becomes part of everyday life.
Daily Cooking and Food Prep
Quartzite is extremely hard and dense, which makes it well-suited for busy kitchens.
In daily use:
-
It resists scratches better than most natural stones
-
Knives won’t damage the surface (though cutting boards are still recommended)
-
The stone holds its structure even with heavy use
Quartzite handles real cooking environments without showing immediate wear.
Heat Exposure
Quartzite performs very well around heat.
You can expect:
-
Strong resistance to hot pans and cookware
-
No heat-related discoloration
-
Stability around cooktops
While trivets are still a best practice, quartzite is far more forgiving than many engineered materials.
Spills and Moisture
Quartzite resists staining well—but it isn’t completely non-porous.
In real life:
-
Water may temporarily darken the stone when wet
-
Color returns as the stone dries
-
Proper sealing minimizes absorption
Prompt cleanup keeps quartzite looking consistent, even in busy households.
Oils, Acids, and Everyday Messes
Quartzite handles common kitchen messes better than softer stones.
It:
-
Doesn’t etch like marble
-
Resists oil absorption when sealed
-
Maintains surface integrity with routine cleaning
That said, oils and acidic substances should still be wiped up in a timely manner to protect the sealer.
Scratches, Chips, and Wear
After years of use, most quartzite surfaces show:
-
Minimal visible scratches
-
Very little edge wear
-
No worn “traffic paths”
Chipping is uncommon when edges and cutouts are fabricated correctly.
Water Around Sinks and Faucets
Sink areas see the most exposure.
In everyday use:
-
Standing water may cause temporary darkening
-
Sealed stone dries evenly
-
Regular wiping keeps appearance consistent
This behavior is normal and manageable—not a flaw.
Cleaning and Maintenance Reality
Quartzite doesn’t require special daily routines.
Typical care includes:
-
Gentle cleaning with pH-neutral products
-
Periodic sealing
-
Avoiding harsh or abrasive cleaners
Most homeowners find quartzite becomes easier to live with as habits settle in.
How Quartzite Compares in Real Homes
| Material | Real-Life Performance |
|---|---|
| Quartzite | ⭐⭐⭐⭐⭐ Durable, forgiving |
| Granite | ⭐⭐⭐⭐ Durable, may dull |
| Marble | ⭐⭐ Etches and scratches |
| Quartz | ⭐⭐⭐ Sensitive to heat |
| Laminate | ⭐ Wears quickly |
Quartzite consistently ranks at the top for real-world use.
Why Fabrication and Installation Matter
Quartzite reacts best to real life when:
-
Slabs are inspected for density
-
Cutouts are reinforced
-
Seams are placed strategically
-
Stone is installed without stress
Poor fabrication can create problems that feel like “real-life wear” but aren’t.
Final Takeaway – How Quartzite Reacts to Real Life Use
Quartzite reacts to real-life use by doing what it’s known for: holding up.
With proper selection, fabrication, and basic care, quartzite:
✨ Resists daily wear
✨ Handles heat and moisture
✨ Maintains its appearance
✨ Ages gracefully
Quartzite isn’t just a showroom stone—it’s built for real homes and real life.

How to Choose Quartzite
Quartzite is one of the most beautiful and durable natural stones you can choose—but selecting the right quartzite isn’t as simple as picking a color you like. Because quartzite varies naturally, the choices you make upfront directly affect how the stone looks, performs, and ages in your home.
Here’s how to choose quartzite the right way—without guesswork or regret.
1️⃣ Start With How the Space Will Be Used
Before looking at slabs, think about how the surface will be used.
Quartzite performs exceptionally well in:
-
Busy kitchens
-
High-traffic family homes
-
Spaces that need durability and heat resistance
If the space sees heavy daily use, prioritize dense quartzite with balanced veining over purely decorative slabs.
2️⃣ Choose the Slab, Not Just the Name
Quartzite names are marketing labels—not quality grades.
Always:
-
View the exact slab you’ll receive
-
Look at the entire slab, not just the center
-
Check consistency across the surface
Two slabs with the same name can perform very differently.
3️⃣ Evaluate Density and Structure
Density is one of the most important performance indicators.
Higher-quality quartzite:
-
Absorbs less moisture
-
Stains less easily
-
Holds edges and cutouts better
A fabricator can help evaluate density and identify slabs best suited for your layout.
4️⃣ Pay Attention to Veining and Movement
Veining affects both appearance and durability.
-
Subtle, flowing veining works well in most kitchens
-
Bold, fractured patterns require careful planning
-
Chaotic movement may need additional reinforcement
Choose veining that fits both your design and your lifestyle.
5️⃣ Match Undertones to Your Home
Quartzite comes in warm, cool, and neutral undertones.
Compare the slab against:
-
Cabinets
-
Flooring
-
Wall colors
-
Hardware
Undertone mismatches are one of the most common reasons a space feels “off” after installation.
6️⃣ Decide How Bold You Want the Stone to Be
Quartzite can either:
-
Anchor the design subtly
-
Become the main focal point
If the stone is bold, keep surrounding materials simple. If the stone is subtle, you have more flexibility elsewhere.
7️⃣ Choose the Right Finish
Finish affects both appearance and maintenance.
-
Polished: Bright, reflective, easiest to maintain
-
Honed: Soft, modern, may show water more
-
Leathered: Textured, warm, best used selectively
Lighting and usage should guide this choice.
8️⃣ Think About Layout and Seams Early
Quartzite selection should include planning.
Consider:
-
Where seams will fall
-
How veins will align
-
Placement of sink and cooktop cutouts
Good planning prevents visual and structural issues later.
9️⃣ Understand Sealing and Maintenance Expectations
Quartzite requires sealing—but not constant attention.
Expect:
-
Periodic sealing (typically yearly)
-
Simple daily cleaning
-
Predictable long-term care
If this aligns with your lifestyle, quartzite is a great fit.
10️⃣ Work With a Fabricator Who Specializes in Quartzite
Quartzite is strong but unforgiving.
A qualified fabricator will:
-
Inspect slabs before cutting
-
Plan reinforcement and seams
-
Fabricate without rushing
-
Install without forcing the stone
This expertise matters just as much as the stone itself.
Signs You’ve Chosen the Right Quartzite
✔ The slab fits your space visually
✔ Undertones feel cohesive
✔ Veining matches the layout
✔ Maintenance expectations feel reasonable
✔ The design feels intentional
When these boxes are checked, quartzite performs beautifully.
Final Takeaway – How to Choose Quartzite
Choosing quartzite isn’t about finding the prettiest slab—it’s about finding the right slab for your home.
When selected thoughtfully and fabricated correctly, quartzite delivers:
✨ Long-term durability
✨ Timeless beauty
✨ Reliable performance
✨ Lasting value
Quartzite rewards good choices upfront. Get those right, and it becomes one of the most satisfying materials you can install in your home.

How Maintenance Habits Impact Quartzite
Quartzite is one of the most durable natural stones available—but its long-term performance isn’t automatic. Two homes can install the same quartzite slab and see very different results years later. The difference usually isn’t the stone. It’s maintenance habits.
Quartzite doesn’t require excessive care, but it does respond directly to how it’s treated. Here’s how everyday habits impact how quartzite looks, performs, and ages over time.
Daily Cleaning Habits Shape Long-Term Appearance
Quartzite holds up well to routine use, but cleaning choices matter.
Healthy habits include:
-
Wiping surfaces with a soft cloth or sponge
-
Using pH-neutral stone cleaners or mild soap
-
Drying the surface after heavy water exposure
Problematic habits—like using acidic, abrasive, or degreasing cleaners—slowly break down sealer and dull the finish. These effects build gradually and often go unnoticed until the stone looks uneven or worn.
How Quickly You Clean Spills Matters
Quartzite resists staining better than many natural stones, but it isn’t stain-proof.
When spills are wiped promptly:
-
Liquids don’t have time to absorb
-
Water darkening remains temporary
-
The surface stays consistent
When spills—especially oils, wine, coffee, or cosmetics—are left sitting, absorption risk increases, even on sealed stone.
Sealing Habits Directly Affect Performance
Sealing is one of the most important maintenance habits for quartzite.
Good sealing habits:
-
Reseal when water stops beading
-
Use the appropriate sealer for the stone
-
Ensure even coverage across the surface
Neglecting sealing leads to:
-
Increased moisture absorption
-
Blotchy or uneven appearance
-
Higher likelihood of staining
Homes that maintain sealing consistently experience far fewer issues over time.
Cleaning Products Can Help or Hurt
Many everyday household cleaners are not stone-safe.
Products that cause long-term problems include:
-
Vinegar or citrus-based cleaners
-
Bleach or ammonia
-
Degreasers
-
Abrasive pads or powders
These don’t damage quartzite immediately—but they degrade the sealer, leaving the stone more vulnerable over time.
Water Exposure Patterns Influence How Quartzite Looks
Quartzite may temporarily darken when wet. This is normal.
Homes that:
-
Wipe counters dry regularly
-
Avoid constant standing water
-
Maintain proper sealing
see predictable drying and consistent color return. Homes with poor water habits may notice prolonged darkening or uneven appearance.
Edges and Sink Areas Need Extra Awareness
Edges and cutouts are the most stressed areas of any countertop.
Protective habits include:
-
Avoiding heavy impacts
-
Keeping standing water minimal around sinks
-
Cleaning regularly near fixtures
These habits reduce chipping risk and discoloration around high-use zones.
Good Habits Make Quartzite Easier Over Time
One of the biggest misconceptions is that quartzite is “high maintenance.”
In reality:
-
Good habits make quartzite feel low-maintenance
-
Poor habits create avoidable issues
Homeowners who develop simple routines often find quartzite gets easier to live with—not harder—as years go by.
Habit Impact Summary
| Habit | Long-Term Effect |
|---|---|
| Gentle daily cleaning | Stable, even appearance |
| Prompt spill cleanup | Minimal staining |
| Regular sealing | Predictable performance |
| Harsh cleaners | Dull finish, sealer breakdown |
| Ignored sealing | Increased absorption |
Final Takeaway – How Maintenance Habits Impact Quartzite
Quartzite responds directly to how it’s treated.
With good maintenance habits, quartzite:
✨ Stays consistent
✨ Resists wear
✨ Ages gracefully
✨ Requires predictable care
Most quartzite issues aren’t material failures—they’re habit-related. A few simple practices protect the stone and allow it to perform the way it’s meant to for decades.
Quartzite doesn’t demand perfection. It just rewards consistency.

Why Quartzite Is a Long-Term Material
When choosing countertops or stone surfaces, it’s easy to focus on how they look on installation day. But the real value of a material shows up years later—after daily use, changing trends, and normal wear. This is where quartzite stands apart.
Quartzite isn’t a short-term design choice. It’s a long-term material, built to perform and look great for decades.
Here’s why.
Formed Under Extreme Natural Conditions
Quartzite is created when sandstone is subjected to intense heat and pressure deep within the earth. This natural process produces a stone that is:
-
Extremely dense
-
Structurally stable
-
Resistant to scratching and wear
That natural strength is what allows quartzite to handle long-term use without breaking down.
Exceptional Resistance to Daily Wear
Quartzite consistently holds up to everyday life.
Over time, it:
-
Resists scratches better than most natural stones
-
Handles heat without damage
-
Maintains a smooth, intact surface
-
Avoids visible wear paths
In busy kitchens and bathrooms, this durability becomes more valuable every year.
Color and Pattern That Don’t Fade
Unlike engineered materials that rely on pigments or resins, quartzite’s color and veining are completely natural.
As years pass:
-
Whites stay bright
-
Warm tones don’t yellow
-
Grays don’t dull
-
Veining remains crisp
Sunlight, indoor lighting, and normal use don’t degrade its appearance.
Ages Gracefully Instead of Looking Worn
Quartzite doesn’t rely on coatings to look good.
Instead:
-
It develops a subtle, even patina
-
Minor marks blend naturally into the surface
-
The stone looks lived-in, not damaged
This is why quartzite often looks better at year ten than it did at year one.
Maintenance Is Predictable and Manageable
Long-term materials shouldn’t require constant care.
Quartzite maintenance is simple:
-
Periodic sealing
-
Gentle, routine cleaning
-
Prompt spill cleanup
There’s no need for frequent professional refinishing or special treatments.
Timeless Design Outlasts Trends
Quartzite’s organic patterns don’t follow design trends.
That means:
-
It doesn’t feel dated as styles change
-
It pairs easily with future cabinet or décor updates
-
It works across modern, transitional, and traditional homes
A quartzite surface installed today still feels relevant decades later.
Structural Integrity Holds Over Time
When quartzite is fabricated and installed correctly:
-
Seams remain stable
-
Edges stay intact
-
Cutouts remain strong
-
The stone doesn’t shift or settle
This structural reliability is critical for long-term performance.
Quartzite vs Shorter-Term Materials
| Material | Long-Term Performance |
|---|---|
| Quartzite | ⭐⭐⭐⭐⭐ Built for decades |
| Granite | ⭐⭐⭐⭐ Durable, may dull |
| Marble | ⭐⭐ Shows wear quickly |
| Quartz | ⭐⭐⭐ Resin may age |
| Laminate | ⭐ Short lifespan |
Quartzite consistently ranks among the most reliable long-term choices.
Why Fabrication Matters for Longevity
Even the best stone won’t last if it’s handled poorly.
Professional fabrication ensures:
-
Stress-free installation
-
Reinforced weak points
-
Clean seam placement
-
Proper sealing
When shortcuts are avoided, quartzite reaches its full lifespan.
Final Takeaway – Why Quartzite Is a Long-Term Material
Quartzite is a long-term material because it:
✨ Handles daily use without breaking down
✨ Maintains color and structure over time
✨ Ages gracefully instead of deteriorating
✨ Supports changing design styles
✨ Delivers predictable, manageable maintenance
Quartzite isn’t chosen for the next few years—it’s chosen for the long haul.
When installed correctly, it becomes one of the most enduring and rewarding surfaces you can add to a home.

Why Quartzite Looks Better With Age
Some countertop materials peak on installation day—and slowly decline from there. Quartzite is different. When properly selected, fabricated, and maintained, quartzite doesn’t just hold up over time—it often looks better with age.
Homeowners who live with quartzite for years consistently notice the same thing: the stone settles in, becomes more consistent, and continues to elevate the space long after trends fade.
Here’s why quartzite ages so well.
1️⃣ Quartzite Is Naturally Hard and Stable
Quartzite forms under extreme heat and pressure, which gives it exceptional strength and stability.
Over time, this means:
-
Minimal surface wear
-
Very few visible scratches
-
No breakdown of the stone’s structure
Unlike softer stones that show heavy use quickly, quartzite maintains its integrity year after year.
2️⃣ The Surface Develops a Natural, Even Patina
Rather than looking worn, quartzite develops a subtle, uniform patina.
This results in:
-
A more natural appearance
-
Reduced visual contrast from minor marks
-
A lived-in look that feels refined—not damaged
Especially with honed or leathered finishes, quartzite ages gracefully instead of deteriorating.
3️⃣ Color and Veining Remain Consistent
Quartzite is a natural stone without resins or dyes.
As it ages:
-
Whites stay bright
-
Warm tones don’t yellow
-
Grays don’t fade
-
Veining stays crisp
Sunlight, indoor lighting, and daily use don’t degrade the stone’s color, which helps it remain visually stable over time.
4️⃣ Proper Sealing Improves Long-Term Appearance
Sealing doesn’t just protect quartzite—it helps stabilize how it looks.
Over time:
-
Water absorption becomes more predictable
-
Temporary darkening evens out
-
Staining risk decreases
When sealing is maintained, quartzite tends to look more consistent—not more fragile—as it ages.
5️⃣ Edges and Details Hold Their Shape
Quartzite’s density helps it maintain sharp, clean details.
Years later:
-
Edges remain crisp
-
Chipping is rare
-
Mitered and waterfall edges stay intact
This is a major reason quartzite continues to look high-end long after installation.
6️⃣ Everyday Use Adds Character, Not Damage
Quartzite is designed to handle real life.
Instead of showing:
-
Scratches
-
Etching
-
Heavy wear patterns
It simply gains subtle character that blends naturally into the stone.
This makes kitchens and bathrooms feel welcoming rather than delicate.
7️⃣ Timeless Design Ages Better Than Trends
Quartzite’s organic patterns don’t follow trends.
That means:
-
It doesn’t look dated after a few years
-
It pairs well with changing cabinetry or decor
-
It adapts as styles evolve
A quartzite countertop installed today still feels relevant years later.
Quartzite vs Other Materials Over Time
| Material | Appearance Over Time |
|---|---|
| Quartzite | ⭐⭐⭐⭐⭐ Improves with age |
| Granite | ⭐⭐⭐⭐ Durable but may dull |
| Marble | ⭐⭐ Etching and scratches show |
| Quartz | ⭐⭐⭐ Can discolor |
| Laminate | ⭐ Wears quickly |
Quartzite consistently ranks among the best long-term performers.
Why Fabrication Matters for Long-Term Beauty
Quartzite only ages well when it’s fabricated correctly.
Proper fabrication ensures:
-
Stress-free installation
-
Strong edges and seams
-
Reinforced cutouts
-
Long-term structural integrity
When shortcuts are taken, the stone can’t age the way it should.
Final Takeaway – Why Quartzite Looks Better With Age
Quartzite looks better with age because it:
✨ Resists wear
✨ Maintains color and structure
✨ Develops natural character
✨ Ages gracefully rather than deteriorating
When chosen thoughtfully and fabricated properly, quartzite becomes more than a surface—it becomes part of the home’s character.
Quartzite doesn’t just last. It improves.

Designing a Kitchen Around Quartzite
Quartzite isn’t just a countertop material—it’s a design anchor. Because quartzite has natural movement, depth, and variation, the most successful kitchens are designed around the stone, not the other way around.
When quartzite leads the design, the entire kitchen feels intentional, cohesive, and timeless. Here’s how to design a kitchen that lets quartzite shine without overwhelming the space.
Start With the Quartzite Slab First
The biggest mistake homeowners make is choosing cabinets, flooring, and tile before selecting quartzite.
Quartzite varies slab to slab, so it should come first.
When selecting the slab, consider:
-
Color and undertone (warm vs cool)
-
Veining style (subtle vs bold)
-
Overall movement and contrast
Once the slab is chosen, every other design decision becomes easier.
Decide If Quartzite Is the Star or the Support
Quartzite can either:
-
Lead the design as a statement piece
-
Support the design as a subtle, refined element
If you choose a bold slab:
-
Keep cabinets simple
-
Limit competing textures
-
Use quartzite strategically (island, waterfall)
If you choose a subtle slab:
-
You have more flexibility with cabinets and finishes
-
The kitchen feels calm and timeless
Intentional hierarchy prevents visual clutter.
Choose Cabinetry That Complements the Stone
Cabinets should balance the quartzite—not compete with it.
General guidelines:
-
Bold quartzite → simple, light cabinetry
-
Subtle quartzite → light wood, white, or muted colors
-
High movement stone → slab or minimal-detail doors
Avoid pairing busy quartzite with heavy cabinet detailing.
Coordinate Undertones Across Materials
Undertone harmony is key to a polished look.
Compare the quartzite slab against:
-
Cabinet finish
-
Flooring
-
Backsplash
-
Wall color
A warm quartzite paired with cool gray cabinets can feel disconnected. Matching undertones creates cohesion.
Plan the Layout to Showcase Veining
Quartzite’s beauty comes from its movement.
Good design planning includes:
-
Aligning veins across seams
-
Highlighting movement on islands
-
Planning waterfall edges intentionally
-
Avoiding awkward vein breaks
This step happens before fabrication—and it makes a huge difference visually.
Use Backsplashes Strategically
Quartzite backsplashes can elevate the entire kitchen.
Options include:
-
Full-height quartzite backsplash for a seamless look
-
Simple tile backsplash to let countertops stand out
-
Matching quartzite slab behind the range as a focal point
Less grout often means a cleaner, more modern design.
Choose the Right Finish for the Look You Want
Finish impacts both appearance and feel.
-
Polished: bright, reflective, classic
-
Honed: soft, modern, understated
-
Leathered: textured, organic, best as an accent
Lighting should guide this decision—polished finishes help brighten darker kitchens.
Keep Hardware and Fixtures Simple
When quartzite is present, hardware should enhance—not distract.
Best choices include:
-
Matte black
-
Brushed brass
-
Soft nickel
-
Minimal profiles
Let the stone do the talking.
Design for How the Kitchen Is Used
Quartzite performs exceptionally well in real kitchens—but design should still match lifestyle.
For high-traffic kitchens:
-
Use durable edge profiles
-
Choose balanced veining
-
Avoid overly fragile details
For show kitchens:
-
Statement slabs shine
-
Waterfall edges add drama
Designing for use ensures long-term satisfaction.
Lighting Brings Quartzite to Life
Lighting highlights depth and texture.
Consider:
-
Under-cabinet lighting
-
Pendant lighting over islands
-
Warm vs cool light temperatures
Good lighting can completely change how quartzite looks.
Final Takeaway – Designing a Kitchen Around Quartzite
Designing a kitchen around quartzite means:
✨ Choosing the stone first
✨ Letting it guide color and material choices
✨ Keeping the design balanced and intentional
✨ Planning details before fabrication
When quartzite leads the design, the result is a kitchen that feels cohesive, elevated, and timeless—one that looks beautiful on day one and continues to impress for years.
Quartzite isn’t just part of the kitchen. Done right, it defines it.

When Subtle Quartzite Works Better Than Bold Designs
Quartzite is often admired for its dramatic veining and bold movement—but bigger isn’t always better. In many homes, subtle quartzite creates a more refined, timeless result than highly expressive designs.
Choosing between subtle and bold quartzite isn’t about playing it safe—it’s about choosing what actually works best for your space, lifestyle, and long-term goals.
Here’s when subtle quartzite is the smarter choice.
What Is Subtle Quartzite?
Subtle quartzite typically features:
-
Light or neutral backgrounds
-
Soft, flowing veining
-
Low contrast between base color and movement
-
Calm, balanced patterns
Instead of demanding attention, subtle quartzite quietly elevates the space.
1️⃣ In Smaller or Compact Spaces
Bold quartzite can easily overwhelm small kitchens or bathrooms.
Subtle quartzite works better because it:
-
Makes the room feel larger
-
Reflects light more evenly
-
Keeps visual clutter to a minimum
In compact spaces, restraint often delivers the most polished result.
2️⃣ When the Design Already Has Visual Interest
If your space includes:
-
Patterned tile
-
Wood grain cabinetry
-
Decorative flooring
-
Strong architectural details
A bold stone may compete for attention. Subtle quartzite allows these elements to shine without creating visual chaos.
3️⃣ For High-Traffic, Everyday Kitchens
Busy kitchens benefit from calm surfaces.
Subtle quartzite:
-
Hides crumbs and water spots better
-
Feels cleaner throughout the day
-
Creates a relaxed, livable atmosphere
When countertops are used constantly, quieter patterns often feel more comfortable long-term.
4️⃣ When Resale Matters
From a resale perspective, subtle quartzite is usually the safest choice.
Buyers tend to prefer:
-
Neutral palettes
-
Timeless materials
-
Designs that feel flexible
Bold quartzite can be stunning—but it’s more personal. Subtle quartzite appeals to a broader audience.
5️⃣ In Homes With Limited Natural Light
Bold veining can appear heavier in darker spaces.
Subtle quartzite:
-
Reflects light more evenly
-
Keeps rooms feeling bright
-
Avoids a closed-in feeling
In low-light kitchens or bathrooms, softer stone choices perform better visually.
6️⃣ When You Want the Stone to Support, Not Lead, the Design
Sometimes quartzite is meant to complement—not dominate.
Subtle quartzite works best when:
-
Cabinets are the focal point
-
Hardware or lighting takes center stage
-
The design aims for quiet luxury
This approach often feels more cohesive and intentional.
7️⃣ For Large, Continuous Surfaces
On long countertops or full-height backsplashes, bold patterns can feel overwhelming.
Subtle quartzite:
-
Maintains visual flow
-
Avoids repetition fatigue
-
Feels calm across large areas
It’s often the better choice when quartzite will cover a lot of surface area.
Common Misconception
Subtle does not mean boring.
Well-chosen subtle quartzite still offers:
✨ Natural depth
✨ Organic movement
✨ Luxurious texture
✨ Timeless elegance
It just delivers those qualities in a more restrained way.
When Bold Quartzite Makes More Sense – When Subtle Quartzite Works Better Than Bold Designs
Bold quartzite shines when:
-
Used on islands or accent features
-
The rest of the design is minimal
-
The space is large and open
-
The goal is strong visual impact
The key is intentional placement, not overuse.
Final Takeaway
Subtle quartzite often works better than bold designs when:
-
The space is smaller or busier
-
Daily usability matters
-
Long-term comfort is a priority
-
Resale appeal is important
It creates spaces that feel calm, elegant, and livable—without sacrificing beauty or quality.
The best quartzite choice isn’t about how dramatic the slab is—it’s about how well it fits your home.

Choosing Quartzite That Fits Your Home
Quartzite is a stunning natural stone—but the best quartzite choice isn’t about picking the most dramatic slab in the showroom. It’s about choosing quartzite that fits your home, your layout, your lighting, and how you actually live in the space.
When quartzite is chosen thoughtfully, it feels effortless and timeless. When it isn’t, even a beautiful slab can feel out of place. Here’s how to make sure your quartzite truly belongs in your home.
Start With Your Home’s Overall Style
Quartzite works across many design styles, but not every slab works in every home.
Consider your home’s architecture and interior style:
-
Modern / contemporary homes tend to pair best with lighter quartzites, subtle movement, and clean veining.
-
Transitional homes work well with warm neutrals and soft, flowing patterns.
-
Traditional homes often benefit from quartzite with gentle contrast and classic tones.
-
Organic or natural designs pair beautifully with warmer quartzites and understated movement.
Quartzite should complement the style—not compete with it.
Match the Stone’s Undertone to Your Finishes
Two quartzites can both look “white” and behave very differently once installed.
Pay attention to undertones:
-
Warm (cream, beige, gold)
-
Cool (gray, blue, green)
-
Neutral (balanced mix)
Compare the slab directly against:
-
Cabinet finishes
-
Flooring
-
Wall color
-
Hardware
If undertones clash, the space can feel disconnected—even if each element looks good on its own.
Consider the Size and Scale of the Space
Quartzite’s visual weight matters.
In smaller or compact spaces:
-
Lighter colors help the room feel larger
-
Subtle veining keeps things calm
-
Polished finishes reflect more light
In large, open layouts:
-
Bolder quartzite can shine
-
More movement adds interest
-
Statement islands work especially well
The right quartzite feels proportional to the room—not overwhelming or underwhelming.
Think About How the Space Is Used
Quartzite should match your lifestyle.
Ask yourself:
-
Is this a high-traffic family kitchen?
-
Do you cook daily or entertain often?
-
Is this a primary bathroom or a guest space?
Busy kitchens usually benefit from:
-
Dense quartzite
-
Balanced veining
-
Practical finishes
Feature spaces can handle:
-
More dramatic slabs
-
Bolder movement
-
Design-forward choices
Performance and aesthetics should work together.
Decide Whether You Want Subtle or Statement
Quartzite can either anchor a design or lead it.
-
Subtle quartzite blends in, feels timeless, and works well for resale.
-
Statement quartzite becomes the focal point and defines the space.
There’s no wrong choice—only the wrong placement. Statement stone works best when the rest of the design is simple and intentional.
Choose the Right Finish
Finish changes how quartzite looks and lives.
-
Polished: bright, reflective, easiest to maintain
-
Honed: soft, modern, slightly more forgiving visually
-
Leathered: textured, warm, best used selectively
Lighting and usage should guide this decision.
Don’t Skip Slab Selection
Quartzite varies naturally from slab to slab.
Always:
✔ View the exact slab you’ll use
✔ Look at consistency across the surface
✔ Identify areas for seams and cutouts
✔ Visualize how veins will flow in your layout
Choosing by name or sample alone is risky.
Fabrication Planning Is Part of the Fit
Quartzite fitting your home isn’t just about looks—it’s also about execution.
Proper planning ensures:
-
Seam placement complements the layout
-
Veining flows naturally
-
Edges match the home’s style
-
The stone performs long-term
This is where professional experience makes a noticeable difference.
Signs You’ve Chosen the Right Quartzite
You’ll know it fits when:
✔ It complements your home’s style
✔ Undertones feel balanced
✔ The stone enhances—not dominates—the space
✔ The design feels cohesive and intentional
The best quartzite choice feels natural, not forced.
Final Takeaway – Choosing Quartzite That Fits Your Home
Choosing quartzite that fits your home is about more than picking a beautiful slab. It’s about aligning the stone with your space, your lifestyle, and your long-term goals.
When quartzite is selected and planned correctly, it:
✨ Enhances the entire home
✨ Feels timeless rather than trendy
✨ Performs well for years
✨ Looks like it was always meant to be there
Quartzite should feel like a natural extension of your home—not just a standout feature.

Is All Quartzite the Same?
Quartzite is often talked about as if it’s one uniform material—but in reality, not all quartzite is the same. Two slabs can look similar, share the same name, or even come from the same quarry and still perform very differently once installed.
Understanding these differences is critical if you want quartzite that not only looks beautiful, but also holds up long-term in your home.
Here’s what actually separates one from another.
Quartzite Is a Natural Stone—and Natural Means Variation
Quartzite forms when sandstone is transformed under extreme heat and pressure. Because this process happens naturally over millions of years, variation is unavoidable.
Differences can appear in:
-
Density
-
Mineral composition
-
Veining structure
-
Porosity
-
Overall strength
This natural variation is why slab selection matters far more than just choosing a color name.
1️⃣ Density Makes a Big Difference
One of the most important differences between quartzite slabs is density.
Denser slabs:
-
Absorbs less moisture
-
Is more resistant to staining
-
Holds up better to daily use
-
Performs more predictably over time
Less-dense quartzite can still be beautiful, but it may:
-
Darken more easily when wet
-
Require more frequent sealing
-
Be less forgiving in high-traffic kitchens
Density is one of the first things professionals evaluate.
2️⃣ Veining Isn’t Just Visual—It Affects Performance
Veining patterns play a role in how quartzite behaves structurally.
-
Calm, flowing veining often distributes stress evenly
-
Highly fractured or chaotic patterns may need extra reinforcement
-
Intersecting veins can create natural stress points
Statement quartzites can perform beautifully—but only when they’re fabricated and installed with that structure in mind.
3️⃣ Natural Fissures vs. Structural Weakness
Many quartzite slabs contain natural fissures, which are often mistaken for cracks.
The difference:
-
Surface fissures are cosmetic and normal
-
Through-body fractures can compromise strength
Knowing which is which requires experience. This is where professional slab inspection becomes critical.
4️⃣ Quarrying and Processing Matter
How quartzite is quarried and processed affects long-term performance.
Higher-quality slabs are:
-
Cut cleanly from the block
-
Handled carefully during transport
-
Processed without excessive internal stress
Poor handling can introduce micro-fractures that don’t show up until months or years later.
5️⃣ Finish Compatibility Varies by Slab
Not every slab works equally well with every finish.
-
Some slabs polish beautifully
-
Others perform better honed
-
Some leathered finishes highlight texture without compromising performance
If a slab struggles to take an even finish, that can indicate underlying inconsistencies.
6️⃣ Sealing Behavior Reveals a Lot
Sealing is often where differences become obvious.
Higher-quality quartzite:
-
Absorbs sealer evenly
-
Beads water consistently
-
Shows uniform color response
Uneven absorption can signal variable density or internal structure differences across the slab.
7️⃣ Fabrication Suitability Isn’t Universal
Some slabs are simply easier—and safer—to fabricate.
Better slabs:
-
Cut cleanly without excessive chipping
-
Hold edges well
-
Accept reinforcement near cutouts
-
Allow precise seam polishing
A slab that constantly fights fabrication increases the risk of long-term issues.
Why the Name Alone Doesn’t Tell the Whole Story
Quartzite names are often used for marketing, not performance grading.
Two slabs labeled the same can:
-
Come from different parts of a quarry
-
Have different mineral makeup
-
Perform differently once installed
That’s why selecting quartzite by name alone is risky.
How We Make Sure Quartzite Performs Well
This is why professional fabricators don’t just sell stone—we evaluate it.
We:
-
Inspect slabs for density and structure
-
Identify areas to avoid for cutouts and seams
-
Match slab characteristics to how the space will be used
-
Fabricate with reinforcement where needed
-
Install without stress or forcing
This process is what turns quartzite into a long-term success instead of a gamble.
Final Takeaway
No—all quartzite is not the same.
What separates a great quartzite project from a problematic one isn’t just color or pattern—it’s:
✨ Density
✨ Structure
✨ Veining behavior
✨ Finish compatibility
✨ Fabrication suitability
When the right slab is chosen and handled correctly, quartzite becomes one of the most durable, reliable, and beautiful surfaces you can install.
Quartzite doesn’t fail because it’s inconsistent—it fails when its differences are ignored.

Why Quartzite Performs Differently From House to House
Quartzite has a reputation for being strong, reliable, and long-lasting—but some homeowners are surprised to hear that quartzite can perform very differently from one house to another. One homeowner may experience years of worry-free use, while another notices water darkening, staining, or wear much sooner.
The reason isn’t that quartzite is unpredictable. It’s that performance depends on more than the stone alone.
Here’s why quartzite behaves differently from house to house—and what actually determines how well it performs.
1️⃣ Not All Quartzite Slabs Are the Same
Quartzite is a natural material, and natural stone varies.
Differences in:
-
Density
-
Mineral composition
-
Natural fissures
-
Veining structure
Also these all affect how a slab performs. Two slabs with the same name can absorb water differently, react differently to sealing, and wear differently over time.
This is why slab selection matters just as much as color.
2️⃣ How the Space Is Used Changes Everything
Quartzite performs based on real-life use, not just material specs.
Performance can vary depending on:
-
How often the kitchen is used
-
Whether cooking happens daily
-
If the surface is exposed to oils and acids regularly
-
The number of people using the space
A quartzite countertop in a busy family kitchen will behave differently than one in a rarely used show kitchen—even if the stone is identical.
3️⃣ Lighting and Environment Play a Role
Environmental conditions affect how quartzite looks and feels day to day.
Factors include:
-
Amount of natural sunlight
-
Indoor humidity levels
-
Temperature changes
-
Proximity to windows or exterior doors
Homes with high humidity or strong sunlight may notice more temporary water darkening or visual changes—even though the stone is performing normally.
4️⃣ Sealing Quality and Maintenance Habits Matter
Quartzite requires sealing, but how and when it’s sealed makes a major difference.
Performance depends on:
-
Type of sealer used
-
Number of coats applied
-
How evenly it was sealed
-
Whether resealing is maintained
Homes that keep up with sealing experience far fewer issues than homes where sealing is skipped or delayed.
5️⃣ Fabrication and Installation Have Long-Term Impact
Many performance issues blamed on quartzite actually originate during fabrication or installation.
Key factors also include:
-
Proper slab inspection
-
Strategic seam placement
-
Reinforced cutouts
-
Level and supported cabinetry
-
Stress-free installation
Quartzite that’s installed under tension or poorly supported may develop issues over time—even if the stone itself is high quality.
6️⃣ Finish Choice Affects Daily Performance
Different finishes behave differently in real homes.
-
Polished finishes tend to repel moisture better and show fewer marks
-
Honed finishes feel softer but may show water darkening more easily
-
Leathered finishes hide fingerprints but can trap residue if not cleaned properly
Two homes with the same quartzite but different finishes will experience different maintenance needs.
7️⃣ Cleaning Products and Habits Make a Difference
Quartzite performs best with gentle care.
Homes that use:
-
pH-neutral cleaners
-
Soft cloths
-
Prompt spill cleanup
tend to see better long-term results than homes that use harsh or acidic cleaners, which can degrade sealer and dull the surface over time.
Why This Isn’t a Problem—It’s a Reality of Natural Stone
Quartzite’s variability isn’t a flaw—it’s part of what makes it natural.
What matters is:
-
Matching the right slab to the right home
-
Fabricating and installing it correctly
-
Setting realistic expectations
-
Maintaining it properly
When those factors align, quartzite performs exceptionally well regardless of the house.
How to Ensure Quartzite Performs Well in Your Home
Quartzite performs best when:
✔ The slab is carefully selected
✔ Usage patterns are considered
✔ The finish matches the environment
✔ Fabrication is done professionally
✔ Installation is stress-free
✔ Sealing is maintained
Moreover these steps turn quartzite into one of the most reliable surfaces available.
Final Takeaway – Why Quartzite Performs Differently From House to House
Quartzite doesn’t perform differently because it’s inconsistent—it performs differently because homes are different.
Usage, environment, slab quality, fabrication, installation, and maintenance all shape how quartzite behaves over time. When these factors are addressed upfront, quartzite delivers exactly what it’s known for: durability, beauty, and long-term performance.
Quartzite isn’t unpredictable. It’s responsive—and when handled correctly, it performs beautifully wherever it’s installed.

What Makes One Quartzite Slab Better Than Another?
Not all quartzite slabs are created equal. Two slabs may share the same name, color, or origin—yet perform very differently once installed. Homeowners are often surprised to learn that the quality of a quartzite slab has far more to do with structure, density, and fabrication suitability than with appearance alone.
Here’s what truly makes one quartzite slab better than another—and how to spot the difference before you commit.
1️⃣ Density and Stone Structure Matter Most
The single biggest factor in quartzite quality is density.
High-quality quartzite:
-
Feels solid and heavy
-
Has tightly packed mineral structure
-
Absorbs less moisture
-
Holds up better under daily use
Lower-density quartzite may look beautiful but can be more prone to:
-
Water absorption
-
Staining
-
Long-term wear
Density is something you feel and test—not something you see in photos.
2️⃣ Natural Fissures vs Structural Weakness
Quartzite often contains natural fissures, but not all fissures are a problem.
A better slab:
-
Has surface-level fissures that don’t compromise strength
-
Avoids deep fractures that run through the stone
-
Shows consistent integrity across the slab
Experienced fabricators know the difference between cosmetic character and structural risk—and plan accordingly.
3️⃣ Veining Pattern Affects Performance
Veining isn’t just a design feature—it impacts how the slab performs.
Stronger slabs tend to have:
-
Balanced, flowing veining
-
Fewer intersecting fracture lines
-
Predictable stress distribution
Highly chaotic or heavily fractured patterns can still perform well—but they require expert reinforcement and careful layout to ensure longevity.
4️⃣ Consistency Across the Slab
A high-quality quartzite slab performs evenly across its entire surface.
Warning signs include:
-
Soft or crumbly areas
-
Inconsistent texture
-
Zones that absorb moisture faster than others
Consistency ensures the slab behaves predictably after installation.
5️⃣ How the Slab Was Quarried and Processed
Quarrying and processing methods matter more than most people realize.
Better slabs typically:
-
Are cut cleanly at the quarry
-
Avoid excessive internal stress
-
Are properly handled during transport
Poor handling can introduce micro-fractures that don’t show up until later.
6️⃣ Finish Compatibility
Not every quartzite slab works well with every finish.
A strong slab:
-
Holds polish evenly
-
Accepts honed finishes without blotchiness
-
Maintains texture in leathered finishes
If a slab struggles to take a consistent finish, it may indicate structural issues.
7️⃣ How the Slab Responds to Sealing
Sealing reveals a lot about slab quality.
Higher-quality quartzite:
-
Absorbs sealer evenly
-
Beads water consistently
-
Shows uniform color response
Uneven absorption may signal variable density or internal weakness.
8️⃣ Fabrication Suitability
Some slabs are simply easier—and safer—to fabricate.
A better quartzite slab:
-
Allows clean, controlled cutting
-
Holds edges without excessive chipping
-
Supports reinforcement near cutouts
-
Accepts seam polishing smoothly
A slab that fights fabrication is more likely to cause long-term issues.
Why Slab Selection Is Just as Important as Installation
Even the best fabrication can’t fully compensate for a poor slab.
That’s why professional fabricators:
-
Inspect slabs in person
-
Advise clients honestly—even if it means selecting a different slab
-
Plan layouts to avoid weak zones
-
Match slab quality to how the space will be used
This is where experience protects your investment.
What Homeowners Should Look For
When choosing a slab, ask:
-
Has this slab been inspected for structure and density?
-
Are there areas to avoid for cutouts or seams?
-
How will veining affect performance?
-
Is this slab suitable for my layout and usage?
Clear answers indicate confidence and expertise.
Final Takeaway – What Makes One Quartzite Slab Better Than Another?
What makes one quartzite slab better than another isn’t just color or pattern—it’s:
✨ Density
✨ Structural integrity
✨ Consistency
✨ Fabrication suitability
When a high-quality slab is paired with professional fabrication, quartzite becomes one of the most reliable and long-lasting surfaces available.
Choosing the right slab is the first step toward a countertop that doesn’t just look beautiful—but performs beautifully for decades.
How Quartzite Impacts Home Resale Appeal
When it comes to resale, buyers don’t just look at square footage or paint colors—they judge the quality of finishes almost instantly. Countertops, in particular, play a major role in how a home is perceived. Among all countertop materials, quartzite consistently stands out as one that elevates resale appeal rather than limiting it.
Here’s how quartzite impacts home resale—and why it’s considered one of the safest premium choices you can make.
First Impressions Happen Fast
Buyers typically decide how they feel about a home within moments of walking in. Quartzite contributes immediately by making kitchens and bathrooms feel:
-
Bright and open
-
High-end and custom
-
Clean and well cared for
Even buyers who can’t identify the stone by name recognize that it looks expensive and intentional.
Quartzite Signals Quality Without Risk
One of quartzite’s biggest resale advantages is perception.
To buyers, quartzite suggests:
-
A thoughtful renovation
-
Durable, long-lasting materials
-
Attention to detail
-
A higher overall build standard
Unlike bold trends that divide opinion, quartzite feels safe but upscale—a combination buyers trust.
Timeless Design Holds Buyer Interest
Resale-friendly materials need to age well visually.
Quartzite works because:
-
Its patterns are organic, not trendy
-
Neutral color palettes appeal to a wide range of buyers
-
It pairs easily with different cabinet styles and finishes
This allows buyers to imagine themselves in the home without feeling locked into someone else’s taste.
Durability Reduces Buyer Hesitation
Buyers worry about maintenance—even if they don’t say it out loud.
Quartzite reassures buyers because it:
-
Resists scratching better than marble
-
Handles heat well
-
Shows minimal wear over time
-
Ages more gracefully than many alternatives
That durability translates into confidence during showings and inspections.
Quartzite Photographs Exceptionally Well
Online listings matter more than ever.
Quartzite:
-
Reflects light beautifully
-
Looks clean and bright in photos
-
Enhances kitchen and bathroom images
Homes with quartzite often stand out visually, which can increase interest and foot traffic.
Quartzite vs Other Countertops in Resale Perception
| Material | Buyer Appeal |
|---|---|
| Quartzite | ⭐⭐⭐⭐⭐ Luxury, durable, safe |
| Granite | ⭐⭐⭐⭐ Familiar, solid |
| Quartz | ⭐⭐⭐ Clean, modern |
| Marble | ⭐⭐⭐ Beautiful but risky |
| Laminate | ⭐ Budget, dated |
Quartzite consistently ranks at the top for perceived value.
When Quartzite Adds the Most Resale Value
Quartzite has the strongest impact when:
-
The home targets mid- to high-end buyers
-
Kitchens or bathrooms are focal points
-
Neutral or softly veined slabs are chosen
-
Fabrication and installation quality are high
In these cases, quartzite doesn’t just protect resale—it actively enhances it.
Common Resale Mistakes to Avoid
Quartzite works best for resale when:
-
It isn’t overly dark or chaotic
-
It’s balanced with simple cabinetry
-
Seams and edges are well executed
Poor slab choice or rushed installation can reduce the impact—even with a premium material.
Does Quartzite Increase Home Value?
Quartzite doesn’t always raise appraised value dollar-for-dollar, but it often:
-
Improves buyer perception
-
Justifies a higher asking price
-
Helps homes sell faster
-
Reduces negotiation friction
In resale terms, quartzite functions as a confidence builder.
Final Takeaway – How Quartzite Impacts Home Resale Appeal
Quartzite impacts home resale appeal by delivering:
✨ Instant visual upgrade
✨ Timeless, natural design
✨ Strong durability signals
✨ Broad buyer acceptance
It’s a premium material that rarely scares buyers and often impresses them. When chosen and installed correctly, quartzite becomes one of the most reliable ways to elevate a home’s marketability.
If resale matters—even a little—quartzite is one of the smartest countertop investments you can make.

How to Tell If Quartzite Will Perform Well in Your Home
Quartzite is known for its beauty and durability—but not every slab performs the same way, and not every home uses stone the same way. A quartzite countertop that thrives in one space may struggle in another if the stone, layout, or installation isn’t right.
Before you commit, here’s how to tell if quartzite will truly perform well in your home, not just look good on installation day.
1️⃣ Start With How You Actually Use Your Space
Performance isn’t just about the stone—it’s about lifestyle.
Quartzite performs especially well in homes where:
-
The kitchen is used daily
-
Cooking happens often
-
Multiple people use the space
-
Durability matters more than perfection
If your kitchen or bathroom sees real use, quartzite is often a strong choice. If the space is purely decorative, performance matters less—but quartzite will still hold up exceptionally well.
2️⃣ Look for Dense, Structurally Sound Slabs
Not all quartzite slabs are equal.
A well-performing quartzite slab should have:
-
Good density
-
Minimal open fissures
-
Consistent structure
-
No excessive soft or fractured areas
Some quartzites are more decorative and require extra care. Others are also naturally dense and ideal for high-use areas. Slab inspection is critical to performance.
3️⃣ Pay Attention to Veining and Movement
Veining isn’t just an aesthetic feature—it affects durability.
In high-use areas:
-
Balanced, flowing veining performs best
-
Extremely fractured or chaotic patterns may require more reinforcement
-
Calm quartzites tend to be more forgiving long-term
That doesn’t mean bold quartzite won’t perform—but it does mean fabrication and reinforcement become even more important.
4️⃣ Consider Where the Stone Will Be Used
Quartzite performs differently depending on application.
It performs especially well for:
-
Kitchen countertops
-
Islands and waterfall edges
-
Bathroom vanities
-
Shower walls
-
Fireplace surrounds
Performance also depends on:
-
Proper support
-
Reinforced cutouts
-
Correct seam placement
A slab that performs beautifully as an island may not be ideal for every layout without planning.
5️⃣ Think About Lighting and Finish
Finish choice affects how quartzite behaves visually and practically.
-
Polished finishes reflect light, show less water darkening, and are easiest to maintain
-
Honed finishes feel softer but may show moisture more clearly
-
Leathered finishes hide fingerprints but can trap residue if not cleaned properly
Performance includes how the stone looks in daily use, not just durability.
6️⃣ Sealing Expectations Matter
Quartzite will perform well when sealing is maintained.
You should expect:
-
Periodic sealing (typically once per year)
-
Water to bead when sealed properly
-
Temporary darkening when wet, depending on the stone
If sealing is ignored, performance drops—not because the stone is weak, but because protection is missing.
7️⃣ Fabrication and Installation Are Non-Negotiable
Many performance issues blamed on quartzite are actually installation problems.
Quartzite performs best when:
-
Cabinets are level and supported
-
Cutouts are reinforced
-
Seams are placed intentionally
-
Slabs are never forced into position
Moreover proper fabrication isn’t optional with quartzite—it’s essential to long-term success.
8️⃣ Ask the Right Questions Before Committing
If quartzite will be fabricated and installed correctly, you should be able to get clear answers to:
-
Has this slab been inspected for structure?
-
Where will seams be placed?
-
How are sink and cooktop cutouts reinforced?
-
What finish is best for my usage?
-
How should this stone be sealed and maintained?
When those questions are addressed upfront, quartzite performs exactly as expected.
Signs Quartzite Will Perform Well in Your Home
✔ Dense, well-selected slab
✔ Veining appropriate for the space
✔ Finish chosen for lifestyle and lighting
✔ Proper support and reinforcement planned
✔ Realistic expectations about sealing and care
When these boxes are checked, quartzite is one of the most reliable long-term surfaces you can choose.
Final Takeaway – How to Tell If Quartzite Will Perform Well in Your Home
Quartzite performs well when it’s:
-
Chosen intentionally
-
Matched to how the space is used
-
Fabricated and installed correctly
-
Maintained with basic, predictable care
When those factors align, quartzite isn’t just beautiful—it’s dependable, durable, and built to handle real life for decades.
Quartzite doesn’t fail. Poor planning does.
Get the planning right, and quartzite will perform exactly the way it’s meant to.

Quartzite Countertop Tips
Quartzite is one of the most durable and beautiful countertop materials available—but like any premium surface, it performs best when chosen and used correctly. Whether you’re planning a new kitchen or already living with quartzite, these expert tips will help you avoid common mistakes and get the most out of your investment.
1️⃣ Choose the Slab, Not Just the Name
Quartzite varies dramatically from slab to slab—even within the same color name.
Tip:
Always view and select the exact slab that will be used in your project. Look for:
-
Consistent color and veining
-
Minimal fissures in high-stress areas
-
Areas that will fall at seams or cutouts
A great slab selection sets the foundation for everything else.
2️⃣ Think About How Much Movement You Want
Quartzite can be calm or dramatic.
Tip:
Match the level of veining to your space:
-
Busy kitchens → subtle quartzite
-
Large or minimalist kitchens → bolder quartzite works well
Too much movement in a small or already busy space can feel overwhelming.
3️⃣ Don’t Underestimate Lighting
Lighting dramatically affects how quartzite looks.
Tip:
View slabs in natural light whenever possible and consider:
-
Warm vs cool lighting
-
How much daylight your space gets
-
Whether the finish reflects or absorbs light
Polished finishes brighten spaces; honed finishes create a softer feel.
4️⃣ Choose the Right Edge Profile
Edges affect both durability and design.
Best choices for most kitchens:
-
Eased edge
-
Softened square edge
-
Half-bullnose
These profiles reduce chipping risk while maintaining a clean look.
5️⃣ Prioritize Proper Fabrication and Installation
Many quartzite issues come from poor workmanship—not the stone itself.
Tip:
Work with professionals who regularly fabricate and install quartzite. Proper reinforcement, seam placement, and support are critical for long-term performance.
6️⃣ Seal Quartzite Properly (and On Schedule)
Quartzite is dense, but it still needs sealing.
Tip:
Reseal when water stops beading on the surface—usually about once a year. Sealing:
-
Reduces water absorption
-
Helps prevent oil stains
-
Keeps the stone looking consistent
Skipping sealing is one of the most common mistakes.
7️⃣ Use the Right Cleaners
Harsh or acidic cleaners do more harm than good.
Tip:
Stick to:
-
pH-neutral stone cleaners
-
Mild soap and water
-
Soft cloths or sponges
Avoid vinegar, citrus cleaners, and abrasive pads.
8️⃣ Wipe Spills—Especially Oils
Quartzite handles water well, but oils are a different story.
Tip:
Wipe up:
-
Cooking oils
-
Butter and grease
-
Lotions and cosmetics
Prompt cleanup prevents deep staining and keeps maintenance simple.
9️⃣ Use Cutting Boards and Trivets (Even Though Quartzite Is Tough)
Quartzite is scratch- and heat-resistant—but best practices still apply.
Tip:
-
Cutting boards protect your knives
-
Trivets protect sealers from prolonged heat
These habits extend the life of both the stone and its finish.
10️⃣ Expect Quartzite to Get Easier Over Time
Many homeowners are surprised to learn that quartzite becomes easier to live with.
Tip:
Once you understand how your stone behaves and keep up with basic care, quartzite maintenance becomes routine—not stressful.
Common Quartzite Myths (Quick Debunk)
-
❌ “Quartzite stains easily” → Rare when sealed properly
-
❌ “Quartzite is fragile” → One of the hardest natural stones
-
❌ “Quartzite is high-maintenance” → Moderate and predictable
Final Takeaway – Quartzite Countertop Tips
Quartzite countertops reward smart choices and simple habits. When you:
✔ Select the right slab
✔ Match the stone to your space
✔ Use experienced fabricators
✔ Maintain proper sealing
Quartzite delivers decades of beauty, durability, and performance—without becoming a maintenance burden.
If you want a countertop that looks premium and handles real life, quartzite is hard to beat.
What Buyers Notice First About Quartzite
When buyers walk into a kitchen or bathroom, they don’t analyze materials the way designers do. Instead, they react instinctively. Within seconds, they form an opinion about the space—and quartzite plays a major role in that first impression.
So what do buyers actually notice first about quartzite? And why does it consistently elevate how a home is perceived?
Let’s break it down.
1️⃣ The Natural Look (Before Anything Else)
The very first thing buyers notice is that quartzite looks real and high-end.
Even buyers who don’t know the name can tell:
-
It’s natural stone
-
It’s not laminate or builder-grade
-
It feels custom rather than mass-produced
Quartzite’s depth, variation, and organic movement immediately signal quality.
2️⃣ Light, Bright, and Clean Appearance
Quartzite often makes a space feel:
-
Brighter
-
Larger
-
Cleaner
-
More open
Especially in kitchens and bathrooms, buyers are drawn to surfaces that reflect light and feel fresh. Polished quartzite does this exceptionally well, which is why it photographs beautifully in listings.
3️⃣ Veining That Feels Intentional (Not Busy)
Buyers tend to respond best to quartzite veining that feels:
-
Natural
-
Flowing
-
Balanced
They may not articulate it, but they notice when:
-
Veins align across seams
-
Waterfall edges flow correctly
-
The stone looks planned, not random
Good fabrication makes quartzite feel calm and cohesive—something buyers instinctively appreciate.
4️⃣ The “This House Was Done Right” Feeling
Quartzite gives buyers a strong subconscious message:
“This homeowner didn’t cut corners.”
It often suggests:
-
A quality renovation
-
Attention to detail
-
Long-term durability
-
A higher overall build standard
That perception carries over to how buyers view the rest of the home.
5️⃣ Condition and Wear (or Lack of It)
Buyers notice what isn’t there:
-
No heavy scratches
-
No dull, etched spots
-
No obvious wear paths
Quartzite tends to look better at showing time than many other materials, even after years of use. That alone reduces buyer hesitation.
6️⃣ How Well It Works With the Rest of the Space
Quartzite that’s chosen correctly feels like it belongs.
Buyers respond positively when:
-
Undertones match cabinets and flooring
-
The stone doesn’t overpower the room
-
Everything feels cohesive
When quartzite fits the space, buyers don’t question it—they accept it as “right.”
7️⃣ Seam Quality and Edges (Even If They Don’t Realize It)
Most buyers can’t explain why something looks premium—but seams and edges play a huge role.
They notice:
-
Smooth transitions
-
Clean edge profiles
-
Minimal, well-placed seams
Poor fabrication breaks the illusion of quality. Good fabrication disappears—and that’s exactly what buyers respond to.
Quartzite vs Other Materials in Buyer Perception
| Material | First Buyer Impression |
|---|---|
| Quartzite | ⭐⭐⭐⭐⭐ Luxury, natural, durable |
| Granite | ⭐⭐⭐⭐ Familiar, solid |
| Quartz | ⭐⭐⭐ Clean, modern |
| Marble | ⭐⭐⭐ Beautiful but delicate |
| Laminate | ⭐ Budget, dated |
Quartzite consistently ranks near the top in perceived value.
Why This Matters for Resale
Buyers don’t just buy square footage—they buy confidence.
Quartzite helps by:
-
Reducing concerns about durability
-
Creating emotional appeal
-
Elevating listing photos
-
Supporting a higher perceived price point
Even when buyers can’t name the stone, they feel its impact.
Final Takeaway – What Buyers Notice First About Quartzite
What buyers notice first about quartzite isn’t just the stone—it’s what the stone represents.
Quartzite communicates:
✨ Quality
✨ Care
✨ Longevity
✨ Thoughtful design
When quartzite is selected well and fabricated correctly, it becomes one of the strongest silent selling features in a home.
If the goal is to impress buyers without chasing trends, quartzite consistently delivers.
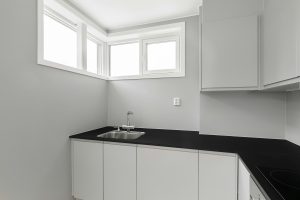
Using Quartzite in High-Traffic Kitchens
High-traffic kitchens are tough on surfaces. Between constant cooking, kids, guests, pets, and everyday messes, countertops need to handle far more than just looking good on day one.
This is where quartzite truly shines.
Quartzite has become a top choice for high-use kitchens because it combines natural beauty with serious durability, making it one of the most reliable materials for homes where the kitchen is always in use.
What Defines a High-Traffic Kitchen?
A high-traffic kitchen typically includes:
-
Frequent cooking and food prep
-
Multiple people using the space at once
-
Kids doing homework or snacking
-
Entertaining and gatherings
-
Appliances being moved or used daily
In short: real life happens here.
Quartzite is designed to handle it.
Why Quartzite Performs So Well in Busy Kitchens
1️⃣ Exceptional Scratch Resistance
Quartzite ranks 7–8 on the Mohs hardness scale, making it harder than granite and far more scratch-resistant than marble.
In practical terms:
-
Knives and utensils won’t scratch it
-
Sliding cookware causes minimal wear
-
Daily use doesn’t leave visible damage
This makes quartzite ideal for kitchens where counters are constantly in use.
2️⃣ Heat Resistance You Can Rely On
Hot pans, baking sheets, and appliances are common in active kitchens.
Quartzite:
-
Handles heat exceptionally well
-
Doesn’t scorch like resin-based surfaces
-
Performs safely near ranges and cooktops
Trivets are still recommended—but accidental heat contact is far less risky with quartzite than with many alternatives.
3️⃣ Strong Resistance to Wear Over Time
Many materials look great initially but show wear quickly in busy kitchens.
Quartzite:
-
Holds its finish longer
-
Resists dull paths and uneven wear
-
Maintains a consistent appearance
Even after years of heavy use, quartzite typically still looks clean and refined.
4️⃣ Better Than Marble for Family Kitchens
Marble is beautiful, but in high-traffic kitchens it often struggles.
Quartzite offers:
-
Similar elegance
-
Much less scratching
-
Better resistance to etching
-
Lower long-term maintenance stress
For families who want a luxury look without constant worry, quartzite is the smarter option.
Sealing & Maintenance in a High-Traffic Setting
Quartzite does require sealing—but in busy kitchens, sealing actually works in your favor.
Proper sealing:
-
Reduces liquid absorption
-
Helps prevent oil staining
-
Makes cleanup easier
Most high-traffic kitchens need sealing about once a year, depending on usage. Daily maintenance remains simple: wipe spills and clean with a pH-neutral cleaner.
Edge Profiles Matter in Busy Kitchens
Edges are the most vulnerable part of any countertop.
For high-traffic kitchens, the best choices are:
-
Eased edges
-
Softened square edges
-
Half-bullnose profiles
These reduce chipping risk while still keeping a clean, modern look.
Choosing the Right Quartzite for Heavy Use
Not all quartzites perform exactly the same.
In busy kitchens, look for:
-
Dense slabs with consistent structure
-
Minimal natural fissures
-
Balanced veining (not overly fractured patterns)
-
Proper slab inspection before fabrication
Correct slab selection plays a huge role in long-term durability.
Common Concerns (and the Reality)
“Will it stain in a busy kitchen?”
Rarely, when sealed properly and spills are wiped in a reasonable time.
“Will it show wear over time?”
Much less than marble or softer stones.
“Is it too high-maintenance for a family?”
No—most families find quartzite easier to live with than expected.
Quartzite vs Other Materials in High-Traffic Kitchens
| Material | Performance in Busy Kitchens |
|---|---|
| Quartzite | ⭐⭐⭐⭐⭐ Durable, reliable |
| Granite | ⭐⭐⭐⭐ Durable but can dull |
| Marble | ⭐⭐ High risk of wear |
| Quartz (engineered) | ⭐⭐⭐ Heat sensitivity |
| Laminate | ⭐ Short lifespan |
Quartzite consistently ranks among the best long-term performers.
Why Fabrication and Installation Matter Even More
In high-traffic kitchens, poor fabrication shows quickly.
Proper fabrication ensures:
-
Reinforced sink and cooktop cutouts
-
Clean, durable edges
-
Well-placed seams
-
Long-term structural stability
When quartzite is fabricated and installed correctly, it thrives under constant use.
Final Takeaway – Using Quartzite in High-Traffic Kitchens
Quartzite is an excellent choice for high-traffic kitchens because it:
✨ Handles daily wear with ease
✨ Resists scratches and heat
✨ Ages better than most materials
✨ Maintains a clean, high-end appearance
✨ Fits real family life
If your kitchen is the heart of your home—and always in motion—quartzite is built to keep up.
How to Tell If Quartzite Will Look Good in Your Home
Quartzite is stunning in a showroom—but what really matters is how it looks in your home, with your lighting, cabinets, floors, and layout. A slab that’s beautiful on its own can feel wrong once installed if it isn’t chosen intentionally.
If you’re considering quartzite, here’s how to tell—before fabrication—whether it will truly work in your space.
1️⃣ Start With Your Home’s Overall Style
Quartzite works in many design styles, but not every slab works in every home.
Ask yourself:
-
Is your home modern, transitional, traditional, or organic?
-
Do you prefer calm and subtle—or bold and dramatic?
-
Do you want the stone to blend in or be the focal point?
Rule of thumb:
-
Clean, modern homes → lighter quartzites with subtle or linear veining
-
Transitional homes → warm neutrals with soft movement
-
Statement spaces → bolder quartzite used intentionally (islands, accents)
If the stone fights the style of the home, it will always feel out of place.
2️⃣ Look at the Undertone—Not Just the Color
Two quartzites can both be “white” and look completely different in a room.
Quartzite undertones can be:
-
Warm (cream, beige, gold)
-
Cool (gray, blue, green)
-
Neutral (balanced mix)
Compare the stone against:
-
Cabinet finish
-
Flooring
-
Wall color
-
Hardware finish
If undertones clash, the space can feel off—even if each element looks good on its own.
3️⃣ Consider How Much Visual Movement Your Space Can Handle
Quartzite veining varies from calm to extremely dramatic.
In smaller or busier spaces:
-
Subtle, flowing veining usually looks better
-
Too much contrast can feel chaotic
In large, open spaces:
-
Bold slabs can shine
-
Dramatic veining can become art
A good test:
If the room already has pattern (tile, wood grain, busy cabinets), choose calmer quartzite. If the room is simple, quartzite can carry more visual weight.
4️⃣ Think About Lighting (This Changes Everything)
Lighting dramatically affects how quartzite looks.
Before deciding:
-
View slabs in natural daylight if possible
-
Ask how the stone looks under warm vs cool lighting
-
Consider how much sunlight your space gets
Polished quartzite reflects light and brightens rooms. Honed finishes feel softer but can absorb light in darker spaces.
A slab that looks perfect under showroom lights can feel darker or flatter at home if lighting isn’t considered.
5️⃣ Match Quartzite to the Size of the Space
Quartzite scale matters.
In small kitchens or bathrooms:
-
Lighter colors make spaces feel larger
-
Subtle patterns feel cleaner and calmer
In large kitchens or open floor plans:
-
More movement adds interest
-
Islands can handle bolder stone than perimeter counters
Quartzite should complement the space—not overwhelm it.
6️⃣ Don’t Forget Edge Profiles and Thickness
The same quartzite can look completely different depending on fabrication details.
Consider:
-
Thin, eased edges for modern spaces
-
Mitered edges for a bold, architectural look
-
Softer edges for traditional homes
Edge choice affects how heavy or light the stone feels visually.
7️⃣ Always See the Actual Slab (Not Just Photos)
Quartzite varies slab to slab—even within the same name.
Before committing:
✔ View the exact slab you’ll use
✔ Look for consistency across the slab
✔ Check for areas that may fall at seams or cutouts
✔ Visualize vein flow on islands and backsplashes
Photos and samples are helpful—but nothing replaces seeing the real stone.
8️⃣ Imagine It in Use, Not Just Installed
Ask yourself:
-
Will this still look good with daily use?
-
Will water spots or movement bother me?
-
Do I want something calm or expressive long-term?
Quartzite looks best when it fits your lifestyle—not just your Pinterest board.
Common Signs Quartzite Will Look Good in Your Home
✔ Undertones match your finishes
✔ Veining scale fits the room size
✔ Lighting enhances the stone
✔ The design feels balanced
✔ You’re not forcing it to “make it work”
When quartzite is right, it feels obvious—not stressful.
Final Takeaway – How to Tell If Quartzite Will Look Good in Your Home
Quartzite will look good in your home when it:
-
Matches your home’s style and scale
-
Complements (not competes with) other materials
-
Works with your lighting and layout
-
Is chosen intentionally—not impulsively
Quartzite is a major visual investment. Taking the time to evaluate how it fits your space ensures it feels timeless, cohesive, and truly custom once installed.

Is Quartzite Really Low Maintenance?
Quartzite is often described as a “low-maintenance luxury stone,” but what does that actually mean in real life? Is it truly easy to live with—or does it come with hidden upkeep that surprises homeowners later?
The honest answer: Quartzite is low maintenance compared to most natural stones, but it is not maintenance-free. And that distinction matters.
Here’s what living with quartzite really looks like.
What “Low Maintenance” Means for Quartzite
Low maintenance doesn’t mean you can ignore it completely. It means:
-
No constant worry about scratches
-
No frequent professional refinishing
-
No babying the surface daily
-
Simple, predictable care routines
Quartzite falls into a category of materials that reward basic care with long-term durability and consistent appearance.
Daily Care: Easier Than Most Expect
Day-to-day quartzite care is simple:
✔ Wipe with a soft cloth
✔ Use mild soap or pH-neutral stone cleaner
✔ Clean spills when they happen
That’s it.
Unlike marble, quartzite doesn’t require constant attention to avoid visible damage. Normal kitchen use won’t immediately punish the surface.
Sealing: The One Real Maintenance Requirement
Quartzite does require sealing, but not constantly.
Most quartzite countertops need:
-
Sealing about once per year
-
Sometimes less, depending on the stone and usage
Sealing:
-
Reduces water absorption
-
Helps prevent oil staining
-
Keeps color consistent
This is a quick process—not a major maintenance burden—and far easier than repeated polishing or restoration.
How Quartzite Compares to Other Materials
| Material | Maintenance Level |
|---|---|
| Quartzite | ⭐⭐ Low–Moderate |
| Granite | ⭐⭐ Moderate |
| Marble | ⭐⭐⭐ High |
| Quartz (engineered) | ⭐ Very Low |
| Laminate | ⭐⭐ Increases over time |
Quartzite sits in a sweet spot: natural stone beauty with manageable upkeep.
What Makes Quartzite Feel High Maintenance (When It Isn’t)
Quartzite only feels difficult when certain mistakes are made.
Using the Wrong Cleaners
Acidic or harsh cleaners can degrade the sealer and dull the surface, creating problems that look like “high maintenance” issues.
Skipping Sealing
When sealing is ignored, water and oils absorb more easily—leading to dark spots or stains that could have been prevented.
Poor Fabrication or Installation
Issues like visible seams, chipping, or cracking are often blamed on maintenance—but they’re actually installation problems.
When quartzite is fabricated and installed correctly, it’s much easier to live with.
What Quartzite Does Not Require
Quartzite does not require:
-
Constant polishing
-
Professional refinishing every few years
-
Extreme cleaning routines
-
Fear of normal kitchen use
You can cook, entertain, and live normally without worrying about every spill.
Does Quartzite Get Easier Over Time?
Yes — for most homeowners.
Once you:
-
Learn how your stone behaves
-
Establish simple cleaning habits
-
Keep up with sealing
Quartzite becomes predictable and easy. Many homeowners report they worry less about quartzite than they expected.
Who Quartzite Is Perfect For
Quartzite is a great fit if you want:
✔ A natural stone that looks high-end
✔ Strong resistance to scratches and heat
✔ Minimal daily upkeep
✔ Long-term durability
It may not be ideal if:
✘ You want zero maintenance
✘ You prefer perfectly uniform patterns
✘ You don’t want to think about sealing at all
Final Verdict – Is Quartzite Really Low Maintenance?
Yes—quartzite is genuinely low maintenance for a natural stone.
It doesn’t demand constant care, but it does require:
-
Proper installation
-
Occasional sealing
-
Basic, common-sense cleaning
When those boxes are checked, quartzite delivers long-lasting beauty without becoming a chore.
If you want a countertop that looks luxurious and fits real life, quartzite earns its reputation.
Is Quartzite Too Much for a Bathroom?
Quartzite is often associated with luxury kitchens and dramatic statement islands—but many homeowners hesitate when it comes to bathrooms. Is quartzite overkill for a smaller, more intimate space? Is it impractical? Or is it actually one of the best materials you can use?
The short answer: No, quartzite is not too much for a bathroom—when it’s used correctly, it can be one of the smartest and most beautiful choices.
Let’s break it down.
Why Quartzite Works Surprisingly Well in Bathrooms
Bathrooms place unique demands on materials: moisture, daily use, cleaning products, and visual balance all matter. Quartzite performs well across all of these areas.
1️⃣ It Handles Moisture Better Than Many Expect
Quartzite is dense and highly resistant to water absorption when properly sealed.
-
Temporary darkening from water is normal and harmless
-
Mold and mildew resistance is strong
-
Performs well in humid environments
This makes quartzite suitable for:
-
Vanity tops
-
Shower walls
-
Tub surrounds
-
Accent walls
2️⃣ It Elevates the Entire Space
Bathrooms are smaller than kitchens, which means materials have more visual impact. Quartzite instantly raises the perceived quality of the room.
Instead of feeling “too much,” quartzite often makes bathrooms feel:
-
More spa-like
-
Cleaner and brighter
-
Thoughtfully designed
-
Custom and high-end
A little quartzite goes a long way.
3️⃣ It’s More Durable Than Marble
Many homeowners love marble bathrooms—but worry about etching and staining.
Quartzite offers:
-
A marble-like appearance
-
Far better scratch resistance
-
Much less etching from water and mild products
For bathrooms that are used daily, quartzite is often the more practical luxury option.
When Quartzite Can Feel Like Too Much
Quartzite only feels overwhelming when it’s poorly matched to the space.
Common Mistakes
-
Choosing overly dark or extremely bold slabs in tiny bathrooms
-
Using quartzite on every surface without balance
-
Pairing busy veining with patterned tile or heavy cabinetry
-
Ignoring lighting conditions
These aren’t quartzite problems—they’re design balance issues.
How to Use Quartzite Tastefully in a Bathroom
1️⃣ Choose Softer Colors
Light and neutral quartzites work best in bathrooms:
-
Soft whites and creams
-
Light gray veining
-
Warm beige tones
These keep the room feeling open and calm.
2️⃣ Limit Quartzite to Key Surfaces
You don’t need to use it everywhere.
Great applications include:
-
Vanity countertop
-
Full-height backsplash behind the sink
-
Feature shower wall
-
Tub surround accent
This creates impact without overwhelming the room.
3️⃣ Pair It With Simple Materials
Let quartzite be the star.
Balance it with:
-
Minimal cabinetry
-
Neutral wall colors
-
Simple fixtures
-
Matte finishes
Quartzite shines best when it isn’t competing with other bold elements.
4️⃣ Pick the Right Finish
Finish matters in a bathroom setting.
| Finish | Why It Works |
|---|---|
| Polished | Reflects light, brightens small spaces |
| Honed | Soft, spa-like, modern |
| Leathered | Best for accents, adds warmth |
Is Quartzite Worth the Cost in a Bathroom?
In many cases, yes.
Bathrooms use less material than kitchens, which means:
-
Lower overall slab cost
-
High visual impact per square foot
-
Strong resale appeal
A quartzite vanity or shower wall often delivers more perceived value than upgrading multiple smaller finishes.
Quartzite vs Other Bathroom Materials
| Material | Bathroom Performance |
|---|---|
| Quartzite | ⭐⭐⭐⭐⭐ Durable, elegant |
| Marble | ⭐⭐ Beautiful but delicate |
| Quartz | ⭐⭐⭐⭐ Low maintenance, uniform |
| Porcelain | ⭐⭐⭐⭐ Practical, modern |
| Granite | ⭐⭐⭐ Traditional, heavier look |
Quartzite offers one of the best balances between beauty and performance.
Final Verdict – Is Quartzite Too Much for a Bathroom?
Quartzite is not too much for a bathroom—it’s often just right.
When chosen thoughtfully, quartzite:
-
Adds luxury without excess
-
Performs well in moisture-rich spaces
-
Elevates resale appeal
-
Creates a timeless, spa-like feel
If you want a bathroom that feels intentional, elevated, and built to last, quartzite is a smart—and surprisingly practical—choice.
Does Quartzite Get Easier or Harder to Maintain
Quartzite is known for its durability and luxury appearance—but many homeowners wonder what life with quartzite actually looks like years down the road. Does it become harder to maintain? Or does caring for quartzite get easier over time?
The honest answer: for most homeowners, quartzite becomes easier to maintain, not harder—especially once good care habits are established.
Here’s why.
What Quartzite Maintenance Looks Like at the Beginning
When quartzite is newly installed, maintenance often feels more involved simply because everything is new.
At first, homeowners are learning:
-
Which cleaners are safe
-
How often to wipe spills
-
When to reseal
-
How the stone reacts to water
This “learning phase” can make quartzite feel more demanding than it really is.
Why Quartzite Gets Easier Over Time
1️⃣ You Learn Its Behavior Quickly
Quartzite is predictable once you’ve lived with it.
You’ll notice:
-
Water darkening fades on its own
-
Most spills wipe up easily
-
Scratches and damage are rare
Once you understand how the stone behaves, daily care becomes second nature.
2️⃣ The Surface Becomes More Stable
With proper sealing, quartzite tends to:
-
Absorb less moisture over time
-
Dry more evenly
-
Show fewer temporary dark spots
Repeated sealing helps maintain consistent performance and appearance.
3️⃣ You Stop Over-Cleaning
New quartzite owners often over-clean, which can:
-
Strip sealer prematurely
-
Dull the finish
-
Create unnecessary worry
Over time, most people realize quartzite needs less attention than expected—just regular wiping and gentle cleaning.
4️⃣ Wear Is Minimal Compared to Other Stones
Unlike marble or limestone, quartzite doesn’t develop:
-
Widespread etching
-
Heavy scratch patterns
-
Rapid surface dulling
Because it resists everyday damage, maintenance doesn’t increase year after year.
What Can Make Quartzite Feel Harder to Maintain
Quartzite only becomes “difficult” if certain mistakes happen.
Skipping Resealing
If sealing is ignored:
-
Water absorbs more easily
-
Oil stains become more likely
-
Dark spots linger longer
This makes the stone feel high-maintenance—when the real issue is neglected sealing.
Using the Wrong Cleaners
Repeated use of:
-
Vinegar
-
Citrus sprays
-
Harsh disinfectants
can break down the sealer and dull the surface, leading to more frequent cleaning and frustration.
Poor Fabrication or Installation
Problems blamed on maintenance are often installation-related:
-
Weak edges
-
Poor seam placement
-
Insufficient reinforcement
Well-fabricated quartzite stays easy to live with.
Quartzite vs Other Materials Over Time
| Material | Maintenance Trend Over Time |
|---|---|
| Quartzite | ⭐ Gets easier |
| Granite | ⭐⭐ Stays about the same |
| Marble | ⭐⭐⭐ Gets harder |
| Quartz (engineered) | ⭐⭐ Stays consistent |
| Laminate | ⭐⭐⭐ Gets harder as it ages |
Quartzite’s resistance to wear helps keep maintenance predictable.
Long-Term Care Habits That Make Life Easy
✔ Wipe spills promptly
✔ Use pH-neutral stone cleaner
✔ Reseal when water stops beading
✔ Avoid abrasive pads
✔ Use cutting boards and trivets
These habits take seconds but prevent years of extra maintenance.
What Quartzite Looks Like After Years of Use
Well-maintained quartzite typically:
-
Retains its finish
-
Shows minimal wear
-
Maintains consistent color
-
Requires only routine cleaning
Most homeowners report less worry over time—not more.
Final Takeaway – Does Quartzite Get Easier or Harder to Maintain
Quartzite does not get harder to maintain as it ages. In fact, for most homeowners, it becomes easier as:
-
You learn how the stone behaves
-
Proper sealing stabilizes performance
-
Minimal wear means fewer issues
Quartzite rewards basic care with long-term beauty and durability—making it one of the most practical luxury stones you can choose.
If you want a countertop that looks great without becoming a maintenance burden, quartzite delivers.
Quartzite vs. Everything Else
When choosing countertops, homeowners are faced with endless options—granite, marble, quartz, porcelain, laminate, and more. Each material has strengths, but very few balance luxury appearance, durability, and long-term performance the way quartzite does.
So how does quartzite really stack up against everything else? Let’s take an honest, real-world look.
What Makes Quartzite Unique?
Quartzite is a natural metamorphic stone formed when sandstone is subjected to extreme heat and pressure over millions of years. That process creates a surface that is:
-
Extremely hard (7–8 on the Mohs scale)
-
Dense and durable
-
Naturally heat resistant
-
One-of-a-kind in color and veining
This combination puts quartzite in a rare category: natural beauty with serious strength.
Quartzite vs. Granite
Granite has long been the go-to natural stone, but quartzite has quietly surpassed it in many modern homes.
Where granite excels:
-
Proven durability
-
Wide availability
-
Often lower cost
Where quartzite wins:
-
Harder and more scratch-resistant
-
More refined, marble-like appearance
-
Often ages more gracefully
Granite still performs well, but quartzite offers a more elevated aesthetic without sacrificing durability.
Quartzite vs. Marble
Marble is undeniably beautiful—but it comes with tradeoffs.
Marble’s drawbacks:
-
Scratches easily
-
Etches from acidic foods
-
Requires frequent maintenance
Quartzite advantage:
-
Similar elegance and veining
-
Far greater resistance to wear and etching
-
Much better suited for kitchens
If you love marble’s look but want peace of mind, quartzite is the practical alternative.
Quartzite vs. Quartz (Engineered Stone)
These countertops are popular for convenience, but they aren’t without limitations.
Quartz strengths:
- data-end=”2108″>
Non-porous
No sealing required
-
Consistent patterns
Quartz limitations:
-
-
Contains resins
<
-
li data-start=”2196
-
- ” data-end=”2230″>
Can scorch or discolor from heat
-
Not UV-stable outdoors
Quartzite, on the other hand, is naturally heat resistant, UV-stable, and free from synthetic materials—making it better for both high-heat kitchens and outdoor spaces.
Quartzite vs. Porcelain Slabs
Porcelain slabs are sleek and modern, but they feel very different in use.
Porcelain benefits:
-
Thin and lightweight
-
Extremely stain-resistant
-
Contemporary appearance
Where quartzite outperforms:
-
More depth and natural movement
-
Better edge durability
-
Warmer, more organic feel
Porcelain works well for minimalism, but quartzite delivers character and presence.
Quartzite vs. Budget Surfaces (Laminate & Solid Surface)
Budget-friendly materials can be tempting—but they’re not built for longevity.
Common issues:
-
Scratches and burns easily
-
Shorter lifespan
-
Lower resale appeal
Quartzite costs more upfront but often lasts decades longer, making it a better long-term investment.
Real-World Performance Comparison
| Feature | Quartzite | Granite | Marble | Quartz | Porcelain |
|---|---|---|---|---|---|
| Scratch resistance | ⭐⭐⭐⭐⭐ | ⭐⭐⭐⭐ | ⭐⭐ | ⭐⭐⭐ | ⭐⭐⭐ |
| Heat resistance | ⭐⭐⭐⭐⭐ | ⭐⭐⭐⭐ | ⭐⭐⭐⭐ | ⭐⭐ | ⭐⭐⭐⭐ |
| Maintenance | Medium | Medium | High | Low | Low |
| Visual depth | High | Medium | High | Low | Medium |
| Longevity | Decades | Decades | Shorter | Long | Long |
Quartzite consistently ranks near the top across categories.
Maintenance Reality: Is Quartzite Hard to Care For?
Quartzite does require:
-
Periodic sealing
-
pH-neutral cleaners
-
Basic spill awareness
But compared to marble, the maintenance is minimal—and far less stressful in daily life.
Who Should Choose Quartzite?
Quartzite is ideal if you want:
-
Natural stone with luxury appeal
-
A surface that handles real life
-
Strong resale value
-
Long-term durability with timeless style
It may not be the best fit if:
-
You want zero maintenance
-
You prefer perfectly uniform patterns
-
Budget is the primary driver
Final Verdict – Quartzite vs. Everything Else
When you compare quartzite to granite, marble, quartz, porcelain, and budget materials, it consistently delivers the best balance of beauty, performance, and longevity.
Quartzite isn’t just another countertop option—it’s often the choice homeowners make when they want something that looks exceptional on day one and still performs years later.
If you’re investing in a surface you’ll live with every day, quartzite stands out for all the right reasons.

The Most Underrated Quartzite Colors
When people think of quartzite, names like Taj Mahal or Mont Blanc usually steal the spotlight. But beyond the well-known favorites, there’s a whole world of underrated quartzite colors that offer incredible beauty, versatility, and often better value.
These lesser-known quartzites are quietly becoming designer favorites—perfect for homeowners who want something distinctive without chasing trends.
Why Underrated Quartzite Colors Matter
Choosing a less common quartzite color can offer real advantages:
-
A more unique, custom look
-
Less competition for slabs
-
Often better pricing than top-tier “name” stones
-
Timeless appeal without feeling overused
If you want quartzite that feels special—but not trendy—these options deserve a closer look.
1️⃣ Avohai Quartzite
Soft gray elegance with modern appeal
Avohai features smooth gray tones with gentle movement that works beautifully in contemporary and transitional spaces.
Why it’s underrated:
-
Neutral but not boring
-
Works with warm or cool cabinets
-
Ideal for modern kitchens and open layouts
A great alternative to brighter white quartzites.
2️⃣ Naica Extra Quartzite
Warm, luminous neutrals with subtle drama
Often overshadowed by Taj Mahal, Naica Extra offers a creamy background with delicate veining and occasional translucent areas.
Why designers love it:
-
Softer and warmer than stark whites
-
Elegant without being flashy
-
Excellent for full-height backsplashes and islands
Perfect for modern organic interiors.
3️⃣ Le Blanc Quartzite
Refined gray-white tones with marble-like flow
Le Blanc offers a balanced mix of white and gray with soft veining—ideal for homeowners who want elegance without high contrast.
Why it deserves more attention:
-
Clean and timeless
-
Easy to pair with most finishes
-
Less dramatic, more livable
A fantastic choice for kitchens that should feel calm and cohesive.
4️⃣ Sea Pearl Quartzite
Soft coastal tones that feel fresh and sophisticated
Sea Pearl blends gentle greens, blues, and grays into a calming palette inspired by nature.
Why it’s underrated:
-
Adds color without overpowering the space
-
Ideal for bathrooms and spa-like kitchens
-
Works beautifully with light wood cabinetry
It’s subtle, serene, and surprisingly versatile.
5️⃣ Emerald Mist Quartzite
Moody greens with movement and depth
Emerald Mist brings rich green tones with flowing veining that adds personality without going full statement slab.
Why it’s a hidden gem:
-
Perfect for accent islands or bars
-
Feels bold but still refined
-
Pairs beautifully with brass or black hardware
Great for homeowners ready to step beyond neutrals—without going too far.
6️⃣ Silver Shadow Quartzite
Cool gray sophistication
Silver Shadow features layered grays and silvery undertones that complement modern and minimalist interiors.
Why it stands out quietly:
-
Works well in monochrome kitchens
-
Pairs nicely with stainless steel and concrete looks
-
Elegant without heavy veining
An excellent option for sleek, urban designs.
7️⃣ Macaubas Fantasy Quartzite
Soft movement with artistic flow
Often overlooked next to White Macaubas, this variation introduces more movement and character.
Why it’s worth considering:
-
Unique linear-meets-organic pattern
-
Ideal for waterfall islands
-
Feels custom and architectural
Perfect for modern homes that want something different—but still refined.
How to Choose an Underrated Quartzite Color
When exploring less common quartzites, keep these tips in mind:
✔ View slabs in person whenever possible
✔ Focus on undertone (warm vs cool)
✔ Consider lighting—natural light makes a big difference
✔ Think long-term, not trend-based
✔ Pair with simple cabinets to let the stone shine
Underrated doesn’t mean risky—it often means thoughtful and timeless.
Final Takeaway – The Most Underrated Quartzite Colors
The most underrated quartzite colors offer everything homeowners want:
-
Natural beauty
-
Durability
-
Design flexibility
-
A unique, high-end feel
If you want your space to feel intentional and elevated—without choosing the same stone everyone else has—these quartzites are smart, stylish alternatives worth exploring.

Why Quartzite Ages Better Than Other Stones
When choosing a natural stone for countertops, many homeowners focus on how it looks on installation day—but what really matters is how it looks 5, 10, or even 20 years later. Some stones show wear quickly, while others develop issues that require constant maintenance.
Quartzite stands out because it ages exceptionally well compared to many other natural stones. Here’s why quartzite maintains its beauty, strength, and value long after installation.
1️⃣ Exceptional Hardness Means Less Wear Over Time
Quartzite ranks 7–8 on the Mohs hardness scale, making it harder than granite and significantly harder than marble or limestone.
Because of this:
-
Scratches are rare
-
Micro-abrasions accumulate much more slowly
-
The surface maintains its finish longer
Softer stones gradually lose their polish and show traffic patterns—quartzite resists that kind of visible aging.
2️⃣ Better Resistance to Everyday Damage
Daily life puts countertops through a lot:
-
Sliding cookware
-
Dropped utensils
-
Kids’ activities
-
Cleaning routines
Quartzite’s dense structure allows it to withstand this constant use with minimal visible impact, while softer stones often show dull spots, scratches, or chips over time.
3️⃣ Less Etching Compared to Marble and Limestone
Etching—those dull, chalky marks caused by acids—is one of the biggest reasons natural stone looks worn prematurely.
-
Marble etches easily
-
Limestone etches even faster
-
Quartzite is far more resistant
While quartzite isn’t completely immune, it handles acidic exposure much better, helping it retain a consistent appearance as the years go on.
4️⃣ Stable Color That Doesn’t Yellow or Fade
Quartzite is naturally UV-stable and mineral-based, which means:
-
No yellowing from sunlight
-
No fading from indoor or outdoor exposure
-
No resin breakdown like engineered surfaces
This makes quartzite especially well-suited for:
-
Sun-filled kitchens
-
Outdoor kitchens
-
Fireplace surrounds
Its color remains true decade after decade.
5️⃣ Sealing Protects Without Constant Refinishing
Quartzite does require sealing—but sealing preserves, rather than masks, the stone’s surface.
With proper sealing:
-
Liquids bead instead of absorbing
-
Temporary darkening dries evenly
-
Stains are easier to prevent and remove
Unlike marble, quartzite rarely needs repeated professional polishing to look good over time.
6️⃣ Edges Hold Up Better Over the Years
Edges are often the first area to show age.
Quartzite’s strength helps:
-
Reduce edge chipping
-
Maintain crisp profiles
-
Preserve waterfall and mitered edges
With proper fabrication, quartzite edges stay clean and intact far longer than those made from softer stones.
7️⃣ Natural Patina Without “Worn-Out” Appearance
Some stones develop patina in a charming way—but others simply look damaged.
Quartzite tends to:
-
Maintain a consistent finish
-
Develop subtle character rather than visible wear
-
Avoid blotchy or uneven aging
It ages gracefully without looking tired or neglected.
Quartzite vs Other Stones: Aging Comparison
| Material | How It Ages Over Time |
|---|---|
| Quartzite | ⭐⭐⭐⭐⭐ Holds polish, resists wear |
| Granite | ⭐⭐⭐⭐ Durable but can dull unevenly |
| Marble | ⭐⭐ Scratches & etches quickly |
| Limestone | ⭐ Poor durability, heavy wear |
| Quartz (engineered) | ⭐⭐⭐ Can discolor or scorch |
Quartzite consistently ranks among the longest-lasting natural stones.
Who Benefits Most From Quartzite’s Longevity?
Quartzite is ideal for:
-
Busy kitchens
-
Families with kids
-
Homes with lots of natural light
-
Long-term homeowners
-
High-end remodels focused on resale value
If you want a stone that still looks premium years later, quartzite delivers.
Final Takeaway – Why Quartzite Ages Better Than Other Stones
Quartzite ages better than other stones because it combines:
-
Superior hardness
-
Strong resistance to scratches and etching
-
Color stability
-
Minimal long-term maintenance
Instead of showing wear, quartzite maintains its beauty and performance—making it one of the smartest long-term investments in natural stone.
If you want a countertop that looks just as good years from now as it does today, quartzite is hard to beat.

How Quartzite Is Cut and Fabricated (Behind the Scenes)
Quartzite countertops look effortless once installed—but getting from a massive raw stone slab to a perfectly fitted countertop is also a highly technical, skill-driven process. Because quartzite is one of the hardest natural stones available, cutting and fabricating it requires specialized equipment, expert craftsmanship, and careful planning.
Here’s a behind-the-scenes look at how quartzite is cut and fabricated, step by step.
Step 1: Quarrying the Quartzite Slab
Everything starts at the quarry.
Quarries extract quartzite in massive stone blocks, often weighing tens of thousands of pounds, and transport them to processing facilities where workers slice them into slabs.
At this stage:
-
Blocks are inspected for cracks and structural integrity
-
Large saws cut them into slab thicknesses (typically 2 cm or 3 cm)
-
Slabs are polished or honed on one side
Each slab is completely unique—no two have the same veining or color.
Step 2: Slab Inspection & Selection
Before fabrication begins, fabricators carefully inspect each slab.
They look for:
-
Natural fissures (common in quartzite)
-
Mineral deposits
-
Color consistency
-
Vein direction and movement
-
Areas to avoid for cutouts
This step determines how the slab will be laid out to ensure both beauty and strength.
Step 3: Templating Your Space
Once the slab is chosen, the fabricator creates a precise template of your countertops.
This includes:
-
Exact dimensions
-
Sink and cooktop cutouts
-
Faucet holes
-
Edge profiles
-
Seam locations
Also modern shops use digital laser templating systems to capture measurements down to millimeters. Accuracy is critical—quartzite is extremely difficult to adjust once cut.
Step 4: Layout Planning on the Slab
Before any cutting happens, the template is placed over the slab digitally or physically.
This allows the fabricator to:
-
Align veining for best visual flow
-
Plan waterfall edges
-
Position seams discreetly
-
Avoid weak areas or fissures
This is where craftsmanship really shows—poor layout planning can ruin even the most beautiful slab.
Step 5: Cutting the Quartzite
Fabricators cut quartzite using diamond-bladed saws and also CNC machines designed for ultra-hard stone.
Because quartzite ranks 7–8 on the Mohs hardness scale, standard tools won’t work.
During cutting:
-
The slab is kept wet to control heat and dust
-
Cuts are made slowly to prevent fractures
-
Reinforcement rods may be added around sink areas
This stage requires patience—rushing quartzite can cause cracking or chipping.
Step 6: Creating Cutouts & Reinforcements
Sink and cooktop openings are the most vulnerable areas of a quartzite countertop.
To protect them, fabricators:
-
Use specialized drilling and cutting techniques
-
Add steel or fiberglass reinforcement rods
-
Polish interior edges carefully
This reinforcement ensures long-term durability and prevents stress fractures.
Step 7: Shaping the Edge Profile
Next comes edge detailing.
Popular quartzite edge profiles include:
-
Eased
-
Beveled
-
Bullnose
-
Half-bullnose
-
Mitered edges (for thicker waterfall looks)
Edges are also shaped using diamond tooling and polished to match the surface finish. This step is both technical and aesthetic—edges reveal the quality of fabrication instantly.
Step 8: Polishing or Finishing the Surface
Fabricators polish and finish unfinished slabs and match the edges.
Common finishes:
-
Polished – glossy, reflective
-
Honed – smooth, matte
-
Leathered – textured, natural feel
Each finish changes how the quartzite looks, feels, and reflects light.
Step 9: Dry Fit & Quality Control
Before delivery, many shops perform a dry fit in the fabrication facility.
This ensures:
-
Seams align properly
-
Pieces fit together cleanly
-
Edge profiles match
-
Cutouts are accurate
Any issues are corrected before the stone ever leaves the shop.
Step 10: Sealing & Prep for Installation
Most fabricators apply an initial penetrating sealer before installation.
Sealing:
-
Reduces water absorption
-
Protects against staining
-
Enhances longevity
After sealing, the stone is carefully crated and prepared for transport.
Why Quartzite Fabrication Requires Experts
Quartzite is beautiful—but unforgiving.
Its hardness means:
-
Cutting mistakes are costly
-
Repairs are difficult
-
Fabrication quality matters more than with softer stones
An experienced fabricator makes the difference between a countertop that lasts decades and one that develops issues early.
Final Takeaway – How Quartzite Is Cut and Fabricated (Behind the Scenes)
Quartzite fabrication is a blend of:
-
Advanced technology
-
Skilled craftsmanship
-
Careful planning
-
Attention to detail
From quarry to countertop, every step plays a role in the final result. When done correctly, quartzite becomes a stunning, durable centerpiece that performs beautifully for years.
Top Quartzite Colors
Quartzite has become one of the most in-demand natural stones for countertops, walls, and architectural features—and color plays a huge role in its popularity. From soft neutrals to bold statement slabs, quartzite offers a wide range of tones that work beautifully in both modern and classic designs.
If you’re choosing quartzite for your home, these are the top quartzite colors homeowners and designers love most, along with why they continue to stand the test of time.
1️⃣ Taj Mahal Quartzite
Warm, elegant, and endlessly versatile
Taj Mahal is one of the most popular quartzite colors for a reason. Its creamy beige background and soft veining create a warm, luxurious look that works in almost any space.
Why it’s loved:
-
Complements light and dark cabinets
-
Softer alternative to bright white stone
-
Timeless and resale-friendly
Perfect for kitchens, islands, and bathrooms.
2️⃣ Mont Blanc Quartzite
Clean, bright, and modern
Mont Blanc features a white background with delicate gray veining, giving homeowners the marble look without marble-level maintenance.
Why it stands out:
-
Works beautifully in minimalist kitchens
-
Brightens open floor plans
-
Pairs well with stainless steel and matte black finishes
A top choice for contemporary homes.
3️⃣ Perla Venata Quartzite
Soft neutral tones with subtle movement
Perla Venata offers a calm, balanced appearance that fits seamlessly into modern organic and transitional designs.
Why homeowners choose it:
-
Neutral without being plain
-
Easy to match with flooring and cabinetry
-
Elegant but understated
Ideal for large kitchens and full-slab backsplashes.
4️⃣ White Macaubas Quartzite
Linear veining for sleek designs
Known for its straight, flowing lines, White Macaubas is a favorite for modern and European-inspired interiors.
Why it’s popular:
-
Clean, linear movement
-
Sophisticated and architectural
-
Looks stunning on waterfall islands
Great for homes with a modern or minimalist aesthetic.
5️⃣ Cristallo Quartzite
Dramatic, translucent luxury
Cristallo is a show-stopping quartzite with crystalline structure and light-reflective qualities. In some installations, it can even be backlit.
Why designers love it:
-
Unique and eye-catching
-
High-end, luxury appearance
-
Makes islands and feature walls unforgettable
Perfect for statement pieces.
6️⃣ Sea Pearl Quartzite
Soft blues, grays, and greens inspired by nature
Sea Pearl brings a calm, coastal feel with cool undertones that feel fresh and modern.
Why it works well:
-
Ideal for spa-like bathrooms
-
Complements coastal and modern homes
-
Adds color without overpowering the space
A great option for homeowners wanting something different yet subtle.
7️⃣ Avohai Quartzite
Modern gray elegance
Avohai features gentle gray tones with smooth movement, making it a versatile neutral for modern interiors.
Why it’s a favorite:
-
Works with warm or cool palettes
-
Modern but not trendy
-
Easy to design around
Excellent for kitchens, bathrooms, and open-concept spaces.
8️⃣ Patagonia Quartzite
Bold, artistic, and dramatic
Patagonia is one of the most distinctive quartzites available, featuring a mix of whites, golds, blacks, and translucent sections.
Why it’s chosen:
-
Statement-making design
-
Works as functional art
-
Popular for luxury homes and feature installations
Best used as an island centerpiece or accent wall.
How to Choose the Right Quartzite Color
When selecting a quartzite color, consider:
-
Cabinet color and finish
-
Lighting (natural vs artificial)
-
Veining intensity (subtle vs bold)
-
Overall design style
-
Resale appeal
Always view slabs in person when possible—natural stone varies from slab to slab.
Final Takeaway – Top Quartzite Colors
The top quartzite colors share a few key qualities:
-
Timeless appeal
-
Natural elegance
-
Strong resale value
-
Design versatility
Whether you prefer soft neutrals like Taj Mahal, clean whites like Mont Blanc, or bold statements like Cristallo and Patagonia, quartzite offers a color that can elevate any home for decades to come.
Can Quartzite Stain Permanently?
Quartzite is often chosen for its strength and natural beauty, but many homeowners worry about one thing before buying:
Can quartzite stain permanently?
The short answer is rarely—but it can happen under certain conditions. Understanding why stains occur, how to prevent them, and what to do if they appear will help you keep your quartzite looking flawless for years.
Is Quartzite Stain-Resistant?
Yes. Quartzite is one of the most stain-resistant natural stones, especially when compared to marble or limestone. However, it is still a natural, porous material, which means it can absorb liquids if it isn’t properly sealed or if spills are left too long.
Most “stains” homeowners see on quartzite are temporary dark spots from moisture that disappear once the stone dries.
What Causes Stains on Quartzite?
Permanent staining is uncommon, but these situations can lead to discoloration:
1️⃣ Worn or Missing Sealer
Sealer protects the stone’s microscopic pores. When it wears off:
-
Liquids can soak in
-
Dark spots linger longer
-
Oils may leave residue
2️⃣ Oil-Based Spills
Oil penetrates deeper than water and can be harder to remove if ignored.
Common culprits:
-
Cooking oil
-
Butter or grease
-
Lotion or cosmetics
3️⃣ Long-Term Exposure
Liquids left for hours or days increase staining risk—especially:
-
Wine
-
Coffee
-
Tea
-
Tomato sauce
4️⃣ Using the Wrong Cleaners
Acidic or harsh cleaners can degrade the sealer, making staining more likely over time.
Avoid:
-
Vinegar
-
Lemon juice
-
Bleach
-
Bathroom cleaners
Are Quartzite Stains Permanent?
In Most Cases: No
Most stains can be removed or significantly lightened, especially if addressed early.
Permanent Stains Are Rare
They typically occur only when:
-
The stone was never sealed
-
Oil stains sat for weeks or months
-
Harsh chemicals damaged the surface
-
The stone is misidentified (soft dolomite sold as quartzite)
How to Remove Stains from Quartzite
Water or Dark Spots
✔ Let the area dry completely
✔ These usually disappear on their own
Oil-Based Stains
✔ Use a baking soda or stone-safe poultice
✔ Leave overnight
✔ Repeat if necessary
Organic Stains (Coffee, Wine, Food)
✔ Hydrogen peroxide poultice
✔ Rinse thoroughly
✔ Reseal after cleaning
For stubborn stains, a professional stone restoration service can often restore the surface.
How to Prevent Quartzite Stains
✔ Seal quartzite annually (or as recommended)
✔ Wipe spills quickly
✔ Use coasters and trays under oils or soaps
✔ Clean with pH-neutral stone cleaner
✔ Avoid harsh or acidic products
These simple habits dramatically reduce staining risk.
Quartzite vs Other Stones (Stain Resistance)
| Stone Type | Stain Resistance |
|---|---|
| Quartzite | ⭐⭐⭐⭐ |
| Granite | ⭐⭐⭐ |
| Marble | ⭐⭐ |
| Limestone | ⭐ |
| Quartz (engineered) | ⭐⭐⭐⭐ |
Quartzite offers one of the best balances of beauty and stain resistance among natural stones.
Final Verdict – Can Quartzite Stain Permanently?
Quartzite does not stain easily—and permanent stains are very uncommon when the stone is properly sealed and maintained. Most discoloration issues are temporary and easily fixable.
With basic care, quartzite remains:
✨ Beautiful
💪 Durable
🧽 Low-maintenance
🏡 A smart long-term investment

Quartzite Countertops Pros and Cons
Quartzite has become one of the most sought-after countertop materials in modern homes. Known for its stunning natural beauty and impressive durability, quartzite is often compared to marble and granite — but it performs very differently from both.
Before you decide if quartzite is right for your kitchen or bathroom, here’s a clear, homeowner-friendly breakdown of the pros and cons of quartzite countertops.
What Is Quartzite? (Quick Overview)
Quartzite is a natural metamorphic stone formed when sandstone is exposed to extreme heat and pressure. This process creates a dense, hard surface with elegant veining and natural color variation — making each slab truly one of a kind.
Pros of Quartzite Countertops
1️⃣ Exceptional Durability
Quartzite ranks 7–8 on the Mohs hardness scale, making it harder than granite and far more scratch-resistant than marble.
✔ Resists everyday wear
✔ Ideal for busy kitchens
✔ Holds up well over decades
2️⃣ Marble-Like Beauty
Quartzite offers the elegant veining of marble without the same level of maintenance.
✔ Natural movement and depth
✔ Available in whites, creams, grays, greens, and dramatic patterns
✔ Each slab is unique
3️⃣ Heat Resistance
Quartzite forms under intense heat — so it naturally handles:
✔ Hot pans
✔ Warm cookware
✔ Sun exposure (even outdoors, in many cases)
Still recommended to use trivets, but far more forgiving than engineered surfaces.
4️⃣ Long-Term Value
Quartzite countertops are considered a premium upgrade, often increasing resale appeal and perceived home value.
✔ Attractive to buyers
✔ Timeless design
✔ Long lifespan
5️⃣ Natural and Eco-Friendly
Quartzite is:
-
100% natural
-
Free of resins or plastics
-
Long-lasting (fewer replacements over time)
Appeals to homeowners seeking sustainable materials.
6️⃣ Versatile Applications
Quartzite works beautifully in:
-
Kitchens
-
Bathrooms
-
Showers
-
Fireplace surrounds
-
Outdoor kitchens (with proper sealing)
Few stones offer this level of versatility.
Cons of Quartzite Countertops
1️⃣ Requires Sealing
Like all natural stone, quartzite is porous to some degree.
✘ Needs sealing (usually once a year)
✘ Can absorb liquids if the sealer wears off
Regular sealing prevents staining and water absorption.
2️⃣ Higher Cost
Quartzite typically costs more than standard granite or quartz.
✘ Higher material cost
✘ Fabrication requires specialized tools
✘ Installation can be more expensive
However, many homeowners see this as a long-term investment.
3️⃣ Limited DIY Repairs
Quartzite is extremely hard — which means:
✘ Not DIY-friendly to repair
✘ Chips and scratches require professional restoration
Luckily, damage is rare when properly installed.
4️⃣ Can Be Confused With Look-Alike Stones
Some stones sold as “quartzite” are actually:
-
Dolomite
-
Marble-like materials
These alternatives may not offer the same durability.
✔ Always confirm it’s true quartzite before purchasing.
5️⃣ Heavy Weight
Quartzite is dense and heavy.
✘ Cabinets must be properly supported
✘ Installation requires an experienced crew
This isn’t usually a problem — just something to plan for.
Quartzite vs Other Countertop Materials
| Material | Durability | Maintenance | Appearance |
|---|---|---|---|
| Quartzite | ⭐⭐⭐⭐⭐ | Medium | Natural, elegant |
| Granite | ⭐⭐⭐⭐ | Medium | Speckled, bold |
| Marble | ⭐⭐ | High | Classic, soft |
| Quartz | ⭐⭐⭐ | Low | Uniform, engineered |
Quartzite strikes a balance between beauty and performance.
Is Quartzite Right for You?
Quartzite is a great choice if you want:
✔ Natural stone with luxury appeal
✔ High durability and heat resistance
✔ Long-term performance
✔ A countertop that stands out
You may want to consider alternatives if:
✘ You want zero maintenance
✘ You prefer a uniform, engineered look
✘ Budget is your top priority
Final Verdict – Quartzite Countertops Pros and Cons
Quartzite countertops offer a rare combination of beauty, strength, and long-term value. While they do require sealing and a higher upfront investment, many homeowners find quartzite well worth it for its durability and timeless elegance.
If you’re looking for a premium natural stone that performs as beautifully as it looks, quartzite is hard to beat.
Does Quartzite Scratch or Chip?
Quartzite is often praised as one of the most durable natural stones for countertops — but many homeowners still ask the same question before buying:
Does quartzite scratch or chip?
The short answer is: Quartzite is highly resistant to scratching and chipping, but no natural stone is completely indestructible. Understanding how quartzite performs in real-world use will help you care for it properly and keep it looking beautiful for decades.
How Durable Is Quartzite?
Quartzite ranks 7–8 on the Mohs hardness scale, making it:
-
Harder than granite
-
Significantly harder than marble
-
Resistant to everyday wear and tear
This hardness means quartzite holds up exceptionally well in busy kitchens and high-use areas.
Can Quartzite Scratch?
Under Normal Use: Rarely
Quartzite is very scratch-resistant. Common household items such as:
-
Knives
-
Pots and pans
-
Utensils
are softer than quartzite and usually won’t leave scratches.
What Can Scratch Quartzite?
While uncommon, scratches can occur from:
-
Dragging ceramic or stone items
-
Grit, sand, or debris under appliances
-
Industrial-grade tools or materials
Using cutting boards and wiping away debris greatly reduces any risk.
Can Quartzite Chip?
Yes — But It’s Uncommon
Quartzite is strong, but chipping can happen, especially:
-
Along edges and corners
-
Near sink cutouts
-
If heavy objects are dropped from height
The good news: most chips are small and repairable by a professional.
How to Prevent Scratches and Chips
Simple habits go a long way:
✔ Use cutting boards (protects your knives too)
✔ Avoid dragging heavy or rough-bottomed items
✔ Wipe sand and grit off the surface
✔ Choose a durable edge profile (eased or rounded)
✔ Be careful near edges and sink cutouts
These steps keep your quartzite looking pristine.
Edge Profiles Matter
Some edges are more chip-resistant than others:
| Edge Type | Durability |
|---|---|
| Eased / Slightly Rounded | ⭐⭐⭐⭐⭐ |
| Beveled | ⭐⭐⭐⭐ |
| Bullnose | ⭐⭐⭐⭐⭐ |
| Sharp Square Edge | ⭐⭐⭐ |
Rounded edges distribute impact better and reduce chipping risk.
What If Scratches or Chips Do Happen?
Most issues are fixable:
-
Light scratches can be polished
-
Small chips can be filled and blended
-
Edges can be refinished
Professional stone restoration can make repairs nearly invisible.
Quartzite vs Other Countertop Materials
| Material | Scratch Resistance | Chip Resistance |
|---|---|---|
| Quartzite | ⭐⭐⭐⭐⭐ | ⭐⭐⭐⭐ |
| Granite | ⭐⭐⭐⭐ | ⭐⭐⭐ |
| Marble | ⭐⭐ | ⭐⭐ |
| Quartz (engineered) | ⭐⭐⭐ | ⭐⭐⭐ |
Quartzite consistently ranks at the top for durability.
Final Verdict – Does Quartzite Scratch or Chip?
Quartzite is one of the most scratch- and chip-resistant countertop materials available. While it isn’t completely indestructible, it easily handles everyday kitchen use — even in busy homes.
With basic care and smart habits, quartzite countertops will stay strong, beautiful, and virtually damage-free for years to come.

What to Expect During Quartzite Installation
Quartzite is one of the most beautiful and durable natural stones you can add to your home — but installing it isn’t as simple as dropping it onto the cabinets. Because quartzite is extremely heavy and incredibly hard, the installation process is more detailed than many homeowners realize.
To help you feel prepared (and avoid surprises), here’s exactly what to expect during quartzite installation, from the first measurements to the final polish.
1️⃣ The Initial Walkthrough & Measurements
Everything starts with a professional visit to your home. During this appointment, the installer will:
-
Measure every section of your countertops
-
Confirm cabinet levelness and support
-
Discuss sink type (undermount, farmhouse, etc.)
-
Determine seam locations
-
Review backsplash height
-
Identify any tricky areas (tight corners, narrow doorways)
These details help ensure your quartzite slab will fit perfectly the first time — crucial for a stone that’s nearly impossible to adjust on-site.
2️⃣ Creating the Template
Next comes one of the most important steps: templating.
The installer will create a digital or physical template of your exact countertop layout, including:
-
Sink and cooktop cutouts
-
Overhang dimensions
-
Edge profile selections
-
Faucet hole placements
-
Join and seam locations
This template becomes the “blueprint” for cutting the quartzite slab. Accuracy here determines how flawless the final fit will be.
3️⃣ Slab Selection & Layout Planning
Once the template is finalized, you’ll visit a stone yard (or view slabs online) to choose your quartzite.
During this process, you’ll:
-
Review multiple slabs of the same color
-
Compare veining, movement, and tone
-
Approve which part of the slab becomes which part of your countertop
Many fabricators will “lay the template” over the slab so you can visualize how the veins will flow on your island or main counter run.
✨ Tip: Bring your cabinet door, flooring sample, and paint swatches with you.
4️⃣ Fabrication: Cutting, Shaping & Polishing the Slab
Back at the fabrication shop, the slab is transformed into your custom countertop.
This stage includes:
-
Cutting the slab to the template
-
Reinforcing sink and cooktop cutouts
-
Shaping the chosen edge profile
-
Polishing or finishing the surface (polished, honed, leathered, etc.)
-
Matching seams for a cohesive look
-
Inspecting the stone for fissures or natural variations
Quartzite is incredibly hard, so fabricators use diamond-tipped tools to cut it precisely.
5️⃣ Installation Day: What Actually Happens
Quartzite installation is typically fast — but intense. Here’s what the crew does:
Before Installation
-
Remove old countertops (if included)
-
Protect floors, walls, and nearby appliances
-
Bring in the quartzite slabs using dollies or lift equipment
During Installation
-
Slabs are set into place and leveled
-
Sinks are mounted and secured
-
Seams are bonded, filled, and polished
-
Backsplash pieces are installed
-
Stone is thoroughly cleaned
Because quartzite can weigh 15–23 pounds per square foot, expect a large crew for safety and precision.
Time estimate:
Most homes take 3–6 hours, depending on complexity.
6️⃣ Sealing & Surface Protection
After installation, your installer will usually:
-
Apply a penetrating sealer
-
Wipe and buff the stone
-
Explain future resealing timelines
-
Give you care & maintenance instructions
Proper sealing protects against stains and helps water bead instead of absorbing.
7️⃣ Final Inspection & Homeowner Walkthrough
Before the crew leaves, they will:
-
Check seam smoothness
-
Verify cutouts fit perfectly
-
Ensure the slab sits level
-
Confirm edges are polished correctly
-
Make sure sinks and faucets align properly
This is your chance to ask questions or mention anything you want touched up.
How to Prepare for Quartzite Installation
You can make installation day smoother by:
✔ Clearing all countertops
✔ Emptying cabinets under the sink
✔ Moving furniture out of pathways
✔ Ensuring the driveway and entryways are accessible
✔ Removing fragile items from nearby shelves
✔ Having plumbing ready for reconnection
A little prep helps the team work efficiently and safely.
Final Takeaway – What to Expect During Quartzite Installation
Quartzite installation is a multi-step process that involves:
-
Precise measuring
-
Careful templating
-
Thoughtful slab selection
-
Professional fabrication
-
Skilled installation
-
Sealing and final inspection
When done correctly, the result is a flawless, durable, and stunning surface that elevates the entire room.
Quartzite brings luxury into your home — and the installation process makes sure it fits perfectly for decades of beauty and performance.
Quartzite Colors That Buyers Love
If you’re upgrading your kitchen or bathroom with an eye toward resale value, quartzite is a smart choice. Not only is it one of the most durable and low-maintenance natural stones, but the right color can also boost your home’s appeal and attract buyers who want luxury finishes without future upkeep.
Here are the quartzite colors today’s buyers love most — and why they consistently help homes sell faster and for more.
1️⃣ Taj Mahal Quartzite
A timeless bestseller — warm, elegant, and extremely versatile.
Why buyers love it:
-
Soft cream and beige tones complement any cabinet color
-
Marble-like beauty with superior durability
-
Perfect for modern, transitional, and classic homes
Buyers often say it “just feels expensive” — because it does.
2️⃣ Perla Venata Quartzite
Neutral with a hint of soft warmth — easy to design around.
Appeal Points:
-
Works with both cool and warm interiors
-
Lightens the space while adding subtle movement
-
Popular with Scandinavian and organic modern styles
This color looks clean and fresh without being plain.
3️⃣ Mont Blanc Quartzite
Bright, crisp, and effortlessly modern.
What makes it a top resale choice:
-
White background with fine gray veining
-
Pairs beautifully with stainless steel finishes
-
Ideal for minimalist kitchens and open floorplans
If you love a marble aesthetic, Mont Blanc is the durable alternative buyers seek.
4️⃣ White Macaubas Quartzite
Linear elegance that suits modern designs.
Why it stands out:
-
Soft gray striping creates a sophisticated look
-
Adds depth without overpowering the space
-
Pairs well with dark or wood cabinetry
This one appeals especially to buyers who want a clean, sleek style.
5️⃣ Cristallo Quartzite
A luxury showpiece buyers remember.
Why high-end homes choose Cristallo:
-
Translucent qualities — can even be backlit
-
Stunning crystalline patterns
-
Premium, one-of-a-kind appearance
It instantly adds that “wow factor” buyers love on walkthroughs.
6️⃣ Sea Pearl Quartzite
Soft, calming tones inspired by nature.
Top selling points:
-
Beautiful mix of gray, green, and blue hues
-
Great for coastal or spa-like designs
-
Versatile enough for both warm and cool spaces
Buyers appreciate its refreshing, upscale feel.
7️⃣ Avohai Quartzite
The perfect blend of neutral and interesting.
Why it resells well:
-
Light gray tones with gentle movement
-
Modern but not trendy
-
Works across many design styles
Homebuyers notice the elegance without it demanding full attention.
Why These Colors Stand Out to Buyers
They all share key qualities:
✔ Neutral enough for mass appeal
✔ Unique enough to feel high-end
✔ Easy to pair with popular cabinet & flooring colors
✔ Provide long-term durability and minimal maintenance
Homebuyers want countertops that are:
-
Stylish
-
Strong
-
Easy to maintain
-
Future-proof in design
Quartzite checks every box.
Quick Buyer Appeal Rating
| Quartzite Color | Resale Appeal | Best For |
|---|---|---|
| Taj Mahal | ⭐⭐⭐⭐⭐ | Transitional + luxury homes |
| Perla Venata | ⭐⭐⭐⭐ | Modern organic designs |
| Mont Blanc | ⭐⭐⭐⭐⭐ | Minimalist + bright kitchens |
| White Macaubas | ⭐⭐⭐⭐ | Sleek, linear styles |
| Cristallo | ⭐⭐⭐⭐⭐ | Statement islands + luxury builds |
| Sea Pearl | ⭐⭐⭐⭐ | Coastal + spa-like baths |
| Avohai | ⭐⭐⭐⭐ | Versatile modern homes |
Final Takeaway – Quartzite Colors That Buyers Love
Quartzite has become one of the top return-on-investment upgrades you can make in a kitchen or bath — especially when you choose a color that appeals to the most buyers.
Whether you want soft and neutral or dramatic and luxurious, the quartzite options above will help your home stand out in today’s market.
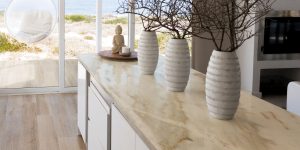
Can Quartzite Be Used Outside?
Quartzite is known for its strength, beauty, and durability indoors — but can it handle the elements outside? The short answer:
Yes! Quartzite is one of the best natural stones for outdoor use.
From outdoor kitchens to patio bars and poolside features, quartzite can elevate your exterior spaces with the same luxurious look it brings to interior countertops.
Here’s what you should know before choosing quartzite for your outdoor project.
Why Quartzite Works Well Outdoors
1️⃣ Extremely Hard and Durable
Quartzite is formed under intense heat and pressure, making it harder than granite and highly resistant to:
✔ Scratches
✔ Impact
✔ Heavy use
This durability makes it a smart choice for outdoor areas with frequent traffic and activity.
2️⃣ Excellent Heat Resistance
Because quartzite developed deep underground under extreme heat, it handles high temperatures without:
-
Burning
-
Melting
-
Scorching
Perfect for outdoor grills, fire features, and sun-heavy areas.
3️⃣ UV-Resistant Coloring
Unlike engineered quartz, quartzite:
✔ Won’t yellow in the sun
✔ Doesn’t fade dramatically over time
Its natural mineral composition keeps it looking beautiful in direct sunlight.
4️⃣ Weather & Moisture Friendly
When properly sealed, quartzite stands up to:
-
Rain
-
Humidity
-
Snow
-
Temperature swings
This makes it suitable for a wide range of climates — even harsh ones.
Best Outdoor Applications for Quartzite
Quartzite performs beautifully in:
-
Outdoor kitchen countertops
-
BBQ island surfaces
-
Patio bars & serving stations
-
Fireplace surrounds
-
Poolside tables & benches
-
Accent walls & cladding
-
Outdoor dining areas
Its natural beauty fits perfectly with outdoor living trends like modern rustic, coastal, and luxury resort-style spaces.
Are All Quartzites Suitable Outside?
Most — but not all.
Quartzites vary in density and mineral makeup. Slabs with higher calcite content or softer structure may absorb more water or weather faster outdoors.
Always confirm with your fabricator:
✔ True quartzite (not mislabeled dolomite)
✔ Good density + strong structure
✔ Sealers rated for exterior use
This ensures long-term performance.
Important Care Tips for Outdoor Quartzite
Quartzite is low-maintenance, but outdoor exposure changes things slightly.
Do:
-
Seal annually (or as needed based on climate)
-
Clean with pH-neutral cleaner
-
Cover countertops when not in use
-
Brush away debris to prevent scratches
Avoid:
-
Harsh acidic cleaners
-
Dragging metal appliances
-
Ignoring chips or cracks
These habits protect both beauty and integrity.
Potential Considerations
| Factor | What to Know |
|---|---|
| Freeze–thaw climates | Proper sealing & installation important |
| Sun-soaked areas | Choose lighter colors to prevent surface heating |
| Beach areas | Rinse salt regularly to maintain finish |
| Outdoor grills | Use heat-protective pads under appliances |
Nothing here is a dealbreaker — just small precautions for maximum lifespan.
Final Verdict – Can Quartzite Be Used Outside?
Quartzite is one of the top natural stone choices for outdoor use thanks to its:
✨ Weather durability
💪 High strength
🔥 Heat resistance
🌞 UV stability
🧽 Easy maintenance
🏡 Premium appearance
If you’re building an outdoor kitchen or designing a high-end patio, quartzite offers luxury beauty that lasts — no matter the climate.

Best Quartzite Countertop Colors for Modern Kitchens
Modern kitchens are all about clean lines, natural textures, and timeless beauty — which is exactly why quartzite has become one of the most popular countertop materials in contemporary design. Its elegant veining, durability, and unique natural variations make it an ideal centerpiece for sleek and stylish spaces.
If you’re searching for the perfect quartzite to complete your modern kitchen, here are some top color options that deliver sophistication, contrast, and long-lasting appeal.
1️⃣ White Macaubas Quartzite
A true modern classic.
Style Benefits:
-
Subtle linear veining for a clean aesthetic
-
Works beautifully with both warm and cool cabinetry
-
Adds brightness without starkness
Best Pairings:
-
Black fixtures
-
Light wood cabinets
-
Matte finishes
2️⃣ Taj Mahal Quartzite
Warm and luxurious — but still totally contemporary.
Why It Works:
-
Creamy beige tones with soft veining
-
A more inviting alternative to pure white stone
-
Perfect for modern organic design styles
Pairs Well With:
-
Light oak cabinetry
-
Brushed gold hardware
-
Matte white appliances
3️⃣ Perla Venata Quartzite
Soft, elegant, and versatile — ideal for open floorplans.
Modern Advantages:
-
Neutral warmth with subtle movement
-
Matches modern Scandinavian and transitional styles
-
Creates a seamless, upscale look
Top Cabinet Matches:
-
White, light wood, or warm gray finishes
4️⃣ Cristallo Quartzite
A standout showpiece for bold modern kitchens.
Why Designers Love It:
-
Translucent qualities (backlighting is possible!)
-
Crystalline details feel luxurious and artistic
-
Makes an island instantly iconic
Best For:
-
Statement islands
-
Under-cabinet lighting drama
5️⃣ Mont Blanc Quartzite
Minimal, bright, and effortlessly chic.
What Makes It Modern:
-
Crisp white background
-
Fine gray veining similar to marble — but way more durable
-
Maintains a polished look over time
Perfect In:
-
Ultra-modern monochrome kitchens
-
Spaces with stainless appliances
6️⃣ Sea Pearl Quartzite
Cool and calming — ideal for coastal modern designs.
Key Benefits:
-
Soft greens and grays mimic ocean tones
-
Adds visual interest without overwhelming the room
-
Pairs great with matte fixtures and natural textures
Cabinet Pairings:
-
White, navy blue, or driftwood tones
7️⃣ Avohai Quartzite
Understated, modern elegance.
What Makes It Stand Out:
-
Gentle gray background with smooth movement
-
Coordinates seamlessly with mixed-material designs
-
Great for homeowners who want a neutral but unique slab
Tips for Choosing Quartzite in a Modern Kitchen –
Best Quartzite Countertop Colors for Modern Kitchens
| Designer Tip | Why It Matters |
|---|---|
| Aim for lighter tones | Enhances the clean, spacious feeling |
| Choose polished or honed finishes | Matches modern minimalism |
| Look for linear or flowing veining | Keeps the look cohesive and sleek |
| Consider bookmatching for feature walls | Adds architectural drama |
| Combine with matte black or brushed gold | Ultimate modern look |
Lighting can dramatically change how quartzite appears — always view slabs under natural light before finalizing your pick.
Final Takeaway – Best Quartzite Countertop Colors for Modern Kitchens
The best quartzite colors for modern kitchens strike the perfect balance between:
✨ Minimalist beauty
💪 Durability and performance
🌿 Natural stone character
🏡 Long-lasting style
Whether you prefer crisp whites, warm neutrals, or subtle greens, there’s a quartzite that will elevate your kitchen into a luxurious and timeless space.
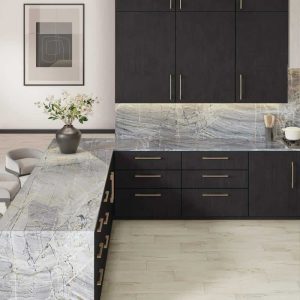
Pairing Quartzite With Wood Cabinets Best Color Combos
Quartzite countertops bring the perfect balance of natural beauty and durability to kitchens. When paired with the right wood cabinet tones, quartzite can transform a space from simple to show-stopping. But with so many wood stains and quartzite patterns to choose from, selecting the right combination can feel overwhelming.
This guide breaks down the best quartzite + wood cabinet color pairings — whether you want a clean, modern look or a warm, inviting kitchen designed for everyday living.
1️⃣ White or Cream Quartzite + Light Oak Cabinets – Pairing Quartzite With Wood Cabinets Best Color Combos
Perfect for: Scandinavian, coastal, and modern organic styles
Light wood + soft neutral stone = bright, airy elegance.
💡 Great matches:
-
Taj Mahal Quartzite
-
Perla Venata Quartzite
-
Mont Blanc Quartzite
Why it works:
Warm veining in cream quartzites ties beautifully into the natural warmth of oak.
2️⃣ Bold Veined Quartzite + Natural Walnut Cabinets
Perfect for: Modern luxe and dramatic transitional kitchens
Walnut adds depth and richness — the ideal contrast for expressive slabs.
Stunning slab options:
-
Cristallo Quartzite
-
Patagonia Quartzite
-
Quartzite with bold white or gold veining
Why it works:
Walnut’s chocolate undertones make dramatic stone patterns feel sophisticated, not overwhelming.
3️⃣ Soft Grey Quartzite + Cool-Toned Wood Cabinets
Perfect for: Sleek contemporary homes
This combo brings a clean, polished look with subtle color harmony.
Pair with:
-
Avohai Quartzite
-
White Macaubas Quartzite
-
Grey-veined Brazilian quartzites
Wood tones like ash or grey-washed oak keep the palette calm and modern.
4️⃣ Green Quartzite + Natural Maple or Honey Cabinets
Perfect for: Biophilic, coastal, and rustic-modern designs
Green quartzites bring nature inside — and warm wood tones enhance the organic feel.
Try pairing:
-
Amazon Green Quartzite
-
Sea Pearl Quartzite
-
Emerald Mist Quartzite
A little greenery and brass hardware complete the look.
5️⃣ White Quartzite + Dark Espresso Cabinets
Perfect for: Classic elegance with maximum contrast
Dark cabinets make bright quartzite shine as the centerpiece.
Top pairings:
-
Super White Quartzite
-
Cristallo Light Quartzite
-
Arctic White quartzites
This combo feels luxurious — especially with polished finishes and sleek edge profiles.
6️⃣ Beige or Gold Quartzite + Cherry or Mahogany Cabinets
Perfect for: Traditional and timeless kitchens
Warm tones complement each other beautifully and add rich character.
Try:
-
Naica Extra Quartzite
-
Golden Macaubas Quartzite
-
Bianco Superiore Quartzite
Ideal for homeowners who want a classic look with natural warmth.
Design Tips for a Perfect Match
| Factor | What to Consider |
|---|---|
| Veining direction | Line up with cabinet layout for a cohesive look |
| Finish | Honed/leathered blends well with rustic wood; polished suits modern styles |
| Lighting | Warm lighting enhances wood tones and brings out stone veining |
| Hardware | Bronze → warm tones · Chrome/Nickel → cool tones |
| Backsplash | Use quartzite for a seamless look or tile for added texture |
Bring a cabinet door sample to the slab yard — natural materials vary and must be seen together.
Final Takeaway – Pairing Quartzite With Wood Cabinets Best Color Combos
The best quartzite + wood cabinet pairings balance:
-
Contrast
-
Texture
-
Color temperature
-
Natural beauty
Whether you prefer striking drama or soft organic warmth, there’s a quartzite + wood match that will transform your kitchen into a timeless showpiece.

Quartzite vs. Marble
Quartzite and marble are two of the most luxurious natural stones used in home design. They both offer stunning beauty and unique character — but they perform very differently in real-world use. So which one is right for your home?
This side-by-side guide breaks down the major differences in appearance, durability, maintenance, cost, and overall performance to help you make a confident decision.
Quick Overview: Quartzite vs. Marble
| Feature | Quartzite | Marble |
|---|---|---|
| Appearance | Similar to marble but more varied | Classic, timeless veining |
| Hardness (Mohs Scale) | 7–8 (very hard) | 3–5 (soft) |
| Scratch Resistance | ⭐⭐⭐⭐⭐ | ⭐⭐ |
| Etch Resistance | ⭐⭐⭐⭐ | ⭐ |
| Heat Resistance | ⭐⭐⭐⭐⭐ | ⭐⭐⭐⭐⭐ |
| Stain Resistance | ⭐⭐⭐⭐ | ⭐⭐ |
| Maintenance | Low | High |
| Cost | Medium–High | Medium–High |
📌 Bottom line: If you want marble-like beauty without the maintenance, quartzite is the stronger choice.
Appearance: Style & Movement
Both materials are visually stunning — but their patterns are different.
Quartzite
-
Often resembles marble with soft, flowing veining
-
Larger variety of colors (neutrals, greens, blues, golds, dramatic patterns)
-
Each slab is completely unique
Marble
-
Famous for its elegant classic veining
-
Softer, more subtle movement
-
Long associated with luxury design
If pure, traditional elegance is your goal — marble shines.
If you want options with similar beauty — quartzite wins.
Durability: Day-to-Day Performance
This is where quartzite really stands out.
Quartzite
✔ Very hard — resists scratches
✔ Tough enough for busy kitchens
✔ Withstands impact and heavy use
Marble
✘ Scratches easily
✘ Shows wear faster in active homes
✘ Better suited for low-traffic areas
Marble ages beautifully — but it will show its history.
Etching & Staining
Etching (dull, chalky marks from acids) is one of the biggest concerns for stone buyers.
Quartzite
-
Highly resistant to etching
-
Resistant to stains when sealed properly
Marble
-
Acidic foods (lemon juice, tomato, wine) can etch instantly
-
More prone to stains and dark spots
If you love to cook — choose quartzite.
Maintenance Differences
Quartzite
-
Mild soap & water or pH-neutral stone cleaner
-
Seal annually (or as recommended)
-
Easy everyday upkeep
Marble
-
Seal more frequently
-
Special cleaners recommended
-
Requires immediate spill cleanup
-
Regular professional polishing may be needed
If you want luxury without the upkeep — quartzite is the smarter pick.
Heat Resistance
Both perform well with heat, but quartzite is more forgiving.
-
Marble can discolor or crack if exposed to sudden extreme heat
-
Quartzite is more heat-tolerant thanks to its formation process
Still—trivets are always recommended for both.
Cost Comparison
Prices largely depend on color rarity and origin.
Quartzite typically ranges $70–$200+ per sq ft installed
Marble typically ranges $60–$180+ per sq ft installed
They overlap in price — so the best choice comes down to lifestyle and durability needs rather than budget.
Which Should You Choose?
Choose Quartzite if you want:
-
Marble-like beauty + superior durability
-
A kid-friendly, cooking-friendly kitchen
-
Long-term performance with fewer worries
Choose Marble if you want:
-
Classic, timeless elegance above all else
-
A softer surface that develops character over time
-
Countertops in low-impact spaces
Final Verdict – Quartzite vs. Marble
For most modern homes — especially active households — quartzite is the better long-term investment.
It delivers:
✨ Luxury appearance
💪 Strong durability
🧽 Easy care
🔥 Excellent performance in busy kitchens
Marble still holds its place in design, but quartzite offers the perfect blend of beauty + practicality.

Is Quartzite a Good Investment for Your Home?
When upgrading your kitchen or bathroom, the countertop you choose can impact both your daily living experience and your home’s future value. Quartzite has quickly become a top choice in high-end residential design — but is it really a good investment?
In most cases, yes. Quartzite offers long-term durability, premium aesthetics, and exceptional performance that benefits homeowners for years. Here’s why it stands out as a smart investment.
1️⃣ Quartzite Adds High-End Luxury Appeal
Quartzite delivers the elegant, natural look that homeowners love — especially those drawn to the beauty of marble. With dramatic veining, striking colors, and one-of-a-kind patterns, quartzite instantly elevates a space from ordinary to luxury.
This kind of visual impact can increase:
-
Buyer interest
-
Perceived home value
-
Stronger offers when selling
Homes with premium natural stone surfaces frequently sell faster and for more.
2️⃣ Long-Term Durability Protects Your Investment
Quartzite ranks 7–8 on the Mohs hardness scale — making it harder than granite and extremely scratch-resistant.
That means:
-
No worrying about knives scraping the surface
-
Less visible wear over time
-
A polished look that lasts for decades
Fewer repairs + long lifespan = excellent return on investment.
3️⃣ Naturally Heat Resistant
Quartzite forms under intense heat and pressure deep in the earth — so it’s built to handle heat from:
-
Hot pans
-
Coffee makers
-
Cooking appliances
-
Outdoor kitchens (depending on climate)
Unlike engineered quartz, quartzite won’t scorch or melt when exposed to heat.
4️⃣ Stain and Etch Resistance Keeps It Looking Beautiful
When properly sealed, quartzite is highly resistant to:
-
Juice
-
Wine
-
Grease
-
Coffee
-
Everyday spills
Even busy families can enjoy luxury stone without constant maintenance.
5️⃣ Low Maintenance = Lower Long-Term Costs
No special routines required — just:
-
Mild dish soap or stone cleaner
-
Soft cloth
-
Sealing once a year (or as recommended)
Homeowners love quartzite because it stays looking premium with minimal effort.
6️⃣ Great for Both Kitchens and Bathrooms
Quartzite isn’t limited to countertops. It adds value wherever it’s used:
| Great Application Areas | Why It Works |
|---|---|
| Kitchen counters & islands | Strength + heat resistance |
| Bathroom vanities | Water & stain resistance |
| Shower walls | Spa-like luxury |
| Fireplace surrounds | High-heat performance |
| Outdoor kitchens | Weather-resistant (varies by slab type) |
The more spaces you upgrade, the bigger the return.
7️⃣ A Natural, Eco-Friendly Choice
Unlike engineered materials, quartzite is:
-
100% natural
-
Contains no plastics or resins
-
A long-lasting product that won’t need replacement anytime soon
Eco-conscious buyers appreciate sustainable building materials — another selling advantage.
So… Is Quartzite a Good Investment for Your Home?
✔ Adds instant luxury appeal
✔ Increases long-term resale value
✔ Durable enough for decades of use
✔ Kid-friendly and busy-kitchen approved
✔ Delivers beauty and function in one material
Quartzite gives homeowners the best of both worlds: show-stopping design and real-world performance.
If you’re investing in your home — especially a kitchen remodel — quartzite is a smart upgrade that pays off now and later.
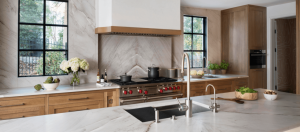
Is Quartzite Harder Than Granite?
When homeowners begin exploring natural stone countertops, granite and quartzite are often the top contenders. Both are beautiful, long-lasting, and full of unique natural variation. But there’s one key question that comes up again and again:
Is quartzite harder than granite?
In most cases — yes. And understanding why can help you choose the right stone for your home.
How Hardness Is Measured
Stone hardness is typically rated using the Mohs hardness scale, which ranks scratch resistance from 1 (softest) to 10 (hardest).
Here’s where these countertop materials fall:
| Material | Mohs Hardness | What That Means |
|---|---|---|
| Quartzite | 7–8 | Resists scratches from household items and even most metals |
| Granite | 6–7 | Still hard, but slightly more susceptible to scratching |
Just one point difference on the Mohs scale may sound small — but it’s a significant jump in real-world durability.
Why Quartzite Is Typically Harder
Quartzite starts as quartz-rich sandstone buried deep underground. Over millions of years, intense heat and pressure fuse those quartz grains into a dense, solid mass — transforming the stone into what we know as quartzite.
Granite is also strong, but it’s composed of:
-
Quartz
-
Feldspar
-
Mica
Those different minerals create beauty but also form soft spots, making granite’s hardness slightly less consistent.
What This Means in Your Home
Scratch Resistance
Quartzite stands up better to:
-
Kitchen knives
-
Pots and pans
-
Kids doing crafts on the counter
-
Everyday wear
(Though we still recommend cutting boards — mostly to protect your knives!)
Surface Longevity
A harder surface means:
-
Less visible wear over time
-
Fewer micro-scratches that dull the finish
-
A better long-term investment
Ease of Cleaning
Smoother, harder surfaces accumulate less residue and become easier to maintain.
Are There Exceptions?
Yes — names can be misleading.
Some stones sold as “quartzite” may actually be:
-
Dolomite
-
Soft quartzite
-
Marble-like stones
A quick scratch test can help verify authenticity:
-
If the stone scratches glass → true quartzite
-
If glass scratches the stone → softer stone
Your fabricator can test this before fabrication.
Is Harder Always Better?
Hardness is important — but it’s not the only consideration.
Here’s a simplified comparison:
| Category | Quartzite | Granite |
|---|---|---|
| Hardness | ⭐⭐⭐⭐⭐ | ⭐⭐⭐⭐ |
| Heat Resistance | ⭐⭐⭐⭐⭐ | ⭐⭐⭐⭐ |
| Maintenance | Low | Low–Medium |
| Appearance | Marble-like elegance | Speckled / more traditional |
| Cost | Medium–High | Medium |
Bottom line:
If you want maximum durability with luxury aesthetics, quartzite is a top contender.
Final Verdict – Is Quartzite Harder Than Granite?
So, is quartzite harder than granite?
✔ In most cases — yes.
✔ It offers stronger scratch resistance and higher durability.
✔ It’s one of the best choices for active kitchens and long-term value.
But both stones are excellent countertop materials. Your final choice should also consider the look, finish, and feel that best fits your home.
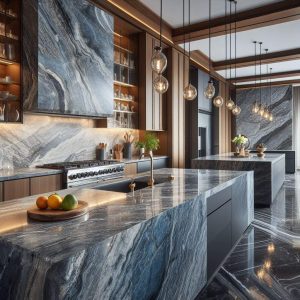
Why Your Quartzite Looks Cloudy and How to Fix It
Quartzite is known for its natural shine and luxurious appearance. So if your countertops suddenly look cloudy, dull, or hazy, it can be frustrating and confusing. The good news? Most cloudy quartzite issues are fixable—and often easy to prevent in the future.
This guide explains what causes cloudiness on quartzite and how to restore the stone back to its original beauty.
Common Causes of Cloudy Quartzite
Several different issues can make quartzite lose its shine. Identifying the cause is the first step toward fixing it.
1. Etching from Acidic Cleaners or Foods
Quartzite is more resistant to etching than marble—but not fully immune.
Acids can weaken the surface finish and create dull, cloudy areas.
Common culprits:
-
Vinegar or lemon cleaners
-
Citrus spills
-
Tomato sauce
-
Wine
-
Coffee
-
Harsh bathroom or lime-scale cleaners
If the surface feels smooth but looks cloudy → likely etching.
2. Hard Water Mineral Build-Up
This happens most often:
-
Around sinks
-
On bathroom vanities
-
Near faucets or dish drying areas
Minerals left behind from water can form a dull film over time.
3. Soap Film and Residue
Using regular dish soap daily can leave a sticky film that traps dirt and makes the surface appear hazy.
Over time, the shine disappears and the stone looks smudged no matter how much you clean it.
4. Sealer Issues (Too Much or Worn Away)
Quartzite should be sealed—but not excessively.
Problems include:
-
Hazy appearance from over-sealing
-
Water spots from under-sealing
-
Uneven finish after improper application
If water no longer beads, your stone likely needs sealing.
5. Installer or Fabricator Overspray
Sometimes the cloudiness appears right after new installation.
This could be:
-
Residual glue or epoxy
-
Grinding or polishing dust left on the surface
-
Inconsistent polishing during fabrication
These issues typically require professional correction.
How to Fix Cloudy Quartzite (Based on the Cause)
Here are safe, stone-approved solutions for each problem:
Fix A: Etching (Dull Spots)
Use a professional polishing compound designed for natural stone.
-
Apply with a microfiber cloth
-
Gently buff in circular motion
-
Repeat if needed
-
Reseal afterward for protection
Severe etching may require a stone restoration pro.
Fix B: Hard Water Deposits
Use a stone-safe calcium & mineral remover, or:
DIY option:
-
Mix water + a few drops of dish soap
-
Scrub gently with non-scratch sponge
-
Rinse and dry thoroughly
Never use vinegar—it will etch the stone further.
Fix C: Soap Film
Switch to a pH-neutral stone cleaner and:
-
Spray generously
-
Allow a few minutes to break down residue
-
Wipe with a clean microfiber cloth
Weekly deep cleans help prevent buildup from returning.
Fix D: Sealer Issues
If over-sealed → remove the excess:
-
Use a stone-safe sealer remover
-
Wipe in small sections
-
Reapply a fresh coat properly if needed
If under-sealed:
-
Apply a high-quality penetrating sealer
-
Let it cure fully before kitchen use
Fix E: Post-Fabrication Haze
This is best handled by a professional:
-
Re-polishing
-
Surface honing
-
Seal and buff finish
Worth it for brand-new counters that should look flawless.
How to Prevent Cloudiness Going Forward
Follow these simple habits:
✔ Use a pH-neutral stone cleaner daily
✔ Dry areas where water sits (around sinks)
✔ Reseal annually—or as needed
✔ Use cutting boards to avoid fine scratches
✔ Avoid these completely:
-
Vinegar
-
Bleach
-
Magic Erasers
-
Bathroom cleaners
-
Citrus-based sprays
Quartzite doesn’t require high maintenance—just the right maintenance.
Final Takeaway – Why Your Quartzite Looks Cloudy and How to Fix It
Cloudy quartzite isn’t a permanent problem. Once you pinpoint the cause, you can restore your countertops to a crystal-clean shine.
Quick diagnosis:
| Appearance | Likely Cause |
|---|---|
| Smooth but dull spots | Etching |
| White crust near sink | Hard water |
| General haze everywhere | Soap film |
| Uneven gloss or streaks | Sealer issues |
With proper care, quartzite will continue to look luxurious and high-end for years to come.
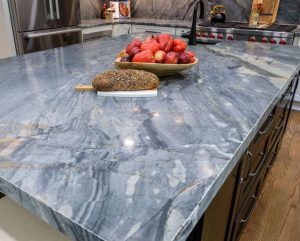
How to Remove Stains from Quartzite Without Damaging It
Quartzite is known for its durability and stain resistance—especially when properly sealed. But like any natural stone, accidents happen. If you notice a stain or discoloration on your quartzite countertops, the key is knowing how to clean it safely without damaging the surface.
This simple homeowner guide explains which cleaning methods work best for different types of stains and how to prevent them from happening again.
Step 1: Identify the Type of Stain
Not all stains are the same. Knowing the cause will help you choose the right cleaning method.
Common quartzite stains include:
-
Oil stains (cooking oils, lotion, butter)
-
Food stains (coffee, wine, juice, tomato sauce)
-
Hard water and mineral deposits
-
Organic stains (fruit, tea leaves)
-
Metal stains (rust from cans or cast iron)
Once you know what you’re dealing with, you can remove it safely.
Step 2: Start With Gentle Cleaning
Before jumping to stain removal techniques, try simple cleaning first.
Basic cleaning routine:
-
Warm water
-
pH-neutral stone cleaner or mild dish soap
-
Soft microfiber cloth or sponge
Avoid scrubbing with anything abrasive.
Sometimes this is enough—especially for fresh spills.
How to Remove Specific Types of Stains
Oil-Based Stains
Oil can soak into pores if the stone isn’t sealed.
Solution: A Poultice
Use a baking soda + water paste:
-
Spread thick over the stain
-
Cover with plastic wrap
-
Leave 12–24 hours
-
Wipe clean and rinse
Oil stains may take 2–3 applications depending on severity.
Wine, Coffee & Other Food Stains
Acidic foods can discolor unsealed areas.
Solution: Hydrogen Peroxide Poultice
Just like the oil method:
-
Hydrogen peroxide + baking soda
-
Apply and let sit overnight
-
Wipe clean and rinse thoroughly
Avoid vinegar or lemon—acids can dull the finish.
Hard Water / Mineral Spots
Often left behind by standing water.
Solution: pH-Neutral Stone Cleaner or Specialized Lime Remover
-
Spray approved stone-safe cleaner
-
Let sit briefly
-
Wipe with a soft cloth
-
Rinse well
Never use bathroom lime removers unless they are labeled safe for natural stone.
Organic Stains (Tea, Fruit, Leaves)
Can cause brownish or dark marks.
Solution: Hydrogen Peroxide
Dab a small amount on the stain:
-
Allow to sit a few minutes
-
Rinse well
-
Repeat if necessary
Rust or Metal Stains
Rust appears as orange or brown spots.
Solution: Stone-Safe Rust Remover
Only use rust removers made specifically for natural stone surfaces.
Do not use bleach or household rust removers—they can etch the finish.
Avoid These Cleaning Mistakes
To keep quartzite looking flawless, avoid:
-
Vinegar or acidic cleaners
-
Lemon or citrus cleaners
-
Abrasive scrub pads
-
Magic Erasers (they dull the finish)
-
Harsh chemicals not labeled stone-safe
-
Leaving oils or liquids sitting overnight
Quartzite is tough—but the wrong cleaner can still damage it.
Preventing Future Stains
The best way to keep quartzite stain-free is simple:
✔ Seal the stone regularly (usually once per year)
✔ Clean spills as soon as they happen
✔ Use coasters, cutting boards & trivets
✔ Use a pH-neutral daily cleaner
✔ Keep the surface dry around sinks and faucets
Proper sealing fills natural pores, keeping stains from soaking in.
When to Call a Professional
If a stain:
-
Has been there for several months
-
Won’t lift after multiple poultice applications
-
Is accompanied by etching or dull spots
A stone restoration expert can deep-clean, polish, and reseal the surface.
Final Tips – How to Remove Stains from Quartzite Without Damaging It
Removing stains from quartzite is usually simple—just match the cleaning method to the type of stain and avoid harsh chemicals.
With quick cleanup and proper sealing, quartzite stays:
-
Beautiful
-
Durable
-
Easy to maintain
-
Resistant to everyday messes
Caring for quartzite the right way ensures it continues to look like the premium natural stone it is.
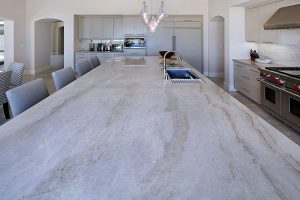
Why Quartzite Is Becoming the #1 Choice
Quartzite has exploded in popularity over the last few years—and it’s quickly becoming the #1 choice for homeowners, designers, and builders who want a high-end surface that blends beauty with durability. If you’ve been exploring countertops or stone slabs, you’ve probably noticed quartzite showing up everywhere.
Here’s why.
1. It Looks Like Marble—But Performs Like a Powerhouse
One of the biggest reasons for quartzite’s popularity is its appearance. Many quartzites have soft, flowing veining and light tones similar to marble.
But unlike marble, quartzite is:
-
Harder
-
More resistant to etching
-
Better against scratches
-
Less prone to damage from acidic foods
You get marble-like elegance without marble’s maintenance headaches.
2. Exceptional Durability for Busy Homes
Quartzite isn’t just durable—it’s one of the toughest natural countertop materials available.
On the Mohs hardness scale:
-
Quartzite ranks 7–8
-
Granite ranks 6–7
-
Marble ranks 3–5
This hardness makes quartzite:
-
Highly scratch-resistant
-
Great for high-traffic kitchens
-
Long-lasting even in active households
-
Resistant to everyday wear and tear
It’s a countertop you don’t have to baby.
3. Naturally Heat-Resistant
Quartzite forms under intense heat and pressure deep within the earth. Because of this, it naturally handles heat better than many other surfaces.
While you should still use trivets for long-term protection, quartzite can tolerate:
-
Warm pots
-
Hot coffee makers
-
Cookware placed briefly on the surface
This makes it ideal for serious cooks and busy families.
4. Unique, One-of-a-Kind Beauty
No two quartzite slabs are the same. Each piece has its own:
-
Colors
-
Veining
-
Natural patterns
-
Mineral variations
Whether you prefer soft neutrals like Taj Mahal, dramatic designs like Patagonia, or vibrant greens like Amazon Green, there’s a quartzite style for every taste.
Quartzite adds character and individuality that engineered surfaces simply can’t replicate.
5. Low Maintenance Compared to Other Natural Stones
Many homeowners love quartzite because it delivers beauty without complicated upkeep.
Maintenance is simple:
-
Clean with mild soap or a stone-safe cleaner
-
Seal once a year (or as recommended)
-
Avoid harsh chemicals like vinegar
Once sealed properly, quartzite becomes highly resistant to staining and easy to keep clean.
6. Works With Almost Any Interior Design Style
Quartzite is versatile. It pairs well with:
-
Modern kitchens
-
Farmhouse style
-
Minimalist spaces
-
Luxury bathrooms
-
Outdoor kitchens (depending on the type)
-
High-end commercial spaces
Whether you’re going for soft and subtle or bold and dramatic, quartzite fits.
7. A Long-Term Investment in Your Home
While quartzite is sometimes pricier than granite or quartz, it offers long-term value because of its:
-
Durability
-
Timeless beauty
-
Resistance to damage
-
High-end aesthetic
Homeowners see it as a smart investment—not a temporary trend.
8. Eco-Friendly and 100% Natural
Quartzite is a fully natural stone that doesn’t contain resins, plastics, or chemical binders like some engineered slabs. For homeowners seeking natural, sustainable materials, quartzite is a strong choice.
Is Quartzite Right for You? – Why Quartzite Is Becoming the #1 Choice
Quartzite is becoming the top choice because it offers the best of all worlds:
-
Luxury appearance
-
Serious durability
-
Heat resistance
-
Unique natural patterns
-
Easy maintenance
-
Long-lasting performance
It’s ideal for kitchens, bathrooms, bars, islands, outdoor spaces, and anywhere you want a surface that looks beautiful and holds up over time.
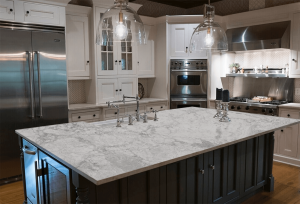
What Is Quartzite? A Simple Guide for Homeowners
What Is Quartzite?
Quartzite is a 100% natural stone formed when sandstone is exposed to extreme heat and pressure deep within the earth. This process—called metamorphism—transforms the stone into an incredibly hard, dense, and durable material.
In simple terms:
Quartzite starts as sandstone and becomes a tougher, more beautiful stone over millions of years.
How Quartzite Is Formed
Here’s the quick version:
-
Sandstone rich in natural quartz is buried deep underground.
-
Heat and pressure fuse the grains together.
-
The stone becomes harder, denser, and more crystalline.
-
The result is quartzite—a high-end, strong, and visually stunning slab.
This unique geologic process creates the dramatic veins, movement, and patterns that quartzite is famous for.
Why Homeowners Love Quartzite
1. It Looks Like Marble But Performs Better
Also many quartzite slabs have soft, flowing veining similar to marble—but without marble’s softness or risk of etching.
2. Incredibly Strong and Scratch-Resistant
Quartzite ranks 7 on the Mohs hardness scale, meaning it’s harder than granite and extremely resistant to everyday wear.
3. Naturally Heat-Resistant
Because quartzite forms under heat and pressure, it handles warm pots and pans better than many other countertop materials.
4. Unique and Natural Patterns
Every slab is one-of-a-kind. No two pieces look the same, giving kitchens and bathrooms a custom, luxury feel.
Common Colors and Styles of Quartzite
Quartzite comes in a surprisingly wide range of colors, including:
-
Beige and cream tones (Taj Mahal, Perla Venata)
-
Bright whites (Cristallo, White Macaubas)
-
Soft grays (Le Blanc, Avohai)
-
Greens and blues (Amazon Green, Emerald Mist, Sea Pearl)
-
Dramatic mixed tones with bold veining (Patagonia, Abstrato)
Whether you prefer something calm or something bold, there’s a quartzite style that fits.
Is Quartzite Easy to Maintain?
Yes—especially compared to marble.
Maintenance Basics:
-
Clean with mild soap and water.
-
Use a stone-safe daily cleaner when possible.
-
Seal once a year (or as recommended based on the slab).
-
Avoid strong acids like vinegar or harsh chemicals.
When sealed properly, quartzite is highly resistant to staining and easy to keep looking new.
Where Quartzite Works Best
Quartzite is also perfect for:
-
Kitchen countertops
-
Bathroom vanities
-
Shower walls
-
Fireplace surrounds
-
Outdoor kitchens (depending on slab type)
-
Accent walls or islands
Thanks to its durability, quartzite works in both busy homes and luxury spaces.
Quartzite vs. Other Stone Options
Quartzite vs. Marble
Quartzite is harder, more durable, and far more resistant to etching.
Quartzite vs. Quartz (Engineered)
Quartzite is natural and heat-resistant, while quartz is man-made and not suited for high heat.
Quartzite vs. Granite
Both are strong, but quartzite often has a more elegant, marble-like appearance.
Is Quartzite Right for You? –
Choose quartzite if you want:
-
A natural stone with luxury aesthetics
-
Better durability than marble
-
A heat-resistant countertop
-
A one-of-a-kind slab with unique veining
-
Long-lasting performance with simple maintenance
It’s a great option for homeowners who want beauty and strength without constant upkeep.
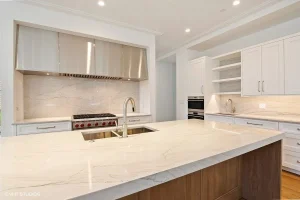
Can you put a crockpot on quartzite?
Quartzite is one of the most durable natural stone countertop materials available, especially when compared to marble, granite, or quartz. Because of that, many homeowners wonder whether it’s safe to place a hot crockpot directly on quartzite during cooking. The short answer: yes, but with caution.
Below is everything you need to know.
Quartzite Is Heat-Resistant — But Not Heat-Proof
Quartzite forms under intense heat and pressure deep within the earth. That natural process makes it far more resistant to heat than resin-based materials like quartz. In most everyday scenarios, quartzite can handle hot pots, pans, and warm appliances without immediate damage.
However, long, continuous heat from a crockpot is different from momentary contact with a hot pan. Crockpots sit in one place for hours and generate a steady stream of heat that can:
-
Slowly warm the surface beneath the feet of the appliance
-
Cause minor thermal expansion under extreme or repeated use
-
Increase the risk of discoloration or dull spots in certain sealers
So while quartzite itself is tough, it’s better not to test its limits unnecessarily.
Can a Crockpot Damage Quartzite?
Damage is uncommon, but it can happen depending on:
-
The quality of the sealer
-
The temperature of the crockpot’s base
-
Whether the appliance traps heat beneath it
-
How often you place hot appliances on the same spot
Possible issues include:
-
Light etching or hazy spots on poorly sealed surfaces
-
Minor cracks or stress lines on extremely thin sections
-
Discoloration around the appliance footprint
-
Wear to the sealant over time
These issues are rare, but they’re not impossible.
Best Practice: Use a Trivet or Heat Pad
To protect your countertop long term, the safest move is simple:
Always place a trivet, heat pad, or silicone mat under your crockpot.
This prevents:
-
Direct heat transfer
-
Moisture damage from steam
-
Vibrations or scratching from the appliance’s feet
-
Premature wear on your sealer
Quartzite lasts decades, and protecting it from unnecessary heat helps maintain its shine and durability.
Is Occasional Direct Use Okay?
If you accidentally place a crockpot directly on the quartzite once or twice, it’s unlikely to cause catastrophic damage. Quartzite is tough enough to handle occasional heat exposure.
Just avoid making it a daily habit.
Final Answer – Can you put a crockpot on quartzite
You can put a crockpot on quartzite, but you shouldn’t do it directly. Use a trivet, heat pad, or silicone mat to protect the natural stone from long-term heat exposure and potential sealer wear.
This simple step keeps your quartzite beautiful, strong, and damage-free for years.

Can quartzite be permanently sealed?
Quartzite is one of the most durable and low-maintenance natural stones available, but many homeowners still wonder if it can be permanently sealed. With all the talk about yearly resealing and stone care, it’s understandable why people want a one-and-done solution.
The short answer: No, quartzite cannot be permanently sealed—but it also doesn’t need permanent sealing to stay protected. Here’s why.
Why Quartzite Can’t Be Permanently Sealed
All natural stone sealers—no matter how advanced—are topical or penetrating coatings that gradually break down with use. Daily cleaning, wiping, cooking, UV exposure, and natural wear slowly degrade the sealant over time.
Even the best professional products don’t last forever. Typical reasons include:
-
Natural porosity: Quartzite is dense, but still porous enough that sealers must soak in.
-
Chemical exposure: Cleaners, acids, and soaps weaken sealants.
-
Daily wear: Scrubbing, spills, and general use slowly reduce hydrophobic protection.
-
Heat & UV: High heat or sunlight can shorten the life of any sealant.
Because of this, a truly “permanent” seal doesn’t exist for natural stone.
But Here’s the Good News
Quartzite already has exceptional durability, even without a heavy sealing schedule. It’s more resistant to etching and staining than marble, and many slabs only need sealing every 1–2 years—sometimes even less depending on color and finish.
How Long Does Quartzite Sealer Last?
Most high-quality penetrating sealers last:
-
12–24 months in normal kitchens
-
6–12 months on high-use islands
-
Up to 3+ years on low-traffic bathroom vanities
Premium sealers (like fluorocarbon-based options) can extend this even longer.
How to Tell When Quartzite Needs Resealing
Do a simple water test:
-
Drop a small amount of water on the surface.
-
Wait 10–20 minutes.
-
If the water darkens the stone, it’s time to reseal.
-
If it beads on top, the protection is still strong.
This works on polished, honed, and leathered quartzite.
Can “Anti-Etch” Coatings Make It Permanent?
You might see products marketed as “permanent sealants,” “lifetime coatings,” or “ceramic/UV coatings.” While they can add extra protection, they:
-
Cost far more than standard sealing
-
Change the feel or sheen of the stone
-
Still degrade over time
-
Are not actually permanent
These coatings can help, but they don’t eliminate resealing forever.
How to Maximize Quartzite Protection Without Over-Sealing
Quartzite stays beautiful with simple, consistent care:
-
Use a pH-neutral daily cleaner
-
Wipe up spills quickly
-
Use coasters for oil-based products
-
Avoid acidic or abrasive cleaners
-
Reseal only when water stops beading
This keeps your countertops protected long-term without unnecessary maintenance.
Final Answer – Can quartzite be permanently sealed?
Quartzite cannot be permanently sealed, but it also doesn’t require heavy upkeep. With a good penetrating sealer and routine care, quartzite stays gorgeous and protected for many years—and far outperforms many other natural stones.

What is the best daily cleaner for quartzite?
Quartzite is one of the most durable and beautiful natural stones you can put in a kitchen or bathroom—but it still needs the right daily cleaner to stay looking its best. Because it’s a natural stone, the products you use can either protect the seal or slowly damage it over time. Choosing the right daily cleaner is the easiest way to keep quartzite clean, streak-free, and long-lasting.
Why Quartzite Needs a Proper Daily Cleaner
Quartzite is a metamorphic natural stone formed through heat and pressure. It’s harder than marble and more heat-resistant than quartz, but it’s still porous and relies on a protective sealer.
The wrong cleaner can:
-
Strip the sealer
-
Cause etching
-
Leave streaks or a dull finish
-
Allow stains to soak in over time
That’s why quartzite should always be cleaned with a pH-neutral, stone-safe daily cleaner.
What to Look for in a Daily Cleaner
✅ Must-Haves
-
pH-neutral formula
-
Safe for sealed natural stone
-
Non-acidic and non-abrasive
-
No vinegar, bleach, ammonia, or harsh chemicals
-
Microfiber cloth–friendly
❌ What to Avoid
-
Vinegar or citrus-based cleaners
-
Household all-purpose cleaners
-
Bleach or ammonia
-
Abrasive powders or scrub pads
-
Soap-based cleaners that leave residue
The Best Daily Cleaners for Quartzite
Below are reliable, commonly used daily cleaners that are safe for sealed quartzite:
1. Granite Gold Daily Cleaner
-
Affordable and widely available
-
Stone-specific, pH-balanced
-
Great everyday option
2. MORE Stone & Quartz Cleaner + Protector
-
Premium option
-
Cleans while adding light protective agents
-
Great for high-end kitchens
3. STONETECH Quartz & Tile Cleaner
-
Low-odor, safe for daily use
-
Trusted brand in the stone industry
4. Rejuvenate Granite & Stone Daily Cleaner
-
Budget-friendly
-
Convenient spray-and-wipe
5. Stone Care International Quartz Clean & Shine
-
pH-neutral
-
Leaves a light polished look
All of these are safe for quartzite as long as the countertop is properly sealed.
Recommended Daily Cleaning Routine
Here’s an easy routine you—and your customers—can follow:
-
Spray the daily cleaner over the surface.
-
Wipe with a microfiber cloth to pick up residue, crumbs, and streaks.
-
Blot spills immediately, especially wine, coffee, tomato sauce, or anything acidic.
-
Dry the countertop if water spots are an issue.
-
Repeat as needed throughout the day if cooking heavily.
Extra Quartzite Care Tips
-
Use trivets for hot pans, even though quartzite handles heat well.
-
Use cutting boards to avoid scratches.
-
Reseal every 6–12 months depending on usage.
-
Avoid leaving oils or colored liquids sitting for long periods.
Final Takeaway – What is the best daily cleaner for quartzite?
The best daily cleaner for quartzite is a pH-neutral stone cleaner that’s safe for sealed natural surfaces. Products like Granite Gold, MORE, STONETECH, and Stone Care International are excellent choices. Consistent daily care will keep quartzite bright, glossy, and protected for many years.

What does vinegar do to quartzite?
Quartzite is one of the strongest and most durable natural stones you can put in your home — but it still has one surprising weakness: acidic cleaners like vinegar.
If you’ve ever wondered whether vinegar is safe on quartzite, here’s what you need to know.
Vinegar Can Etch the Surface
Vinegar is a mild acid. Quartzite itself is very hard, but its surface can still be affected by acidic substances, especially if the stone hasn’t been sealed properly.
Using vinegar repeatedly can cause:
-
Etching — dull spots that look lighter than the surrounding stone
-
Loss of shine
-
Rougher texture in small patches
-
Visible rings or marks where the vinegar sat
Etching doesn’t always happen instantly. Small, repeated uses of vinegar can slowly wear down the surface finish over time.
Why Quartzite Reacts to Vinegar
Quartzite is mostly made of quartz, which is acid-resistant. However:
-
Many quartzite slabs contain natural minerals that react to acids
-
Sealants can break down when exposed to acidic cleaners
-
Residue from vinegar can seep into tiny pores if the stone isn’t well-sealed
So even though quartzite is tougher than marble, acids can still damage its finish.
Signs Vinegar Has Damaged Quartzite
You may notice:
-
Cloudy or dull areas
-
A spot that looks like a “water ring”
-
A faint rough patch
-
A mark that won’t wipe away no matter what cleaner you use
If you see these, the surface likely has mild etching.
How to Fix Vinegar Etching
Light etching can often be improved by:
-
Using a quartzite-safe polishing powder
-
Reapplying a high-quality stone sealer
-
Using a stone refinishing cream made for natural stone
Severe etching may require a stone restoration professional to re-polish or hone the surface.
Better Cleaning Alternatives to Vinegar
Use these instead:
-
A pH-neutral stone cleaner
-
Warm water and a few drops of mild dish soap
-
A microfiber cloth for daily wipe-downs
These options clean effectively without damaging the seal or the stone.
Final Thoughts – What does vinegar do to quartzite?
Vinegar may seem like a harmless natural cleaner, but on quartzite it can cause dullness, etching, and long-term wear. To keep your countertops looking bright and polished, stick to pH-neutral cleaners and avoid anything acidic.
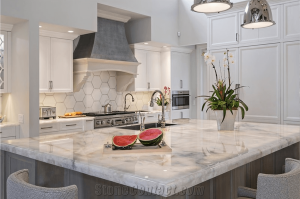
What is the most affordable quartzite color?
Quartzite is one of the most popular countertop materials for homeowners who want natural stone durability with a high-end look. But while quartzite is stunning, it can also vary widely in price — which leads to one common question:
“What quartzite color is the most affordable?”
Fortunately, there’s a straightforward answer.
Why Quartzite Color Affects Price
Quartzite forms when sandstone transforms under intense heat and pressure, creating a very hard, durable stone. But because it’s natural, the cost of each slab also depends heavily on factors such as:
-
how rare the color is
-
the complexity of the veining
-
quarry location and availability
-
how difficult it is to fabricate
-
how much waste is created when cutting
Color plays a major role in all of these.
Most Affordable Quartzite Colors: Light & Neutral Shades
Across the stone industry, the most budget-friendly quartzite colors tend to be:
• White quartzite
• Light gray quartzite
• Beige or cream quartzite
These colors are more commonly quarried, widely stocked, and easier to fabricate — all of which helps keep the price lower.
Examples of Lower-Cost Quartzite Options
Names vary by supplier, but these types of quartzite are generally considered more affordable:
1. White Pearl Quartzite
Soft white stone with gentle gray veining; widely available.
2. White Lux Quartzite
Bright, clean neutral tones with minimal patterning.
3. Taj Mahal Quartzite (Standard Grades)
Premium versions exist, but standard-grade slabs often fall on the lower end of quartzite pricing.
4. Cream or Beige Quartzites
Warm, neutral slabs that are abundant and easier to source.
What Counts as “Affordable” in Quartzite Pricing?
Although pricing varies by region and supplier, here are dependable general ranges:
-
Standard / Budget Quartzite:
$60–$90 per sq ft installed -
Mid-Range Quartzite:
$90–$130 per sq ft installed -
Exotic or Rare Colors (blues, greens, dramatic veining):
$150–$200+ per sq ft installed
Neutral tones almost always fall into the $60–$90 range.
Why Light Colors Cost Less
Additionally there are several reasons lighter quartzites tend to be the most affordable:
-
More quarry availability
-
Simpler, more consistent patterns
-
Less fabrication waste
-
Lower freight and handling costs
-
High demand paired with high supply
In contrast, bold colors and exotic patterns are rarer, more fragile during fabrication, and more expensive to import.
Final Takeaway – What is the most affordable quartzite color?
The most affordable quartzite colors are typically light and neutral — especially whites, light grays, and also soft beiges.
These shades are more common, easier to fabricate, and cost significantly less than exotic or dramatic quartzite varieties.

Why does my quartzite look cloudy?
Quartzite is known for its bright, crisp appearance, so it can be frustrating when it suddenly looks dull or hazy. Cloudiness is usually caused by something on the surface rather than a defect in the stone. Here are the most common reasons quartzite becomes cloudy and what you can do to fix it.
1. Soap or Cleaner Residue
Using dish soap or regular household cleaners can leave behind a thin film. Over time, this residue builds up and makes the surface look streaky or cloudy.
How to fix it:
Clean with a pH-neutral stone cleaner or a mix of warm water and a small amount of rubbing alcohol. Wipe dry with a microfiber cloth.
2. Hard Water Spots
Minerals from hard water—such as calcium—create a chalky haze, especially near sinks, faucets, and dish areas.
How to fix it:
Use a stone-safe hard water remover or a 50/50 mix of water and white vinegar only if the stone is sealed. Wipe and dry immediately.
3. Etching From Harsh Chemicals
Quartzite is more resistant than marble, but acidic or abrasive products (bleach, vinegar, bathroom cleaners, Magic Erasers) can still dull the finish.
How to fix it:
Switch to gentle, stone-safe cleaners.
Use stone polishing cream for light etching.
Severe etching may need professional refinishing.
4. Sealer Issues
A sealer that was applied incorrectly — or one that’s wearing off — can leave a hazy or uneven film. Too much sealer can also trap moisture and look cloudy.
How to fix it:
Remove excess sealer with a sealer remover.
Reapply a penetrating sealer properly and wipe all excess.
5. Trapped Moisture
Recently installed quartzite or areas that stay wet for long periods may develop temporary cloudiness.
How to fix it:
Allow the stone to fully dry.
Moisture often clears within 24–48 hours.
6. Micro-Scratches and Surface Wear
Everyday use can create tiny scratches that scatter light and make the stone appear dull.
How to fix it:
Use a stone polishing cream to restore clarity.
Heavily worn areas may need a professional hone-and-polish.
How to Prevent Cloudiness
-
Clean with pH-neutral stone cleaners
-
Avoid vinegar, bleach, and abrasive pads
-
Keep areas around sinks dry
-
Reseal the surface annually
-
Use microfiber cloths rather than rough sponges
Final Thoughts – Why does my quartzite look cloudy?
Cloudiness on quartzite is almost always a surface issue, not damage to the stone itself. With proper cleaning and the right maintenance, you can restore quartzite’s natural shine and keep it looking clear and vibrant long-term.

Do high end homes use quartzite countertops?
When homeowners, designers, and luxury builders want a countertop material that’s both breathtaking and durable, quartzite often rises to the top of the list. But is quartzite actually used in high-end homes?
Absolutely — and more than ever.
Here’s why quartzite has become a go-to choice in luxury properties across the U.S.
Yes — Quartzite Is Extremely Popular in High-End Homes
Luxury homeowners want surfaces that look impressive, last for decades, and elevate the overall design. Quartzite checks all three boxes with ease. Its natural veining, subtle texture, and one-of-a-kind color patterns give it a level of elegance that manufactured materials can’t replicate.
High-end builders especially love quartzite for:
-
Designer kitchens
-
Waterfall islands
-
Statement bathroom vanities
-
Outdoor kitchens (because quartzite handles heat and sun extremely well)
Why Luxury Designers Choose Quartzite
1. Natural Beauty That Looks Expensive
Quartzite is formed from sandstone under intense heat and pressure, resulting in rich veining and marble-like elegance — but stronger.
Styles like Taj Mahal, Perla Venata, and Dumont are top picks in luxury homes for their soft, warm tones and refined movement.
2. Superior Durability
High-end homeowners don’t want delicate materials. Quartzite offers:
-
Excellent scratch resistance
-
High heat resistance
-
Strong resistance to etching compared to marble
-
Natural UV resistance for sunny kitchens and outdoor areas
This makes it perfect for both everyday family use and large, premium kitchens.
3. Exclusive, Unique Slabs
No two quartzite slabs are identical — and exclusivity is a huge selling point for luxury buyers.
Some slabs feature dramatic veining that looks like abstract art, while others have soft, minimalist patterns perfect for modern luxury.
4. Excellent Return on Investment
Premium finishes increase property value. Quartzite costs more than many stones, but it also elevates the home’s overall market appeal, especially in higher-end neighborhoods.
Where Quartzite Appears in Luxury Homes
You’ll commonly see quartzite featured in:
-
Grand kitchen islands with full-height backsplash
-
Spa-like bathrooms
-
Fireplace surrounds
-
Outdoor bars and grilling stations
-
Custom table tops and accent pieces
Designers love its versatility — quartzite can look modern, rustic, coastal, or ultra-luxurious depending on the slab.
Is Quartzite Better Than Quartz for Luxury Homes?
Many high-end homes use quartz, but quartzite often wins for luxury spaces because:
-
It’s 100% natural, not engineered
-
The veining looks more organic and premium
-
It withstands heat better
-
It has a higher-end feel overall
Quartz is still popular — especially for rental properties — but luxury designers often prefer quartzite when they want a truly elevated look.
Final Verdict: Quartzite Is a Top-Tier Luxury Material – Do high end homes use quartzite countertops?
If you’re aiming for a high-end, timeless aesthetic, quartzite is one of the best materials you can choose. It’s beautiful, durable, and unique — and it instantly makes any kitchen or bathroom feel more expensive.
Whether you want a warm, elegant look like Taj Mahal or a bold, artistic pattern like Patagonia, quartzite is a premium choice that stands out in luxury homes across the country.
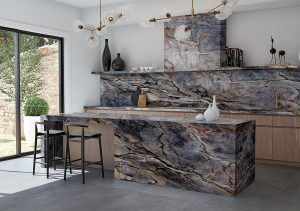
How to daily clean quartzite?
Quartzite countertops are among the most durable and elegant natural stone surfaces available. While they’re resistant to heat, scratches, and everyday wear, keeping them looking stunning requires consistent, gentle care. Here’s how to clean quartzite on a daily basis without damaging its natural beauty.
1. Start with a Soft Cloth and Warm Water
For everyday messes, all you need is a soft microfiber cloth or sponge and warm water. Wipe the surface thoroughly to remove dust, crumbs, and light spills. This simple habit helps prevent buildup and keeps your quartzite glossy and streak-free.
2. Use a Mild, pH-Neutral Cleaner
If water alone isn’t enough, mix a few drops of a gentle dish soap into warm water. Avoid acidic or alkaline cleaners—like vinegar, lemon, bleach, or ammonia—as they can dull the surface and weaken the sealant over time. You can also purchase a stone-safe cleaner specifically formulated for natural stone.
3. Wipe Up Spills Immediately
Quartzite is resistant but not invincible. Liquids like wine, coffee, and juice can stain if left sitting too long. Always wipe spills as soon as they occur using a damp cloth, then dry with a clean towel.
4. Dry and Buff for a Streak-Free Finish
After cleaning, use a dry microfiber cloth to buff the surface. This not only prevents water spots but also enhances the natural sheen of the stone.
5. Avoid Abrasive Tools or Pads
Never use steel wool, rough sponges, or abrasive cleaners. These can scratch the protective sealant and make the surface more vulnerable to future stains.
Bonus Tip: Keep the Seal Strong
Quartzite should be resealed periodically (every 1–2 years) depending on use and exposure. A well-sealed surface makes daily cleaning easier and provides added protection against etching and staining.
In summary – How to daily clean quartzite:
Daily quartzite care is simple—gentle soap, soft cloth, and quick cleanup go a long way. With just a few minutes of maintenance, your quartzite countertops will stay radiant and elegant for years to come.
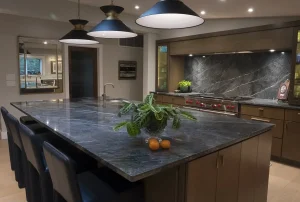
Can you set hot pots on quartzite?
Quartzite is one of the most popular choices for kitchen countertops — and for good reason. It offers the elegant veining of marble with durability closer to granite. But one of the biggest questions homeowners ask is simple:
Can you set hot pots directly on quartzite countertops?
The short answer: Yes, quartzite is naturally heat-resistant — but you should still use caution.
Let’s break down why.
Why Quartzite Handles Heat Well
Quartzite starts as sandstone and transforms over millions of years under intense heat and pressure. This natural process makes quartzite:
-
Dense
-
Hard
-
Heat-resistant
-
Scratch-resistant
Most quartzite slabs can easily withstand typical kitchen heat levels — including warm dishes, hot pans, and brief contact with pots.
However, heat-resistant is not the same as heat-proof.
The Real Risk: Thermal Shock
If you place a very hot pot or pan directly on quartzite, there’s a chance of thermal shock. This is when a rapid temperature change causes stress in the stone, potentially leading to:
-
Micro-cracks
-
Dull spots
-
Weakened areas
-
Damage to the sealant layer
While these issues are rare, they are most likely to happen when the countertop experiences extreme, sudden heat.
What About Quartzite Sealers?
Most quartzite is sealed to protect it from:
-
Stains
-
Spills
-
Oils
-
Acids
Sealer is essential for everyday use — but sealers are not heat-resistant.
When a very hot item sits directly on a sealed surface, it can:
-
Burn the sealer
-
Create a cloudy or whitish ring
-
Leave a mark that requires refinishing
So even though the stone itself is strong, the finish can still be damaged.
Best Practice: Use Trivets and Hot Pads
To protect your quartzite for the long run:
-
Use a trivet or hot pad under pots, pans, and slow cookers.
-
Avoid placing items straight from high heat (like an oven at 450°F) directly on the countertop.
-
Let cookware cool for a minute or two before setting it down if needed.
These small habits preserve both the stone and its beautiful finish.
Quick Comparison: Quartzite vs. Quartz
| Material | Heat Resistance | Can You Place Hot Pots Directly? | Notes |
|---|---|---|---|
| Quartzite | High (natural stone) | Recommended to use protection | Best durability with proper care |
| Quartz (engineered) | Low–Medium | No | Resin can melt or discolor |
| Granite | High | Still use pads | Similar guidance as quartzite |
If you want natural beauty and resilience, quartzite is one of the best options available.
Final Answer – Can you set hot pots on quartzite?
Yes — you can set hot pots on quartzite, but you should not do so regularly.
Quartzite is heat-resistant, but sudden high heat can damage the finish or cause stress to the stone.
To keep your countertops looking brand-new for years, use trivets or hot pads — it’s a small step that protects a major investment.
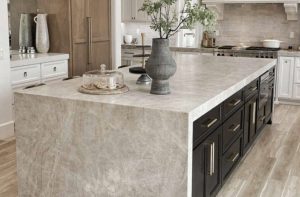
Does quartzite crack easily?
Quartzite has become one of the most sought-after natural stones in home design, known for its durability, elegant veining, and luxurious appearance. Whether used for kitchen countertops, bathroom vanities, or custom stone features, quartzite is considered a premium material with long-lasting performance. But one common question homeowners ask is:
“Does quartzite crack easily?”
The short answer is no — quartzite does not crack easily. In fact, it is one of the strongest and hardest natural stone surfaces available. However, like any natural material, certain conditions can increase the risk of cracking.
Let’s break it down.
Quartzite Strength: Why It’s So Durable
Quartzite begins as sandstone and undergoes extreme heat and pressure beneath the earth’s surface. This process, called metamorphism, fuses the mineral quartz into a dense, interlocking crystalline structure.
Key Strength Properties of Quartzite:
| Property | Result |
|---|---|
| Mohs Hardness | 7 (harder than granite) |
| Heat Resistance | Excellent |
| Scratch Resistance | High |
| Porosity | Low to medium, depending on variety |
Because of this natural density and hardness, quartzite is far more resistant to cracking than materials like marble or even some granites.
So Why Do Some Quartzite Countertops Crack?
Even though quartzite is strong, cracks can occur under certain conditions — usually related to installation or structural stress, not the stone itself.
Common Causes of Cracking:
-
Improper Support During Installation
Large overhangs or cutouts (like sinks and cooktops) must be supported. If not, pressure points can form. -
Thermal Shock
Quartzite is heat resistant, but placing a scorching hot pan directly on the same spot repeatedly can create stress fractures over time. -
Impact Damage
Dropping heavy cookware or appliances on an edge can chip or crack the stone. -
Poor Slab Quality or Fabrication
Some slabs have natural fissures that require proper reinforcement. Skilled fabrication matters.
Most cracks are preventable with proper installation and routine care.
How to Prevent Cracks in Quartzite Countertops
Here are simple care and usage guidelines to maintain your surface for years:
-
Use cutting boards for chopping (not because it will scratch quartzite, but to protect your knives).
-
Place heat pads or trivets under extremely hot pans.
-
Ensure your countertop has proper support, especially around seating overhangs.
-
Avoid standing or sitting on your countertops (common cause of stress fractures).
-
Have your quartzite sealed properly to protect natural veins and micro-fissures.
Is Quartzite a Good Choice for High-Traffic Kitchens?
Yes. Quartzite is one of the best materials for busy kitchens.
Its hardness, heat resistance, and durability make it ideal for everyday use, cooking environments, and families that want beauty without constant worry.
If you love the look of marble but want something more resilient — quartzite is the perfect match.
Final Answer – Does quartzite crack easily?
Quartzite does not crack easily.
It is a strong, durable, heat-resistant natural stone that performs exceptionally well when properly installed and cared for. Any cracks that do occur are typically due to external stress, not the stone’s natural weakness.
Choosing a premium slab and working with an experienced fabricator ensures your quartzite stays pristine for decades.
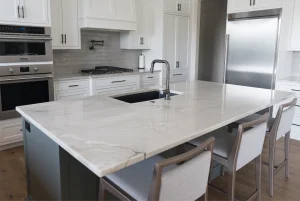
What not to do with quartzite?
Quartzite is one of the most durable natural stones available, loved for its stunning veining and ability to withstand everyday use. But even though quartzite is stronger than many countertop materials, it is still natural stone—and there are a few things you’ll want to avoid to keep it looking beautiful for years.
If you’re planning to install quartzite countertops, backsplashes, or surfaces in your home, here are the most important “don’ts” to remember.
1. Don’t Skip Sealing Your Quartzite
Quartzite is more resistant to staining than marble, but it’s still porous. If left unsealed or improperly sealed, liquids like wine, oil, coffee, and juice can seep in and leave marks.
Do instead:
Seal your quartzite once a year (or as recommended by your fabricator) and wipe spills promptly.
2. Don’t Use Glass Cleaners or Harsh Chemicals
Cleaners like Windex, bleach, degreasers, and anything acidic or alkaline can dull the surface over time and break down the sealer.
Avoid:
-
Vinegar
-
Lemon-based cleaners
-
Ammonia-based sprays
-
Bathroom tile cleaners
Do instead:
Use a pH-neutral stone cleaner or warm water with a tiny bit of mild dish soap.
3. Don’t Cut Directly on the Surface
Quartzite is tough, but cutting directly on it can:
-
Scratch the stone
-
Damage your knives
-
Wear down your sealer faster
Do instead:
Always use a cutting board.
4. Don’t Place Hot Pots Directly on It
Quartzite is heat resistant, but sudden changes in temperature (thermal shock) can cause cracks or discoloration.
Do instead:
Use trivets or hot pads under:
-
Pots
-
Pans
-
Crockpots
-
Air fryers
5. Don’t Use Abrasive Scrub Pads
Steel wool, scouring powders, and rough scrub sponges can scratch the polish and dull the finish.
Do instead:
Use a soft microfiber cloth or sponge.
6. Don’t Let Oily Spills Sit
Oil is one of the hardest stains to remove from any natural stone. Leaving oily spills over time can darken the stone permanently.
Do instead:
Clean oil or greasy spills immediately, especially around:
-
Stove areas
-
Cooking prep areas
-
Bathroom beauty product zones
7. Don’t Skip Routine Cleaning
Even though quartzite is strong, it still benefits from simple, consistent care. Allowing dust or food buildup can gradually dull the shine.
Do instead:
Wipe countertops daily with a soft cloth + gentle cleaner.
Final Thoughts – What not to do with quartzite?
Quartzite is a luxury stone that combines beauty and durability, making it perfect for kitchens, bathrooms, and statement designs. With the right care (and by avoiding the mistakes above), your quartzite surfaces will stay stunning for decades.
If you’re shopping for premium quartzite slabs, explore our collection at Tez Marble—we offer fast nationwide slab delivery and curated natural stone selections.
Ready to find your perfect quartzite?
Browse our quartzite collection today.
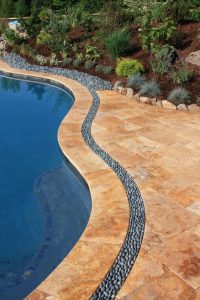
How do you maintain travertine?
Travertine is one of the most timeless natural stones used in homes today. Its warm tones, subtle patterns, and natural texture make it a favorite for flooring, countertops, showers, and outdoor spaces. But like any natural stone, it needs the right care to keep looking great.
The good news? Maintaining travertine is simple — as long as you follow a few key steps.
In this guide, we’ll cover how to keep your travertine clean, protected, and beautiful for years to come.
1. Clean Regularly with the Right Products
Travertine is sensitive to acidic and harsh chemicals. Vinegar, bleach, harsh bathroom cleaners, and even lemon-based products can etch or dull the surface.
Best Cleaning Practices:
-
Use a pH-neutral stone cleaner or a mild dish soap diluted in warm water.
-
Wipe spills right away, especially wine, coffee, juice, or anything acidic.
-
Sweep or dry-dust floors regularly to prevent scratches from sand and grit.
Products to Avoid:
-
Vinegar or lemon cleaners
-
Bleach or ammonia
-
Any abrasive powders or scrubbing pads
Tip: When in doubt, stick to cleaners labeled safe for natural stone.
2. Reseal Travertine Every 1–3 Years
Because travertine is a porous stone, it absorbs moisture and liquids. Sealing helps protect it from stains and makes everyday cleaning easier.
How Often to Seal:
-
Indoor flooring: every 2–3 years
-
Countertops, showers, or high-use areas: every 1 year
-
Outdoor travertine (pavers/patios): every 1–2 years, depending on weather exposure
To check if your travertine needs sealing, drip a few drops of water on the surface.
If the water darkens the stone within a few minutes, it’s time to reseal.
3. Protect the Surface from Wear and Stains
Little habits make a big difference with natural stone.
Do:
-
Use coasters under glasses
-
Place mats under kitchen appliances
-
Add felt pads under furniture legs
-
Use rugs at entryways to limit dirt and grit
Avoid:
-
Dragging chairs or furniture across travertine floors
-
Leaving standing water on countertops or shower ledges
-
Using suction cup bath mats (they can trap moisture)
4. Maintain Outdoor Travertine Pavers
Outdoor travertine is durable and weather-friendly, but it still benefits from simple care.
Outdoor Care Tips:
-
Sweep debris and leaves regularly to prevent staining
-
Clean with a gentle pressure rinse — not too strong
-
Refill joints with sand or polymeric sand when needed
-
Reseal pavers when water stops beading on the surface
Avoid using vinegar for mold or algae removal — use stone-safe cleaners instead.
5. Handle Stains and Etching the Right Way
If a stain does happen, don’t panic. Travertine can often be restored.
For Common Issues:
-
Oil stains: use a poultice made for natural stone
-
Water spots: buff gently with a soft microfiber towel
-
Etching (dull spots): may require professional polishing depending on severity
For deep stains or worn areas, professional stone restoration can make your travertine look brand new again.
Final Thoughts – How do you maintain travertine?
Travertine is one of the most beautiful and long-lasting stones you can use in your home — and maintaining it doesn’t have to be complicated. With gentle cleaning, regular sealing, and a few protective habits, your travertine will stay elegant and timeless for decades.
Whether you’re caring for travertine floors, countertops, shower walls, or outdoor pavers, the key is simple, consistent maintenance.
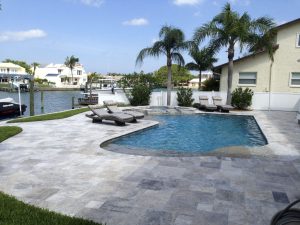
Does putting sand between pavers stop weeds?
If you’ve ever noticed weeds popping up between your pavers, you’re not alone. Even beautifully installed patios, walkways, and driveways can develop unwanted plant growth over time. One common question homeowners ask is: Does putting sand between pavers help stop weeds? The short answer is: Yes — but only if the right type of sand is used and installed properly.
Let’s break it down.
Regular Sand vs. Polymeric Sand
Not all sand is created equal when it comes to preventing weeds.
| Type of Sand | Description | Weed Prevention Level |
|---|---|---|
| Regular Joint Sand | Basic sand swept between pavers | Low — Weeds can still grow |
| Polymeric Sand | Sand mixed with special binders that harden with water | High — Creates a solid, weed-resistant joint |
Regular Joint Sand
Regular sand fills the gaps but doesn’t harden. Rain, wind, and foot traffic can wash it away — leaving space for weeds to take root.
Polymeric Sand
Polymeric sand hardens when moisturized. Once locked in, it:
-
Helps prevent weed seeds from settling
-
Deters ants
-
Reduces shifting and movement between pavers
This makes it much more effective for long-term weed prevention.
Do Weeds Grow From Under the Pavers?
Most weeds don’t grow up from deep below your patio. Instead, they come from:
-
Airborne seeds landing between paver joints
-
Seeds carried by birds or rainwater
-
Dirt/dust settling in small gaps
So, even with good sand, some weeds might still appear — but they’ll be easier to remove and far less frequent.
How to Prevent Weeds Between Pavers
To get the best results:
-
Use Polymeric Sand
Sweep it into the joints, compact it, and wet it lightly to activate binding. -
Seal the Pavers (Optional but Recommended)
A high-quality paver sealer creates a barrier that reduces weed growth and staining. -
Keep the Area Clean
Blow or sweep debris regularly so seeds don’t settle in joints.
So, Does Sand Stop Weeds?
-
Regular sand: No, not effectively.
-
Polymeric sand: Yes — it significantly helps prevent weed growth and keeps your pavers looking clean.
If you’re installing pavers or refreshing an older patio, polymeric sand is one of the easiest and most affordable upgrades you can make for long-lasting results.
Final Takeaway – Does putting sand between pavers stop weeds?
Putting sand between pavers can help stop weeds — but only if you use polymeric sand and maintain the surface periodically. Regular sand alone won’t solve the problem long-term.
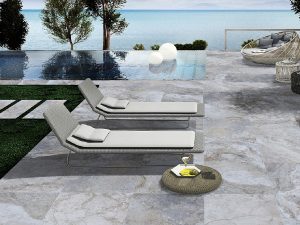
What’s the Difference Between Travertine Tiles and Travertine Pavers?
Travertine is one of the most timeless and elegant natural stones, loved for its warm tones and distinctive patterns. But when it comes time to choose between travertine tiles and travertine pavers, many homeowners and designers wonder what sets them apart. While both are made from the same stone, their intended uses, thickness, and finishes differ — making each one ideal for specific types of projects.
1. Thickness and Strength
The most obvious difference lies in thickness.
-
Travertine Tiles are typically ⅜” thick (about 1 cm) and are designed for indoor applications such as floors, walls, and bathroom surfaces.
-
Travertine Pavers are much thicker — usually 1¼” to 2″ thick (3–5 cm) — and are made to handle outdoor use, including patios, pool decks, and driveways.
That added thickness gives pavers the strength to withstand heavier loads and outdoor conditions like foot traffic, vehicles, and weather exposure.
2. Finish and Texture
-
Tiles often have a smooth, polished, or honed surface, giving interiors a refined and elegant look.
-
Pavers are usually tumbled or textured, creating a natural, slip-resistant surface that’s perfect for outdoor safety and traction — especially around pools or wet areas.
3. Installation Areas
Each serves a different design purpose:
-
Travertine Tiles: kitchens, living rooms, bathrooms, backsplashes, and accent walls.
-
Travertine Pavers: patios, pool decks, garden paths, walkways, and driveways.
In short, tiles belong inside while pavers thrive outside — though both bring the same classic travertine beauty to your project.
4. Base and Installation Method
Travertine tiles are set on a mortar bed over a concrete subfloor using thinset adhesive.
Travertine pavers, however, are generally installed on a compacted sand and gravel base for outdoor flexibility and drainage. This difference in installation method ensures long-term stability for each type of environment.
5. Aesthetic Appeal
Both products come in the same stunning color ranges — ivory, walnut, silver, gold, and more — but the finish and edge treatments vary. Tiles usually have straight or beveled edges, while pavers often feature tumbled edges for a rustic, weathered charm that blends beautifully with outdoor landscapes.
Final Thoughts – What’s the Difference Between Travertine Tiles and Travertine Pavers?
If you’re remodeling a kitchen or bathroom, travertine tiles deliver elegance and sophistication. For outdoor living spaces, travertine pavers offer strength, slip resistance, and a natural warmth that only gets better with time.
No matter which you choose, both options add lasting value and timeless character to your home.
Why is my travertine pavers crumbling?
Travertine is known for its timeless beauty and natural durability, but like any natural stone, it can begin to deteriorate if not properly cared for. If your travertine pavers are crumbling, flaking, or breaking down over time, there are a few common reasons behind it — most of which are preventable with the right maintenance and installation practices.
1. Moisture Penetration and Freeze-Thaw Damage
Travertine is a porous stone, meaning it naturally absorbs moisture. When water seeps into the stone and freezes (especially in colder climates), it expands and causes the stone to crack or crumble.
Solution: Apply a high-quality penetrating sealer every 1–2 years to reduce moisture absorption. Make sure your pavers are properly drained so that water doesn’t pool on the surface.
2. Improper Installation or Base Preparation
If the base beneath your pavers wasn’t compacted or leveled correctly, uneven settling can put pressure on certain pavers, leading to cracking and crumbling over time.
Solution: Ensure the base consists of compacted crushed stone and sand with proper drainage. Always hire experienced installers familiar with natural stone pavers, not just concrete.
3. Use of Harsh Cleaners or Acidic Products
Travertine reacts negatively to acidic substances like vinegar, bleach, or acidic cleaners — they can etch and weaken the stone, making it more prone to crumbling.
Solution: Only use pH-neutral stone cleaners designed for travertine. Avoid pressure washing with strong detergents or chemicals.
4. Lack of Sealing and Maintenance
Over time, unsealed travertine can absorb dirt, water, and salts, leading to internal damage that makes the stone brittle.
Solution: Regularly clean and reseal your pavers. For outdoor applications, sealing once a year (especially in high-traffic or pool areas) helps preserve the integrity and color of the stone.
5. Use of De-Icing Salts or Harsh Weather Exposure
In colder regions, salt used for de-icing can penetrate travertine and cause surface flaking or “spalling.” Extended exposure to extreme heat and cold can also wear down the stone.
Solution: Use alternative ice-melting products like sand or calcium magnesium acetate, which are less corrosive to natural stone.
6. Natural Aging and Low-Quality Stone
Not all travertine is created equal. Lower-grade travertine with excessive voids or poor density tends to break down faster, especially outdoors.
Solution: When purchasing, choose premium-grade or commercial-grade travertine pavers. Reputable suppliers provide dense, properly filled stone that stands up to outdoor conditions.
Final Thoughts – Why is my travertine pavers crumbling?
Crumbling travertine isn’t just an aesthetic issue — it’s a sign that your stone needs attention. With proper installation, sealing, and maintenance, travertine pavers can last decades without major problems.
If your pavers are already showing signs of deterioration, consider professional cleaning, resealing, or replacing the damaged pieces before the problem spreads.
What is the best time to install travertine pavers?
When planning an outdoor project, choosing the right time to install travertine pavers can make a big difference in both the installation process and the longevity of your patio, pool deck, or walkway. Weather conditions, temperature, and moisture levels all play key roles in ensuring your pavers settle correctly and maintain their natural beauty for years to come.
1. Spring: The Ideal Season for Installation
Spring is often considered the best time to install travertine pavers. Temperatures are moderate, and the ground is soft enough to work with after winter rains but not overly saturated. This makes it easier to level the base materials and ensure a strong foundation.
Benefits of Spring Installation:
-
Ideal temperature range (60°F–80°F)
-
Moderate humidity allows mortar or sand to set properly
-
You can enjoy your new patio or pool deck all summer long
2. Summer: Great for Fast Setting — With Caution
Summer is another popular time for outdoor projects, but extreme heat can cause materials to dry too quickly, especially in sunny regions like California. If installing during summer, it’s best to work in the early morning or late afternoon and keep the surface slightly damp to prevent cracking or uneven curing.
Tips for Summer Installation:
-
Avoid direct midday heat
-
Keep the pavers shaded or moist during installation
-
Allow for expansion gaps since stones expand slightly in hot weather
3. Fall: A Comfortable Alternative
Fall provides stable weather and cooler temperatures that make installation comfortable and efficient. The ground remains dry enough for compaction, and there’s less rush compared to the busy summer months. It’s also a good time to prepare your outdoor space before the rainy season begins.
Benefits of Fall Installation:
-
Comfortable working temperatures
-
Reduced risk of heat-related issues
-
Allows pavers to settle before winter moisture
4. Winter: Usually Not Recommended
Winter installation is not ideal unless you live in a mild climate. Cold temperatures can interfere with the bonding of materials like mortar or sealers, and frequent rain can disrupt compaction. However, in regions like Sacramento or Northern California, mild winter days can still allow for small installations if weather conditions are dry.
If Installing in Winter:
-
Monitor the forecast to avoid rain or freezing temperatures
-
Use fast-setting materials if necessary
-
Ensure the base is completely dry before placing pavers
Final Thoughts – What is the best time to install travertine pavers?
The best time to install travertine pavers depends largely on your local climate, but spring and fall tend to offer the most favorable conditions. Planning your installation during these seasons ensures optimal curing, better workmanship, and a long-lasting finish.
Whether you’re creating a new patio, pool surround, or garden walkway, timing the project right will help your travertine pavers look their best for years to come.
Can you pressure wash sealed travertine pavers?
Travertine pavers are a popular choice for patios, pools, and outdoor living spaces thanks to their natural beauty and long-lasting durability. But like any outdoor surface, they collect dirt, algae, and debris over time — which leads many homeowners to ask:
Can you pressure wash sealed travertine pavers?
Yes, you can — but only if it’s done correctly.
Because travertine is a porous natural stone, improper pressure washing can damage the surface, wear down the sealer, or even cause pitting. To keep your pavers looking their best, follow these guidelines.
✅ Best Practices for Pressure Washing Sealed Travertine
-
Use low pressure — no more than ~1200 PSI
High pressure can strip the sealer and erode the stone. -
Use a wide spray tip (25° or 40° nozzle)
Avoid pinpoint jets that dig into the stone. -
Keep the wand moving
Don’t hold the spray in one spot. -
Use a gentle cleaner made for natural stone
Avoid acidic cleaners — they can etch travertine. -
Rinse thoroughly
Make sure all soap and residue is removed.
A professional surface cleaner attachment (flat, circular unit) is ideal because it applies even pressure without leaving streaks.
⚠️ What to Avoid
-
No high-pressure concentrated streams
-
No bleach or vinegar
-
No harsh degreasers not labeled for stone
-
Avoid blasting out sand in the joints
-
Avoid pressure-washing right after sealing (allow 24–48 hours cure time minimum)
Using the wrong technique could remove the sealer and make the stone more vulnerable to stains and weathering.
💡 When Should You Re-Seal After Pressure Washing?
If the water no longer beads up on the surface after cleaning, it’s time to re-seal.
Most sealed travertine pavers need resealing every 1–3 years, depending on:
-
Sun exposure
-
Foot and water traffic
-
Type of sealer used
-
Local weather conditions
A good penetrating sealer will help maintain color, reduce stains, and protect against moisture.
✅ Final Answer – Can you pressure wash sealed travertine pavers?
Yes — you can pressure wash sealed travertine pavers safely as long as you:
✔ Keep the pressure low
✔ Use the right nozzle and cleaner
✔ Protect the sealer and stone surface
Done correctly, pressure washing is one of the best ways to keep travertine looking clean, fresh, and beautiful for years.
What is the best material to put between travertine pavers?
If you’re designing a travertine patio, pool deck, or walkway, one of the most important installation choices is what goes between the pavers. Joint filler affects the look of the space, but also the stability, drainage, and long-term durability of your investment.
Below is a simple guide to help you pick the right option.
Why the Joint Material Matters
Travertine pavers look premium, but leaving joints unfilled can lead to:
-
Paver shifting or settling
-
Water pooling and drainage issues
-
Weed and ant problems
-
Dirt filling the gaps and discoloring the stone
So, the joint filler plays a functional and aesthetic role.
Common Options for Filling the Gaps
✅ Polymeric Sand — The Most Recommended
Polymeric sand is a fine sand mixed with binding polymers that harden when activated with water.
Pros
-
Helps keep pavers locked in place
-
Great wash-out resistance (rain & pool splash-zones)
-
Reduced weed and insect growth
-
Long-lasting and low-maintenance
Cons
-
Higher cost than basic sand
-
Must be installed correctly to avoid haze or staining
Best for: Pool decks, patios, driveways — most travertine applications.
Standard Dry Sand — Budget-Friendly but Higher Maintenance
This is traditional paver jointing sand.
Pros
-
Inexpensive
-
Quick and easy to apply
Cons
-
Washes out over time (especially around water)
-
Weeds and ants can become a problem
-
Requires frequent refill and upkeep
Best for: Low-traffic garden walkways or decorative areas.
Mortar / Grout — Smooth, Rigid Finish
Sometimes joints are fully grouted for a seamless tile-like look.
Pros
-
Very sturdy and polished appearance
-
Prevents debris from entering the joints
Cons
-
Can crack if the base shifts
-
Restricts drainage
-
Labor-intensive and more expensive
Best for: Travertine installed over a concrete slab with minimal movement.
Decorative Gravel or Pebbles — A Style Choice
Small stones or pebbles can replace sand for a natural feel.
Pros
-
High drainage
-
Unique design aesthetic
Cons
-
Less stable for walking surfaces
-
More weed growth if not maintained
Best for: Low-use garden pathways.
How to Choose the Right Option
Consider the following when selecting a filler:
| Factor | Best Option |
|---|---|
| Pool-side or wet areas | Polymeric sand |
| High foot-traffic | Polymeric sand |
| On a concrete slab | Mortar or grout |
| Decorative landscaping | Dry sand or pebbles |
| Low maintenance priority | Polymeric sand |
Tips for Using Polymeric Sand With Travertine
-
Make sure pavers are completely dry before filling joints
-
Use a blower to clear extra sand before wetting
-
Lightly mist with water — don’t over-soak
-
Keep traffic off until fully cured (24–48 hrs)
-
Seal the travertine afterward for extra protection
Final Verdict – What is the best material to put between travertine pavers?
For most travertine installations, especially outdoors:
Polymeric sand is the best material to put between travertine pavers.
It strikes the right balance of strength, appearance, and long-term durability — especially in premium outdoor spaces.
What does vinegar do to travertine pavers?
Travertine pavers are known for their natural beauty, durability, and cool-to-the-touch surface — which makes them a popular choice for patios, walkways, and pool decks. But like all natural stone, they have specific care needs. One common mistake homeowners make is cleaning travertine with vinegar.
So what exactly does vinegar do to travertine pavers? Let’s break it down.
Why Vinegar and Travertine Don’t Mix
Vinegar is an acidic cleaner (typically around 2–3 pH), and travertine is a type of limestone, which is a calcium carbonate stone. When acid comes into contact with calcium carbonate, a chemical reaction occurs that breaks down the stone’s surface.
In simple terms: Vinegar eats away at your travertine.
What Damage Can Vinegar Cause?
Using vinegar on travertine pavers can lead to:
✅ Etching
– Dull, rough patches that interrupt the stone’s smooth finish.
✅ Surface Erosion
– Tiny pits or uneven edges start forming as minerals dissolve.
✅ Loss of Shine & Color
– Vibrant stone becomes faded or chalky-looking.
✅ Weakened Sealant
– Sealer breaks down faster, leaving the stone unprotected.
This damage is often permanent and may require professional honing or refinishing to fix.
Why People Think Vinegar Is Safe
Vinegar is commonly recommended for tile cleaning — but that only applies to ceramic or porcelain tile, which aren’t affected by acid. Travertine is a living stone, more porous and reactive than manufactured surfaces.
Just because something works in the kitchen doesn’t mean it belongs on natural stone outdoors.
Safe Alternatives to Vinegar for Travertine
Stick to products designed specifically for natural stone:
✅ pH-neutral stone cleaner
✅ Mild dish soap diluted in water
✅ Soft-bristle brushes or microfiber mops
For deeper cleaning:
-
Pressure washing (gentle setting, professional recommended)
-
Stone-safe stain removers
-
Professional sealing every 1–2 years
What to Do If Vinegar Has Already Been Used
Don’t panic — but take action:
-
Rinse the affected area with plenty of water.
-
Apply a pH-neutral stone cleaner to balance the acid.
-
If dull spots remain, call a stone restoration professional to hone or polish the surface.
The earlier you address damage, the better the results.
Final Thoughts – What does vinegar do to travertine pavers?
Vinegar may be great for everyday cleaning around the home, but when it comes to travertine pavers, it can do more harm than good. If you want to protect your investment and keep your outdoor space looking beautiful, always choose stone-safe, pH-neutral cleaning products.

Can you acid wash travertine pavers?
Travertine pavers are prized for their timeless beauty and natural texture, making them a popular choice for patios, pool decks, and outdoor walkways. Over time, however, they can develop stains, discoloration, or buildup from weather exposure and foot traffic. One question many homeowners ask is: Can you acid wash travertine pavers?
Let’s take a closer look at what acid washing does, whether it’s safe for travertine, and what you should do instead.
Understanding Acid Washing
Acid washing is a cleaning process that uses a diluted acid (commonly muriatic acid) to remove tough stains, mineral deposits, or grime from stone surfaces. It’s often used on concrete to restore its appearance.
While it can be effective for certain materials, acid washing is not recommended for travertine pavers.
Why You Shouldn’t Acid Wash Travertine
Travertine is a type of limestone — a calcium carbonate–based stone. Acid reacts strongly with calcium carbonate, causing it to etch, dissolve, and dull the surface. Even a mild acid solution can eat away at the stone’s polished or honed finish, leaving rough patches, pitting, and permanent damage.
If you acid wash travertine pavers, you might notice:
-
Loss of natural sheen or smoothness
-
White chalky residue
-
Increased porosity (making the stone more prone to stains)
-
Weakening of the surface structure
In short, acid washing can do far more harm than good.
Safe Alternatives for Cleaning Travertine Pavers
Instead of acid washing, you can safely clean your travertine using gentler methods:
1. Mild Soap and Water
Mix a few drops of pH-neutral stone cleaner or dish soap with warm water. Mop or scrub lightly with a soft-bristle brush, then rinse thoroughly.
2. Pressure Washing (with care)
Use a pressure washer on a low to medium setting to remove dirt, algae, and grime. Avoid using too much pressure, which could loosen the stone or grout.
3. Poultice for Stains
For stubborn stains, apply a poultice made from baking soda and water. Let it sit overnight, then rinse and wipe clean.
4. Professional Stone Cleaner
Look for products labeled “safe for natural stone.” These are specifically formulated to lift dirt and stains without damaging the stone.
Maintaining and Protecting Travertine
To keep your travertine pavers looking their best:
-
Seal them regularly (every 2–3 years) to protect against moisture and stains.
-
Sweep and rinse regularly to prevent buildup.
-
Avoid harsh chemicals, vinegar, or acidic cleaners.
Proper maintenance keeps the stone’s color rich and the surface smooth for years.
Final Thoughts
No — you should not acid wash travertine pavers. The acid will damage the stone, strip its finish, and make it more vulnerable to staining. Instead, use pH-neutral cleaners, light pressure washing, and proper sealing to safely restore and maintain your travertine’s natural beauty.
If your pavers are heavily stained or weathered, consider hiring a professional stone restoration specialist who can clean and reseal them without risk of damage.
Does a travertine paver patio add value to a house?
When homeowners think about outdoor upgrades that increase property value, few features make as lasting an impression as a travertine paver patio. Known for its timeless beauty, durability, and natural charm, travertine is more than just a design choice—it’s an investment that enhances both curb appeal and resale potential.
1. Natural Beauty That Boosts Curb Appeal
Travertine pavers offer a classic, elegant look that instantly elevates any outdoor space. Their earthy tones—ranging from creamy beige to rich walnut and silver—complement almost any architectural style.
A well-designed travertine patio creates an inviting environment that appeals to prospective buyers, especially when paired with features like outdoor seating, fire pits, or water features.
2. High-End Look With Lasting Durability
Unlike concrete or basic tile, travertine is a premium natural stone known for withstanding heavy foot traffic, temperature changes, and moisture. Its cool-to-the-touch surface makes it especially desirable in warmer climates.
Buyers often associate travertine with luxury properties, meaning your home can stand out in a competitive real-estate market.
3. Low Maintenance, Long-Term Value
A key selling point for modern homeowners is easy maintenance. Travertine pavers require only occasional cleaning and resealing to preserve their finish. With proper care, they can last for decades—offering excellent long-term ROI compared to wood decks or poured concrete that deteriorate faster.
4. Outdoor Living Is a Selling Feature
The trend toward outdoor entertaining continues to grow, and homes with beautiful, functional outdoor spaces command higher prices.
A travertine patio adds usable square footage for hosting, dining, and relaxation—essentially extending your home’s living space outdoors.
5. Increased Appraisal and Buyer Interest
While the exact value increase depends on factors like region and home size, real-estate experts estimate that well-designed patios can raise resale value by 5–10%.
Because travertine is a luxury upgrade, it can position your home in a higher tier of comparable listings, potentially shortening the time it spends on the market.
6. Environmentally Friendly and Timeless
Travertine is a natural, eco-friendly material. Its soft, neutral colors never go out of style, so your investment won’t look dated years later. Buyers value materials that balance sustainability with elegance.
Final Thoughts – Does a travertine paver patio add value to a house?
Yes—a travertine paver patio absolutely adds value to a house. Beyond financial return, it enhances the lifestyle appeal, beauty, and function of your property.
Whether you’re upgrading for your own enjoyment or preparing to sell, travertine is a smart, long-lasting choice that delivers both aesthetic and economic rewards.
What happens if you don’t seal travertine pavers?
Travertine pavers are prized for their timeless look and natural beauty — but they’re also porous, which means sealing isn’t just a finishing touch; it’s a form of protection. If you skip sealing your travertine pavers, you may start to notice subtle (and sometimes expensive) consequences over time.
1. Stains Become Permanent
Travertine naturally absorbs liquids like water, oil, and wine. Without a sealer, these liquids seep deep into the pores and leave behind dark, hard-to-remove stains. Even small spills can become permanent, especially on pool decks, patios, or driveways where traffic and moisture are constant.
2. Color Fades and Loses Its Natural Luster
Unsealed travertine is more vulnerable to UV rays, rain, and dirt. Over time, these elements dull the stone’s natural vibrancy. What once looked warm and luxurious can fade into a washed-out, chalky tone — especially in sunny or high-traffic outdoor areas.
3. Water Damage and Erosion
Because travertine is porous, water can penetrate deep into the stone. Repeated wet-dry cycles cause internal erosion and weakening, which may lead to surface pitting, cracking, or flaking. Around pools and fountains, this can happen even faster.
4. Mold, Mildew, and Algae Growth
Moisture trapped inside unsealed pavers becomes a breeding ground for mold and mildew. You might notice green or black patches appearing in shaded or damp spots. These aren’t just unattractive — they can also make surfaces slippery and unsafe.
5. Harder to Clean and Maintain
Unsealed travertine tends to hold onto dirt, debris, and grime. Routine cleaning becomes more difficult because stains and dust penetrate the surface instead of wiping away easily. You’ll find yourself scrubbing more often and still not achieving the same results.
Why Sealing Is Worth It – What happens if you don’t seal travertine pavers?
Sealing your travertine pavers forms an invisible barrier that repels water, resists stains, and preserves color. It also makes cleaning faster and prevents long-term damage — ultimately extending the life of your investment.
For most outdoor spaces, it’s best to seal travertine every 2–3 years, depending on traffic and weather exposure.
In short: Leaving travertine pavers unsealed may save time initially, but it leads to higher maintenance costs and a shorter lifespan. Sealing protects your stone — and keeps your outdoor spaces looking stunning for years to come.
How often does travertine pavers need to be resealed?
Travertine pavers bring a timeless, natural beauty to patios, pool decks, and walkways—but to keep them looking their best, sealing is key. Over time, exposure to weather, foot traffic, and moisture can wear down the protective layer, making resealing an essential part of maintenance. So, how often do travertine pavers need to be resealed? Let’s break it down.
General Resealing Timeline
Most experts recommend resealing travertine pavers every 2 to 3 years. However, the right schedule depends on a few factors:
-
Exposure to Sun and Rain: Outdoor areas that get a lot of direct sunlight, rain, or sprinklers may need resealing every 1 to 2 years.
-
Foot and Vehicle Traffic: High-traffic patios, driveways, and pool decks wear down faster and may need more frequent attention.
-
Type of Sealer Used: Premium penetrating sealers can last longer—sometimes up to 5 years—while topical sealers may need reapplication sooner.
Signs It’s Time to Reseal
You can easily tell when your travertine needs a new coat of sealer. Look for:
-
Dull or Faded Appearance: If your pavers have lost their natural sheen or color vibrancy.
-
Water Absorption: Sprinkle some water on the surface. If it soaks in instead of beading up, it’s time to reseal.
-
Staining or Etching: New stains that don’t wipe off easily can signal the sealer has worn away.
Why Resealing Matters
Travertine is a naturally porous stone, which means it absorbs liquids and stains easily if unprotected. Resealing helps:
-
Prevent oil, wine, and rust stains
-
Reduce mold and mildew growth
-
Protect against salt damage and weather erosion
-
Maintain the color and texture of the stone
Regular sealing not only keeps the stone beautiful but also extends its lifespan, saving you money on future repairs or replacements.
Tips for Longer-Lasting Results
-
Always clean thoroughly before resealing to remove dirt and residues.
-
Avoid acidic cleaners (like vinegar) that can damage the sealer and stone.
-
Choose the right sealer type—penetrating sealers for a natural look, or enhancing sealers for a richer color tone.
-
If you live in a high-moisture or freeze-thaw area, consider sealing annually for maximum protection.
Final Thoughts – How often does travertine pavers need to be resealed?
In most cases, resealing travertine pavers every 2–3 years is ideal for keeping them durable, vibrant, and stain-resistant. If you notice fading or water absorption sooner, don’t wait—an early reseal can prevent long-term damage and keep your outdoor spaces looking fresh year-round.
How does travertine pavers hold up outside?
Travertine pavers are one of the most popular choices for outdoor spaces — and for good reason. Their natural beauty, cool touch, and timeless durability make them ideal for patios, pool decks, driveways, and walkways. But how well do they really hold up outdoors over time? Let’s take a closer look.
1. Weather Resistance
Travertine is a natural stone formed by mineral deposits, giving it excellent resistance to harsh outdoor elements.
-
Heat: Travertine stays cool underfoot, even in direct sunlight, making it perfect for pool areas and patios.
-
Cold: It can withstand freezing temperatures when properly sealed and installed, though sealing is important to prevent moisture absorption that could cause cracks during freeze-thaw cycles.
-
Rain: Its natural porosity allows water to drain efficiently, reducing puddles and slip hazards.
2. Durability and Longevity
Travertine is remarkably strong and dense. When installed on a proper base, it can last for decades with minimal upkeep. Many homeowners find that travertine surfaces only look better with time as they develop a soft, aged patina. For driveways and high-traffic areas, thicker pavers (1.25 inches or more) are recommended for maximum stability.
3. Slip Resistance
Travertine’s naturally textured surface provides excellent traction, even when wet. This makes it a safer option compared to smoother materials like porcelain or concrete, particularly around pools or in humid climates.
4. Maintenance and Care
Travertine requires very little maintenance:
-
Sweep or rinse regularly to prevent debris buildup.
-
Reseal every 2–3 years to protect from stains, water absorption, and color fading.
-
Avoid harsh chemical cleaners that can damage the stone’s surface — use pH-neutral cleaners instead.
5. Longevity vs. Cost
While travertine pavers are generally more expensive than concrete, their durability, beauty, and long lifespan make them a worthwhile investment. Over time, they can outlast cheaper materials that might crack, fade, or erode.
6. A Timeless Outdoor Look
Travertine adds instant elegance to any outdoor space with its natural variations in color and pattern. Whether you prefer classic ivory tones, warm golds, or silver and walnut hues, travertine complements virtually any design style — from Mediterranean to modern.
Final Verdict – How does travertine pavers hold up outside?
Travertine pavers hold up exceptionally well outside when installed and maintained correctly. They resist heat, weather, and wear while adding unmatched beauty and sophistication to outdoor areas. If you’re looking for a durable and timeless surface that can stand the test of time — travertine is one of the best choices you can make.
Should travertine pavers be matte or glossy?
When choosing travertine pavers for your patio, pool deck, or walkway, one of the most common design questions is whether they should have a matte (tumbled/honed) or glossy (polished) finish. Both finishes highlight the natural beauty of travertine, but they serve very different purposes depending on where and how the stone is used.
Matte Travertine: The Natural, Non-Slip Look
Matte finishes—often called tumbled or honed—are the most popular choice for outdoor applications.
Here’s why:
-
Slip Resistance: A matte surface has natural traction, making it much safer for pool decks, patios, and other areas exposed to water.
-
Natural Appearance: It enhances the stone’s rustic character, showcasing travertine’s natural texture and color variation.
-
Low Maintenance: Minor scratches or wear are less visible, and cleaning is easier since the finish doesn’t show water spots or dust as easily.
-
Weather Friendly: Matte travertine holds up well under sunlight and temperature changes without becoming overly slippery or reflective.
Best for: Patios, pool decks, driveways, walkways, outdoor kitchens.
Glossy Travertine: The Elegant Indoor Option
A polished or glossy travertine finish gives the stone a refined, mirror-like sheen that adds instant luxury. However, it’s not ideal for exterior use where traction is important.
Key features include:
-
Sophisticated Appearance: Polished travertine reflects light beautifully, creating a sleek and upscale interior aesthetic.
-
Color Enhancement: The gloss deepens and enriches natural hues, especially in cream, gold, and walnut tones.
-
Smooth Surface: Perfect for formal interior areas where you want a luxurious, finished look.
-
Care Needs: Requires more upkeep—fingerprints, smudges, and etching from acidic substances are more noticeable.
Best for: Indoor floors, bathroom walls, backsplashes, fireplace surrounds.
So, Which Should You Choose? – Should travertine pavers be matte or glossy?
If your travertine pavers will be used outdoors, matte is the clear winner—it’s safer, more durable, and better suited for natural exposure.
If your design is indoors and prioritizes elegance over traction, glossy travertine can create a timeless, high-end effect.
For many homeowners, a combination approach works best—matte travertine for outdoor spaces and polished for indoor features. This keeps the aesthetic cohesive while ensuring function and safety.
In short:
Choose matte travertine for outdoor performance, glossy travertine for indoor luxury. Either way, the key is matching the finish to the environment and purpose.
What color goes best with travertine pavers?
Travertine pavers are known for their timeless beauty and natural variation, making them one of the most popular choices for patios, pool decks, and driveways. But when it comes to designing your outdoor space, one of the most common questions homeowners ask is: what color goes best with travertine pavers?
The answer depends on the look you want to achieve, your home’s architecture, and even the surrounding landscape. Let’s explore the best color pairings and design ideas for a seamless and stunning outdoor space.
1. Warm Neutrals for a Natural, Mediterranean Feel
Travertine naturally has warm undertones — think soft beige, tan, cream, and gold. To keep that cohesive, sun-soaked Mediterranean look, pair it with:
-
Cream or off-white stucco walls
-
Terracotta roof tiles
-
Beige or tan outdoor furniture cushions
These shades complement the stone’s warmth and make your space feel bright, inviting, and timeless. Perfect for villas, Tuscan-inspired homes, and pool areas that get plenty of sun.
2. Greys and Charcoals for a Modern Contrast
If your travertine leans toward silver, grey, or ivory tones, a modern contrast can elevate your outdoor design. Try pairing it with:
-
Charcoal planters or furniture frames
-
Black metal accents (railings, light fixtures, or fire pits)
-
Neutral greys on exterior paint
Silver travertine pavers, in particular, look stunning next to black or dark grey accents — the contrast highlights the stone’s soft movement and creates a sophisticated, high-end look.
3. Earthy Greens and Browns for a Natural Oasis
For a more organic, earthy vibe, pull inspiration from nature. Travertine blends beautifully with:
-
Olive green plants or patio furniture
-
Wooden pergolas or brown trim
-
Rustic décor accents like clay pots or stone planters
These natural hues help the pavers blend seamlessly into gardens, backyards, or wooded areas, creating a calm, resort-like escape.
4. Cool Whites and Blues for Poolside Perfection
If you’re using travertine around a pool, lighter color palettes can enhance that refreshing, coastal feel. Ideal pairings include:
-
White walls or fencing to reflect sunlight
-
Soft blue or aqua accessories like cushions, umbrellas, and tiles
-
Light grey or ivory travertine for a clean, cooling surface underfoot
Ivory and light silver travertine pavers reflect heat well, making them practical and beautiful for hot climates.
5. Bold Accents for a Designer Touch
While neutral palettes are timeless, don’t be afraid to introduce a pop of color.
-
Deep navy pairs beautifully with ivory travertine
-
Terracotta red enhances gold and walnut tones
-
Sage green brings out the soft beige undertones
Using bold accents sparingly — through planters, cushions, or lighting — keeps the focus on the natural stone while adding personality to your outdoor design.
Choosing the Right Travertine Color
Travertine comes in a range of shades, including Ivory, Silver, Walnut, Noche, and Gold. Here’s a quick pairing guide:
| Travertine Color | Best Accent Colors |
|---|---|
| Ivory | White, light grey, navy, aqua |
| Silver | Charcoal, black, cool grey |
| Walnut | Cream, beige, olive, bronze |
| Noche | Terracotta, gold, sand, off-white |
| Gold | White, tan, green, rust |
Final Thoughts – What color goes best with travertine pavers?
The best color to pair with travertine pavers depends on your home’s style and the mood you want to create. Whether you lean toward soft neutrals, modern greys, or natural greens, travertine’s versatility ensures it will always look elegant and timeless.
If you’re not sure which shade suits your space best, request samples or visit a local showroom to see how different colors look under natural light.
Does vinegar stain travertine pavers?
Travertine pavers are a timeless choice for patios, driveways, and pool decks thanks to their natural beauty and durability. But when it comes to cleaning them, one common mistake homeowners make is reaching for vinegar — a natural cleaner that’s safe for many surfaces, but not for travertine.
Why Vinegar Damages Travertine
Vinegar is highly acidic, which means it can etch, dull, or even permanently stain travertine. Travertine is a calcium-based stone, and when acid comes into contact with it, it reacts chemically with the surface. This reaction eats away at the finish, leaving dull, cloudy, or discolored spots that can’t be easily wiped off.
Even if you dilute vinegar with water, the acid level is still strong enough to harm the stone. Over time, repeated exposure can cause the surface to lose its natural polish or develop rough, uneven patches.
What Happens When You Use Vinegar on Travertine
Here’s what you might notice if vinegar is used to clean travertine pavers:
-
Etching: The surface becomes dull or chalky in the affected area.
-
Staining: The acid can penetrate the stone and leave light or dark discolorations.
-
Erosion: The protective sealant wears off faster, allowing dirt and water to seep in.
-
Pitting: With long-term damage, small holes or rough textures can appear.
These effects can be permanent unless the surface is professionally refinished or honed.
Safe Alternatives to Vinegar
To keep your travertine looking its best, always use pH-neutral cleaners specifically formulated for natural stone. Look for products labeled “safe for marble or travertine.” You can also make your own gentle cleaning solution using:
-
Warm water
-
A few drops of mild dish soap (without lemon or vinegar additives)
-
A soft mop or microfiber towel
After cleaning, rinse thoroughly with clean water and let the surface dry completely.
How to Prevent Future Stains or Etching
-
Seal your travertine regularly. A high-quality penetrating sealer helps protect against moisture and spills.
-
Avoid acidic products. This includes vinegar, lemon juice, bleach, and ammonia-based cleaners.
-
Blot spills quickly. Don’t let liquids sit — even water can leave marks if left too long.
-
Use mats or rugs. Especially near outdoor kitchens or pool areas where spills are more likely.
Final Thoughts – Does vinegar stain travertine pavers?
Vinegar might be a great eco-friendly cleaner for many surfaces, but when it comes to travertine, it’s a definite no-go. The acid in vinegar will eat away at the stone’s natural finish, leading to costly repairs or refinishing. Stick to gentle, stone-safe cleaners, and your travertine pavers will stay beautiful for years to come.
How do professionals clean travertine pavers?
Travertine pavers bring natural warmth and elegance to outdoor spaces — from patios and pool decks to driveways and walkways. But to keep them looking their best, regular professional cleaning is key. Travertine is a porous, natural stone that requires care beyond a basic rinse. Here’s how professionals clean travertine pavers the right way.
1. Inspection and Preparation
Before any cleaning begins, professionals inspect the area to identify stains, mold, or surface damage. This step helps determine which cleaning method and products are safe to use. They’ll also remove outdoor furniture, sweep off debris, and check for any loose pavers that need resetting before pressure washing.
2. Gentle Pressure Washing
Professionals use low to medium pressure washers — typically under 1200 PSI — to avoid etching or eroding the stone surface. The water pressure loosens dirt, algae, and grime without damaging the travertine’s natural finish. Using the correct nozzle angle and distance is crucial; too close or too strong can permanently scar the stone.
3. pH-Neutral Cleaning Solutions
Unlike concrete or tile, travertine can’t handle acidic cleaners like vinegar, bleach, or muriatic acid. Professionals use pH-neutral or stone-specific detergents that lift oils, organic stains, and mildew safely. These cleaners are applied evenly and left to dwell for several minutes to break down buildup before being rinsed away.
4. Deep Scrubbing and Spot Treatment
For stubborn stains — such as rust, wine, or organic residue — pros apply specialized poultices or stone-safe degreasers. Soft-bristle brushes or rotary floor machines with non-abrasive pads are used to gently scrub the pavers. This ensures deep cleaning without dulling the natural polish or texture of the stone.
5. Rinsing and Drying
After cleaning, the entire area is thoroughly rinsed with clean water to remove any detergent or residue. Proper drainage is checked to prevent standing water, which can lead to mold growth. Once dry, a visual inspection ensures that no cleaning agents remain trapped in the pores of the stone.
6. Sealing for Long-Term Protection
After the surface dries completely, professionals typically apply a penetrating sealer designed for travertine. Sealing helps repel moisture, oil, and stains — extending the life and beauty of your pavers. Most experts recommend resealing every 1–2 years depending on sun exposure, foot traffic, and local climate.
Why Professional Cleaning Matters
While DIY cleaning can help maintain appearance, professional cleaning ensures your travertine pavers stay in top condition. Experts understand how to balance cleaning power with stone safety — preventing costly damage while enhancing the natural color and texture of the surface.
Keep Your Travertine Looking Timeless – How do professionals clean travertine pavers?
Regular professional maintenance protects your investment and keeps your outdoor spaces beautiful year-round. If your travertine pavers have lost their luster, a deep clean and reseal can make them look brand new again.
Are travertine pavers hard to install?
Travertine pavers are one of the most timeless and elegant materials you can use for patios, pool decks, and walkways. They bring a natural warmth and luxurious look that few materials can match. When it comes to installation, many homeowners wonder — are travertine pavers hard to install?
The short answer: not really, but hiring a professional is worth it.
Understanding Travertine Installation
Travertine pavers are typically installed over a compacted base of gravel and sand. The process involves leveling the ground, ensuring proper drainage, setting the pavers tightly together, and filling the joints with sand or polymeric material.
While the concept is simple, precision is key — even a small slope or uneven base can lead to shifting pavers or poor water runoff. Professionals use specialized tools like plate compactors, string lines, and laser levels to ensure long-term stability and a seamless finish.
DIY vs. Professional Installation
If you have experience with hardscaping projects and access to the right equipment, installing travertine yourself can be a rewarding project. However, for most homeowners, professional installation ensures better results and prevents costly mistakes.
A skilled installer will:
-
Create a proper base for drainage and stability.
-
Cut and fit pavers perfectly around curves and edges.
-
Prevent uneven settling and cracking over time.
-
Apply sealers correctly to protect against moisture and stains.
The end result? A flawless, long-lasting outdoor space that looks like it belongs in a high-end resort.
Final Thoughts – Are travertine pavers hard to install?
Travertine pavers aren’t hard to install — they just require precision and experience. If you want a beautiful finish that stands the test of time, hiring a professional installer is the best investment you can make.
How do I permanently get rid of weeds between travertine pavers?
Travertine pavers add timeless beauty to patios, pool decks, and walkways — but nothing spoils the look faster than weeds sprouting through the joints. These stubborn plants can push through tiny gaps, displace sand, and even stain the stone over time. If you’re tired of constantly pulling weeds, here’s how to get rid of them permanently while keeping your travertine looking elegant.
1. Remove Existing Weeds Completely
Start by eliminating any weeds that are already growing between your pavers.
-
Pull by hand – For light growth, remove weeds by hand or use a thin weeding tool to pull them from the roots.
-
Use boiling water or vinegar – Pouring boiling water or a vinegar-based solution over the cracks kills small weeds naturally without chemicals.
-
Apply a targeted herbicide – For deeper roots, use a selective, non-staining herbicide labeled safe for natural stone. Avoid overspray that could discolor your travertine.
2. Refill and Compact the Joints
Once the weeds are gone, focus on what’s underneath. Weeds thrive in loose, unsealed sand.
-
Clean out old joint material with a pressure washer or stiff broom.
-
Refill with polymeric sand, not regular sand — this special sand hardens when wet, creating a semi-solid barrier that prevents new weeds and ants.
-
Compact the joints with a broom or plate compactor, and lightly mist with water to activate the polymeric sand.
3. Apply a Travertine Sealer
Sealing your travertine not only enhances its color but also protects against moisture, dirt, and weed growth.
-
Use a penetrating sealer formulated for natural stone.
-
Apply it evenly over the surface and between the joints using a roller or sprayer.
-
Reseal every 2–3 years for ongoing protection.
4. Maintain Regularly
Even with polymeric sand and sealer, maintenance matters.
-
Sweep debris off the surface weekly to prevent organic matter buildup.
-
Rinse occasionally with mild soap and water to discourage weed seeds from settling.
-
Check joints annually — if sand loosens, top it up before weeds take hold.
5. Optional: Use Landscape Fabric (For New Installations)
If you’re installing travertine pavers from scratch, adding a landscape fabric layer beneath the base material can make a huge difference. It blocks weed roots from reaching the surface while still allowing proper drainage.
Final Thoughts – How do I permanently get rid of weeds between travertine pavers?
Weeds between travertine pavers can seem relentless, but with the right approach — full removal, polymeric sand, sealing, and simple maintenance — you can enjoy a clean, weed-free outdoor space for years to come.
If you’re refreshing your patio or pool deck, explore Marbellezza’s collection of premium travertine pavers, available in tumbled and honed finishes, perfect for both classic and modern designs.
How to tell if travertine is good quality?
Travertine is one of the most timeless and elegant natural stones used for flooring, countertops, pool decks, and outdoor patios. But not all travertine is created equal. The quality can vary significantly depending on its grade, finish, and origin. Knowing how to tell the difference between high-quality and low-quality travertine can help you make a smarter investment and avoid issues like cracking, discoloration, or uneven surfaces later on.
1. Check for Consistent Color and Veining
High-quality travertine has a uniform color tone throughout the tile or slab. While natural variations are expected, the overall hue should be consistent across pieces from the same batch.
-
Poor-quality travertine often shows dramatic color inconsistencies, muddy undertones, or abrupt streaks.
-
Look for balanced veining—good travertine displays soft, natural movement, not chaotic blotches.
2. Inspect the Surface Fillings
Travertine naturally forms with small holes and pores. To create a smooth surface, these voids are filled with resin or cement.
-
Premium travertine will have even, durable, and well-matched fillings that blend seamlessly with the stone.
-
Lower-quality travertine often has poorly matched or crumbling fillers that can fall out over time, leaving pits and weak spots.
3. Feel the Density and Weight
Denser travertine is stronger, more durable, and less porous.
-
Pick up a piece—heavier tiles generally indicate higher density, meaning the stone will absorb less water and resist cracking.
-
Lower-density travertine feels lighter and chalkier, which can lead to structural weakness, especially outdoors.
4. Examine the Edges and Cutting Precision
Precision cutting and smooth edges are a clear sign of professional fabrication.
-
High-quality travertine will have clean, square edges that align well during installation.
-
Cheap or mass-produced tiles often show chipped, uneven, or rough edges, which cause irregular grout lines and poor fits.
5. Check the Finish Quality
Travertine comes in several finishes—polished, honed, tumbled, and brushed.
-
A quality finish should be evenly applied and consistent in sheen across the surface.
-
Inconsistent polishing or dull patches are indicators of rushed processing or poor factory control.
6. Consider the Grade
Travertine is typically categorized into three grades:
-
Premium (First Grade): Uniform color, minimal holes, consistent thickness.
-
Standard (Second Grade): Some variation in color and filling but still structurally sound.
-
Commercial (Third Grade): Significant holes, color inconsistency, and possible structural imperfections.
If you’re installing travertine in a high-traffic or outdoor area, premium or standard grades are worth the investment for long-term durability.
7. Ask About Origin and Sourcing
Travertine is quarried around the world—Italy, Turkey, Mexico, and the U.S. are top producers.
-
Italian and Turkish travertine are often considered superior due to strict quarrying standards and better selection processes.
-
Reliable suppliers will always disclose the origin and grade certification of their stone.
8. Perform a Water Absorption Test
A quick way to test porosity: place a few drops of water on the surface.
-
If it absorbs slowly, it’s dense and high-quality.
-
If it darkens immediately, it’s more porous and likely to stain or deteriorate faster.
Final Thoughts – How to tell if travertine is good quality?
Good quality travertine should feel dense, balanced, and naturally beautiful—not brittle or patchy. Always buy from a trusted supplier who can guarantee grade consistency and proper sealing. When properly sourced and maintained, premium travertine can last for decades, adding timeless elegance to your home or outdoor space.

What is the best way to clean outdoor travertine pavers?
Travertine pavers are one of the most elegant and durable choices for outdoor spaces. Their natural stone texture adds luxury to patios, pool decks, and walkways. However, keeping them clean requires a gentle and proper approach — since travertine is a porous stone that can be damaged by harsh chemicals or abrasive cleaning methods. Here’s how to clean your outdoor travertine pavers the right way.
1. Start with a Gentle Sweep or Rinse
Begin by removing surface debris such as leaves, dirt, and dust. Use a soft-bristle broom or a leaf blower to prevent scratches. Then, rinse the area with a garden hose to loosen any remaining dirt. Avoid using high-pressure water directly on the stone joints, as it can erode the grout or sand between pavers.
2. Use a Mild, pH-Neutral Cleaner
The best cleaning solution for travertine is a pH-neutral stone cleaner mixed with warm water. Avoid acidic cleaners like vinegar, lemon juice, or bleach — they can etch and dull the surface.
-
Mix the cleaner according to the product directions.
-
Apply it evenly across the pavers using a mop or soft brush.
-
Let it sit for a few minutes to break down grime, but don’t let it dry on the surface.
3. Lightly Scrub and Rinse
Use a soft-bristle brush or mop to gently scrub the surface. Focus on stained or heavily soiled areas, but never use wire brushes or anything abrasive.
Once finished, rinse the area thoroughly with clean water to remove all cleaning residue. Allow the pavers to air dry completely.
4. Address Stains Promptly
If you have stains from oil, food, or rust, treat them quickly:
-
Oil stains: Use a poultice or stone-safe degreaser.
-
Rust stains: Try a stone-approved rust remover.
-
Organic stains (leaves, food, etc.): Use hydrogen peroxide mixed with baking soda (for light stains only).
Always test any product on a small, hidden area first.
5. Seal the Pavers Regularly
Sealing travertine every 1–2 years helps protect against stains, mold, and moisture absorption. Choose a penetrating, breathable sealer made specifically for natural stone.
-
Clean the pavers first and allow them to dry.
-
Apply the sealer evenly using a sprayer or roller.
-
Avoid walking on the surface until it’s fully dry.
6. Maintain with Routine Care
Keep your travertine looking great with consistent upkeep:
-
Sweep or rinse weekly to prevent buildup.
-
Reapply sealer as needed.
-
Clean spills right away to avoid staining.
Final Tip – What is the best way to clean outdoor travertine pavers
Travertine is durable but delicate — treat it with care. Avoid power washers, acidic cleaners, and abrasive tools. With regular maintenance and proper products, your outdoor travertine pavers will stay beautiful and long-lasting for years to come.

How to care for outdoor travertine pavers?
Travertine pavers bring timeless beauty and natural character to outdoor spaces — from patios and walkways to pool decks and driveways. But to keep them looking their best, they require a little regular care. With the right maintenance routine, your travertine can last for decades while retaining its classic, luxurious look.
1. Sweep and Rinse Regularly
Outdoor travertine collects dust, leaves, and debris that can dull its surface over time.
-
Sweep or blow debris off the surface once or twice a week.
-
Rinse with a garden hose to remove dirt and prevent buildup in the pores.
Avoid using high-pressure washers directly on the stone, as they can erode the natural texture and dislodge sand from the joints.
2. Clean with a pH-Neutral Stone Cleaner
Travertine is a natural limestone material, which means it’s sensitive to acidic or harsh chemicals.
-
Use pH-neutral cleaners specifically made for natural stone.
-
Avoid vinegar, bleach, or citrus-based products — they can etch or discolor the surface.
-
For deep cleaning, dilute the stone cleaner in water, mop the area, and rinse thoroughly.
3. Reseal Every 1–2 Years
Sealing is essential to protect travertine from stains, moisture, and fading.
-
Apply a penetrating sealer designed for travertine or other porous stones.
-
Outdoor pavers exposed to sun and rain should typically be resealed every 12–24 months, depending on climate and foot traffic.
-
When water stops beading on the surface, it’s time to reseal.
4. Maintain the Joints
The joints between travertine pavers are often filled with polymeric or sand-based material.
-
Check joints for erosion or gaps once or twice a year.
-
Refill with polymeric sand if needed to prevent weed growth and shifting.
-
Ensure proper drainage to avoid standing water between pavers.
5. Remove Stains Promptly
Travertine is naturally porous and can absorb liquids if not sealed properly.
-
Blot spills immediately — especially oils, wine, or acidic drinks.
-
For stains, use a stone poultice or a mild baking soda paste, but test in a small area first.
-
Avoid scrubbing pads or steel wool, which can scratch the surface.
6. Protect High-Traffic and Pool Areas
If your travertine is installed around a pool or a high-traffic patio:
-
Use outdoor mats or area rugs to reduce wear.
-
Rinse off pool chemicals that splash onto the stone — chlorine can cause long-term discoloration.
-
Choose tumbled travertine for slip resistance and a natural grip underfoot.
7. Handle Seasonal Weather
Travertine holds up well in heat, but freezing conditions require extra care.
-
In cold regions, ensure proper drainage beneath the pavers to prevent freeze-thaw damage.
-
Avoid salt-based de-icers — they can corrode the stone. Opt for sand or non-corrosive alternatives instead.
Keep Your Travertine Beautiful for Years
With simple maintenance — regular cleaning, sealing, and mindful care — your outdoor travertine pavers can maintain their rich, natural look for decades. Their durability and elegance make them one of the best choices for patios, pool decks, and pathways, offering both timeless beauty and lasting performance.
Where to not use travertine pavers?
Travertine pavers are a timeless and elegant choice for many outdoor projects — from patios and pool decks to garden walkways. However, like all natural stones, they have their limits. Knowing where not to use travertine can save you from maintenance headaches, damage, and costly replacements down the line.
Here are a few key areas and situations where travertine pavers might not be the best fit:
1. Freezing or Harsh Winter Climates
Travertine is porous, meaning it can absorb water. In areas where freezing temperatures are common, that absorbed moisture can expand when frozen — leading to cracks, chips, and surface erosion.
Tip: If you live in a freeze-thaw region, avoid using travertine outdoors unless it’s sealed properly and installed with excellent drainage.
2. High-Traffic Commercial Areas
Travertine is durable, but not indestructible. In commercial zones like shopping centers, public walkways, or parking lots, heavy foot traffic, carts, or vehicles can cause wear and surface dulling over time.
For these areas, consider porcelain pavers or concrete alternatives that offer greater resistance to abrasion and impact.
3. Driveways or Heavy Load Surfaces
While travertine pavers can support foot traffic and light patio furniture, they’re not ideal for bearing the weight of vehicles. The constant pressure and movement can cause cracking and uneven settling.
Stick to reinforced concrete or thicker natural stones (at least 2.5 inches thick) for driveways and similar applications.
4. Unsealed Indoor Wet Areas
In bathrooms, laundry rooms, or kitchens, travertine can become slippery when wet and is susceptible to staining from soaps, detergents, and acidic products.
If you want a natural look indoors, use honed and sealed travertine tiles instead of outdoor pavers — or choose non-porous alternatives like porcelain.
5. Poorly Drained or Muddy Soil
Travertine performs best when installed on a solid, well-drained base. If laid over soft or water-retaining soil, it can shift, sink, or develop algae and mildew due to constant moisture.
Always use a compacted gravel base and ensure proper water runoff grading before installation.
6. Acidic or Chemical-Exposed Areas
Travertine reacts with acids — including vinegar, citrus, wine, and pool chemicals. For that reason, avoid using it in outdoor kitchen areas, near BBQs, or chemical storage spaces where spills are likely.
Over time, acids can etch and dull the stone’s surface, leaving permanent marks.
7. Shady, Damp Areas Prone to Moss
If your yard has shaded corners that stay damp, travertine can develop slippery moss or mildew buildup.
You can minimize this with regular cleaning and sealing, but if maintenance is a concern, you may want to opt for materials like textured porcelain or slip-resistant concrete.
Final Thoughts – Where to not use travertine pavers?
Travertine pavers are stunning and long-lasting when used in the right environments — sunny patios, pool surrounds, and garden paths. However, avoiding the conditions above will help preserve their natural beauty and prevent structural issues.
When in doubt, consult a stone specialist or your installer to confirm whether travertine is suitable for your specific climate and site conditions.
How long do travertine pavers last?
When choosing materials for your outdoor space, durability is one of the most important factors. Travertine pavers have long been a favorite for patios, pool decks, walkways, and driveways thanks to their timeless beauty and natural strength. But just how long do travertine pavers last? The short answer: decades—if not a lifetime—when properly installed and maintained.
Natural Durability of Travertine
Travertine is a natural stone formed over thousands of years by mineral deposits around hot springs. Its dense structure makes it exceptionally resilient to wear and tear. Unlike manufactured pavers that may fade or crack over time, travertine holds up well against heavy foot traffic, weather changes, and even poolside environments.
With routine care, travertine pavers can last 30 to 100 years or more, often outlasting the home or landscape they’re installed in. In fact, many ancient Roman structures built from travertine are still standing today, showcasing just how durable this stone can be.
Factors That Influence Lifespan
While travertine is naturally long-lasting, several factors determine how well your pavers age:
-
Installation Quality – Proper base preparation, leveling, and sealing can dramatically extend their lifespan. Poor installation may lead to shifting or cracking.
-
Climate – Travertine performs exceptionally well in hot, sunny climates because it stays cool underfoot. In freeze-thaw regions, sealing and drainage become critical to prevent cracking.
-
Maintenance – Simple upkeep such as sweeping, rinsing, and resealing every few years helps protect against stains, erosion, and fading.
-
Usage – Driveway installations endure more pressure than backyard patios, but with the right thickness and base, travertine can handle both.
Low-Maintenance Beauty That Lasts
Travertine doesn’t just last—it ages gracefully. Over time, it develops a natural patina that adds to its charm without losing its strength. Regular sealing keeps colors vibrant and protects against water absorption, while simple cleaning keeps the surface fresh.
Why Travertine is a Long-Term Investment
While travertine pavers may have a higher upfront cost than concrete or brick alternatives, their longevity makes them a cost-effective choice. Instead of replacing faded, cracked, or worn-out pavers every 10–15 years, you can enjoy the same set of travertine pavers for decades with minimal upkeep.
Final Thoughts
So, how long do travertine pavers last? With proper installation and care, you can expect them to endure for generations. Whether used around a pool, in a backyard patio, or as a grand driveway entrance, travertine pavers combine natural beauty with exceptional longevity—making them one of the best investments for your outdoor spaces.
Are travertine pavers good for a backyard?
When it comes to designing an inviting and long-lasting backyard, choosing the right paving material is one of the most important decisions. Homeowners often ask: are travertine pavers good for a backyard? The answer is yes—travertine is one of the best options for outdoor spaces thanks to its timeless look, durability, and functional benefits.
Natural Beauty That Elevates Any Space
Travertine has a warm, earthy elegance that instantly enhances backyard patios, pool decks, and garden walkways. Its unique veining and natural color variations—ranging from ivory and beige to walnut and silver—create a high-end aesthetic that feels both sophisticated and organic. Unlike manufactured pavers, no two pieces are alike, which adds character to your outdoor retreat.
Cool Underfoot in Hot Weather
One of the standout advantages of travertine pavers is that they remain cooler underfoot compared to concrete, brick, or many other natural stones. This makes them especially ideal for pool areas and sun-exposed patios where comfort matters most. Even on hot summer days, your backyard stays usable and inviting.
Slip-Resistant and Durable
Travertine’s naturally textured surface provides excellent slip resistance, making it a safer choice for areas that get wet, such as around pools or outdoor kitchens. Beyond safety, it’s also known for long-lasting strength. With proper installation and minimal upkeep, travertine pavers can withstand heavy foot traffic, weather changes, and years of outdoor use.
Versatile Design Options
Travertine pavers come in a variety of finishes (tumbled, honed, brushed, and chiseled) and sizes, allowing for countless design patterns—from French patterns for a classic European look to sleek rectangular layouts for modern spaces. Whether you’re aiming for a rustic backyard escape or a contemporary entertainment area, travertine adapts beautifully.
Adds Value to Your Home
Because travertine pavers combine beauty with durability, they’re often seen as a premium feature that increases property value. Investing in this timeless stone not only enhances your backyard lifestyle but can also make your home more attractive to future buyers.
Conclusion – Are travertine pavers good for a backyard?
Travertine pavers are more than just a stylish choice—they’re a practical, durable, and comfort-focused solution for backyard spaces. From staying cool under the sun to adding timeless charm, they check all the boxes for homeowners looking to create a functional and beautiful outdoor area.
Transform your backyard with travertine pavers and enjoy a space that’s both elegant and enduring.

What should you not use on travertine pavers?
Travertine pavers bring timeless beauty and natural elegance to patios, pool decks, walkways, and driveways. Their durability and unique texture make them a popular choice for homeowners and designers alike. But while travertine is strong, it’s also a porous natural stone that requires proper care. Using the wrong cleaning methods or products can cause permanent damage.
If you want your travertine pavers to stay beautiful for years to come, here’s what you should never use on them:
1. Acidic Cleaners (Vinegar, Lemon Juice, Citrus-Based Products)
Travertine is a type of limestone, which means it’s highly sensitive to acids. Even mild acidic solutions like vinegar or lemon juice can etch the surface, leaving dull spots, discoloration, or rough patches. This kind of damage is permanent and can only be repaired with professional resurfacing.
2. Harsh Chemicals (Bleach, Ammonia, Muriatic Acid)
Strong chemicals can weaken travertine’s structure, discolor the stone, and strip away any protective sealants. Muriatic acid, sometimes used for concrete cleaning, is especially destructive and can eat away at the stone’s surface.
3. Abrasive Cleaners and Tools
Avoid using scouring powders, steel wool, or stiff wire brushes. These can scratch travertine’s smooth surface and open its pores, making it more vulnerable to stains and moisture. Always use soft cloths, mops, or non-abrasive brushes designed for natural stone.
4. Pressure Washers on High Settings
While light pressure washing can sometimes be safe, setting the washer too high can chip edges, erode the stone, and loosen grout or sand between pavers. If you must pressure wash, keep the setting low and the nozzle at a safe distance.
5. Generic Household Soap and Detergents
Many common cleaning products contain additives, fragrances, or hidden acidic ingredients that aren’t stone-safe. Over time, they can dull travertine’s natural finish or leave behind residues that attract more dirt. Always look for cleaners specifically labeled as safe for natural stone.
How to Clean Travertine Pavers Safely – What should you not use on travertine pavers?
Instead of harsh products, stick to:
-
pH-neutral stone cleaners designed for travertine and other natural stones
-
Warm water and a soft mop or cloth for quick cleanups
-
Stone-safe sealants to protect against stains and weather damage
By using the right cleaning methods, you’ll protect your investment and keep your travertine pavers looking beautiful for years to come.
✅ Key Takeaway: Never use acids, harsh chemicals, abrasives, or high-pressure water on travertine pavers. Stick to gentle, pH-neutral solutions made for natural stone to preserve both beauty and durability.
What do you put in between travertine pavers to lock them in?
Travertine pavers are a timeless choice for patios, walkways, and pool decks. Their natural beauty and durability make them a favorite for homeowners and designers alike. But once the pavers are set, the question often arises. What do you put in between travertine pavers to lock them in and keep them stable?
The answer lies in choosing the right joint material. Let’s break down the best options and what they do for your installation.
1. Polymeric Sand
Polymeric sand ranks among the most popular materials for filling spaces between pavers. Manufacturers mix fine sand with polymer additives, and when you activate it with water, it hardens to form a strong bond.
Benefits:
-
Locks pavers in place, preventing shifting.
-
Minimizes weed growth.
-
Reduces ant infestations.
-
Helps prevent erosion of joints.
Polymeric sand is ideal for outdoor spaces that see heavy use, like driveways, patios, and pool decks.
2. Regular Jointing Sand
Traditional jointing sand is a simpler option. It’s swept into the joints and helps fill gaps, but unlike polymeric sand, it doesn’t harden.
Benefits:
-
More budget-friendly.
-
Easy to install or reapply if it washes away.
-
Works well for areas with lighter traffic.
Keep in mind that jointing sand may require more frequent maintenance
3. Mortar or Grout (for Tighter Installs)
In some cases, especially for formal designs or indoor/outdoor transitions, mortar or grout can be used.
Benefits:
-
Creates a more permanent, seamless finish.
-
Reduces movement and shifting.
-
Provides a polished look.
However, grout or mortar is less flexible than sand. For outdoor areas where pavers expand and contract with temperature changes, it can be prone to cracking.
4. Grass or Decorative Ground Cover
For a more natural or rustic look, some homeowners choose to fill joints with grass, moss, or creeping ground covers.
Benefits:
-
Softens the look of the stone.
-
Adds greenery and texture.
-
Environmentally friendly option.
This approach requires more upkeep, but it can create a unique, organic aesthetic.
Choosing the Right Option – What do you put in between travertine pavers to lock them in?
The best joint filler for your travertine pavers depends on your goals:
-
Durability & low maintenance → Polymeric sand.
-
Budget-friendly, easy fix → Regular jointing sand.
-
Formal, permanent look → Mortar or grout.
-
Natural, rustic charm → Grass or ground cover.
By choosing the right filler, you not only lock your travertine pavers in place but also protect them against weeds, erosion, and shifting—ensuring your outdoor space remains beautiful and functional for years to come.
Does vinegar clean travertine pavers?
Travertine pavers are a timeless choice for patios, pool decks, and walkways thanks to their natural beauty and durability. When it comes to cleaning, however, homeowners often ask: Can I use vinegar on travertine pavers?
The short answer is no—vinegar should never be used to clean travertine.
Why Vinegar Is Harmful to Travertine
Travertine is a type of natural stone composed largely of calcium carbonate. Vinegar, being acidic, reacts with calcium carbonate and causes etching—a chemical burn that leaves dull, discolored, or rough patches on the stone surface. What may start as a simple cleaning attempt can quickly lead to permanent damage that requires costly restoration.
What to Use Instead
Instead of vinegar or other acidic cleaners (like lemon juice, ammonia, or bleach), opt for safer alternatives:
-
Stone-Safe Cleaners: Use pH-neutral cleaners specifically designed for natural stone.
-
Warm Water and Mild Soap: A few drops of a gentle dish soap mixed with water can handle everyday dirt.
-
Pressure Washing (Carefully): Low to medium pressure washing can help with stubborn dirt, as long as the stone is sealed.
Best Practices for Maintaining Travertine Pavers
-
Seal Regularly: Sealing your travertine helps protect against stains and makes cleaning easier.
-
Sweep Often: Regular sweeping prevents dirt and debris from scratching the surface.
-
Blot Spills Immediately: Especially with acidic liquids like wine, juice, or soda, which can etch the stone just like vinegar.
Final Thoughts – Does vinegar clean travertine pavers?
While vinegar is often recommended as an all-natural household cleaner, it is not safe for travertine pavers. The acidic nature of vinegar can permanently damage your stone. To keep your travertine looking its best, stick with pH-neutral cleaners and routine maintenance.
What travertine pavers do not get hot in the sun?
Travertine is one of the most popular natural stone choices for outdoor patios, pool decks, and walkways—and for good reason. Not only is it beautiful and durable, but it also stays cooler underfoot compared to many other paving materials. However, not all travertine pavers react the same way to heat. The color you choose can make a big difference in how hot (or cool) the surface feels in direct sunlight.
Why Color Matters
Just like clothing or roofing materials, darker colors absorb more heat while lighter colors reflect it. This same principle applies to travertine pavers. A dark walnut or espresso travertine will soak up sunlight and feel warmer, whereas a light ivory or beige travertine will stay noticeably cooler.
For areas with heavy sun exposure—such as pool decks or open patios—lighter travertine is the better choice for comfort and usability.
Light-Colored Travertine Pavers That Stay Cooler
Here are a few options that typically remain cooler in the sun:
-
Ivory Travertine – Soft cream and off-white tones make this one of the coolest travertine options underfoot.
-
Light Beige Travertine – Warm but pale shades reflect more sunlight, reducing surface heat.
-
Shell Stone Travertine – A very light, sandy look that naturally deflects heat.
-
Silver Travertine (lighter variations) – Some silver travertine has pale gray and cream tones that stay cooler than darker batches.
Ideal for Pool Decks and Outdoor Living
If you’re planning to install travertine around a pool, lighter colors are almost always recommended. Not only do they resist heat, but they also brighten the outdoor space and give it a more open, elegant look. Plus, cooler pavers reduce the risk of burnt feet on hot summer days—something families and pets will appreciate.
Final Thoughts – What travertine pavers do not get hot in the sun?
Travertine pavers are already one of the most heat-resistant natural stone choices, but if staying cool in the sun is a top priority, go with light-colored options like ivory, beige, or shell stone. They provide all the durability and elegance of travertine while ensuring your outdoor space is comfortable, even in the peak of summer.
Can you use Oxiclean on travertine pavers?
Travertine pavers are a popular choice for patios, pool decks, and walkways thanks to their timeless beauty and natural durability. But like any natural stone, they need proper care to stay in good shape. A common question homeowners ask is: Can I use OxiClean on my travertine pavers to remove stains?
The short answer: No, you should avoid using OxiClean on travertine pavers.
Why OxiClean Isn’t Safe for Travertine
OxiClean is an oxygen-based cleaner that works well on laundry and some household surfaces, but it is not designed for natural stone. Travertine is a calcium carbonate-based stone, which means it’s sensitive to acidic and abrasive products. Using OxiClean or similar cleaners can:
-
Etch the surface – breaking down the stone and leaving dull spots.
-
Weaken the structure – repeated use can slowly damage the stone.
-
Alter the finish – polished or honed travertine can lose its natural sheen.
Safe Alternatives for Cleaning Travertine Pavers
Instead of OxiClean, use products and methods that are stone-safe:
-
Mild soap and water – A neutral pH dish soap mixed with warm water works for routine cleaning.
-
Stone-safe cleaners – Choose a cleaner specifically labeled for natural stone and pavers.
-
Soft brushes – Use a non-abrasive brush to scrub away dirt without scratching.
-
Pressure washing (with care) – On a low setting, it can help clean larger areas without chemicals.
Preventing Stains on Travertine
To minimize deep cleaning in the first place:
-
Seal your pavers regularly (every 1–2 years depending on use).
-
Wipe spills quickly, especially oils, wine, or acidic substances.
-
Sweep and rinse often to prevent dirt and debris buildup.
Final Thoughts – Can you use Oxiclean on travertine pavers?
While OxiClean may seem like a convenient solution, it’s too harsh for natural stone like travertine. Protect your investment by sticking to pH-neutral, stone-safe products, and your pavers will continue to look beautiful for years to come.
If you’re dealing with stubborn stains or need professional sealing, consider reaching out to a stone care specialist to ensure your travertine stays in top condition.
Should you fill travertine paver holes?
Travertine is one of the most popular natural stones for patios, pool decks, and walkways. Its timeless beauty, cool-to-the-touch surface, and unique textures make it a favorite for outdoor spaces. But one question homeowners often ask is: should you fill the natural holes in travertine pavers?
Why Travertine Has Holes
Travertine forms naturally from mineral deposits, which creates its signature porous texture. These small holes and pits give travertine its rustic, earthy look. Some pavers are sold “unfilled” (holes left open), while others come “filled” (holes smoothed with resin or cement).
Pros of Leaving Holes Unfilled
-
Natural Look: Unfilled travertine maintains an authentic, old-world charm.
-
Slip Resistance: The tiny holes create grip, making unfilled travertine less slippery when wet—perfect for pool areas.
-
Breathability: Leaving holes open allows water to drain naturally, reducing the risk of surface damage from trapped moisture.
Cons of Leaving Holes Unfilled
-
Dirt and Debris: The holes can collect dust, leaves, or sand, making maintenance harder.
-
Insects and Weeds: In outdoor settings, small gaps may become spots for ants or tiny weeds to settle.
-
Comfort: Bare feet or patio furniture legs may catch in larger holes, which some homeowners find bothersome.
Benefits of Filling Travertine Holes
-
Smooth Finish: Filling the holes creates a more polished, modern look.
-
Easier Cleaning: With fewer crevices, sweeping and washing become simpler.
-
Durability: Filling helps protect against erosion and reduces the chances of cracks forming from water penetration.
Should You Fill Them?
The choice depends on your design goals and lifestyle needs:
-
If you love a rustic, Mediterranean feel, leave the holes unfilled.
-
If you prefer a sleeker, low-maintenance surface, filling the holes may be the better option.
-
For high-traffic areas (like patios with lots of furniture), filling can prevent damage over time.
Final Recommendation – Should you fill travertine paver holes?
There’s no wrong answer—it comes down to personal preference and function. Many homeowners choose a hybrid approach: filling larger holes while leaving smaller ones natural. No matter your choice, regular sealing is essential to protect travertine from stains, weather, and wear.
Does travertine pavers get hot in the sun?
When choosing outdoor pavers, especially for patios, pool decks, and walkways, one of the most common concerns is whether the surface will become uncomfortably hot under the sun. Travertine pavers are a popular natural stone choice, but how do they perform in warm weather?
Natural Cooling Properties
Travertine is a type of limestone formed by mineral springs, and one of its biggest advantages is its natural ability to stay cooler than many other paving materials. Unlike concrete, brick, or darker stones, travertine has a porous structure that allows it to absorb moisture and release heat more efficiently. This makes it a preferred option around swimming pools, where barefoot comfort is a must.
Color and Finish Matter
While travertine generally stays cooler than many alternatives, the exact temperature can vary based on the color and finish you choose:
-
Light colors (such as ivory, beige, and cream) reflect sunlight better and remain cooler.
-
Darker colors (like walnut or silver) may absorb more heat and feel warmer to the touch.
-
Tumbled and unpolished finishes are also less likely to heat up compared to polished surfaces, which can retain and reflect more heat.
Comparison With Other Materials
-
Concrete pavers: Typically absorb and hold more heat, making them uncomfortable in direct sunlight.
-
Brick pavers: Tend to get hotter than travertine and can be hard to walk on without shoes.
-
Granite or porcelain: These can become much warmer than travertine under the same conditions.
Best Practices for Comfort
If you want to maximize the cooling benefits of travertine pavers:
-
Opt for lighter shades for sun-exposed areas.
-
Use tumbled finishes for both comfort and slip-resistance.
-
Install travertine in areas where it can occasionally get wet (like near a pool) to keep it naturally cool.
Final Answer – Does travertine pavers get hot in the sun?
Yes, travertine pavers can get warm in the sun, but compared to other hardscaping options, they remain noticeably cooler and more comfortable. With the right color and finish, travertine is one of the best natural stone choices for sunny outdoor spaces, especially if you’re looking for a barefoot-friendly surface.
Should I hire a pro to cut my travertine pavers?
When planning a patio, walkway, pool deck, or any outdoor project with travertine pavers, one question almost always comes up: Should I cut the pavers myself or hire a professional? While the DIY route might seem tempting, the truth is that cutting travertine is a job best left to the pros. Here’s why.
Travertine Is Beautiful—But Tricky to Work With
Travertine is a natural stone, meaning no two pavers are exactly alike. Each piece comes with unique veining, textures, and density. Cutting through this material requires more than just a standard saw—it demands specialized equipment like a wet saw with a diamond blade, which many homeowners don’t have on hand. Without the right tools and skill, the stone can easily chip, crack, or break.
Precision Matters in Outdoor Projects
When laying pavers, every cut has to be precise. Even a slight miscut can throw off the alignment of your entire design. Professionals know how to measure accurately, handle edge cuts, and make adjustments that keep your pattern consistent and visually appealing. A small mistake might not seem like a big deal at first—but once the whole patio or walkway is laid out, it becomes very noticeable.
Save Time and Reduce Waste
Cutting stone isn’t just about skill—it’s about efficiency. Professionals work quickly and minimize waste by getting the cut right the first time. If you attempt it yourself, you may end up wasting expensive pavers through trial and error. Hiring a pro ensures the job is done right, on time, and without unnecessary costs.
Safety Considerations
Travertine dust is harmful to breathe in, and cutting stone can send sharp fragments flying. Pros use protective gear, proper ventilation, and safe cutting techniques to reduce risk. Choosing to handle it yourself without the right safety precautions could result in injury or long-term health issues.
The Bottom Line – Should I hire a pro to cut my travertine pavers?
While it may be tempting to DIY your travertine paver cuts to save money, hiring a professional is the smarter move. You’ll also get cleaner cuts, a more polished finish, and peace of mind knowing your investment in natural stone is being handled correctly.
So yes—hire a pro to cut your travertine pavers. It’s worth it for the beauty, durability, and value of your project.
What color is pure travertine?
Travertine is one of the most timeless and elegant natural stones used in architecture and design. Its beauty lies in its soft, earthy tones and unique patterns. But many people wonder—what color is pure travertine?
The Natural Hue of Travertine
In its most natural and unaltered form, travertine is typically a light beige to cream color. This soft neutral tone comes from the stone’s calcium carbonate composition, formed over centuries by mineral-rich hot springs and limestone deposits. Pure travertine has a clean, uniform look, free from heavy veining or dramatic variations.
Why the Color Varies
While pure travertine is light beige, the stone is rarely found in a single shade. The presence of minerals like iron, sulfur, and organic matter during its formation can introduce a range of tones, including:
-
Ivory or White – Subtle, clean tones often used in modern spaces.
-
Silver or Gray – Cooler shades created by mineral content.
-
Gold or Walnut – Warmer tones with hints of yellow, tan, or brown.
These variations are what give travertine its distinctive character and allow designers to match it with different styles.
Finishes and Their Impact on Color
The finish applied to travertine can also influence its appearance:
-
Polished travertine enhances the stone’s color, making it slightly darker and shinier.
-
Honed (matte) travertine keeps the color soft and natural.
-
Tumbled travertine often appears more rustic and muted due to its textured surface.
Conclusion – What color is pure travertine?
Pure travertine is best described as a light beige or creamy neutral, offering a versatile base that blends beautifully with many design styles. However, part of its charm is the range of warm and cool variations created by nature, making every piece of travertine unique.
What not to use on travertine pavers?
Travertine pavers are a timeless choice for patios, pool decks, walkways, and driveways. Their natural beauty and durability make them a favorite among homeowners and designers. However, travertine is a porous natural stone that requires the right care. Using the wrong products can permanently damage the surface, dull the finish, or weaken the stone’s integrity. If you want your investment to last, it’s just as important to know what not to use on travertine as it is to know the right maintenance routine.
1. Harsh Acidic Cleaners
One of the biggest mistakes people make is cleaning travertine with acidic solutions like vinegar, lemon juice, or bleach. These can etch the surface, leaving dull spots and rough patches. Even some “all-purpose” or bathroom cleaners contain acids that will eat away at the stone’s natural finish.
Tip: Always stick to pH-neutral stone cleaners that are specifically designed for natural stone surfaces.
2. Abrasive Scrub Brushes or Pads
Travertine may look tough, but it scratches easily. Avoid using steel wool, wire brushes, or rough scouring pads. These can leave permanent scratches and make the stone more vulnerable to staining.
Tip: Use soft microfiber cloths or non-abrasive brushes for scrubbing.
3. Pressure Washers at High PSI
While pressure washers are commonly used outdoors, blasting travertine with too much force can cause chipping, cracking, or loosening of the pavers. High PSI settings can also erode grout and sealant.
Tip: If you do use a pressure washer, keep it at a low PSI (under 1200) and use a wide spray nozzle.
4. Harsh Chemicals and Solvents
Avoid products like ammonia, bleach, or paint removers. These chemicals not only discolor the stone but can also weaken its structural integrity. Over time, repeated use will cause the stone to lose its natural luster.
Tip: If you need to remove a tough stain, use a poultice or a stone-safe spot treatment recommended for travertine.
5. Salt and Ice-Melt Products
In colder climates, many people use rock salt or chemical ice melts on walkways. Unfortunately, these products can seep into the pores of travertine and cause pitting, flaking, and long-term damage.
Tip: Use sand or a stone-safe alternative for traction in icy conditions instead.
6. Wax or Oil-Based Polishes
It might be tempting to make travertine look shinier with waxes or oil-based products, but these can leave behind residue, attract dirt, and make the surface slippery.
Tip: If you want to enhance the stone’s look, use a penetrating sealer or enhancer made for natural stone.
Final Thoughts
Travertine pavers are a beautiful investment, but like all natural stone, they need the right care. By avoiding harsh cleaners, abrasives, and chemicals, you’ll preserve their beauty for years to come. Always choose products labeled safe for natural stone and when in doubt, test a small, hidden area before applying anything new.
Is travertine pavers ok outside?
Travertine has been a popular building material for thousands of years, admired for its natural beauty, durability, and timeless charm. But when it comes to using travertine pavers outdoors, many homeowners wonder: is it really a good choice for exterior spaces? The short answer is yes—travertine pavers are an excellent option for outdoor applications when installed and maintained properly.
Why Travertine Works Outdoors
-
Durability
Travertine is a natural stone formed through mineral deposits, making it dense and long-lasting. It can handle heavy foot traffic, outdoor furniture, and even vehicles when used in driveways. -
Slip-Resistance
The naturally textured surface of travertine provides excellent traction, especially when left unpolished. This makes it a safer choice for pool decks, patios, and pathways where surfaces may get wet. -
Heat Resistance
Unlike some other materials, travertine stays relatively cool under the sun. This makes it especially comfortable for bare feet around pools and lounging areas in hot climates. -
Timeless Aesthetic
With its warm tones and natural veining, travertine complements both traditional and modern outdoor designs. It blends seamlessly with gardens, water features, and architectural styles.
Considerations for Outdoor Use
-
Weather Resistance: Travertine performs well in warm and moderate climates, but in freeze-thaw regions, proper sealing and installation are crucial to prevent cracking.
-
Sealing: Sealing helps protect against stains, water penetration, and fading from UV rays. Depending on use and exposure, resealing may be needed every 1–3 years.
-
Maintenance: Regular cleaning with mild soap and water keeps travertine looking fresh. Avoid harsh chemicals, which can damage the stone’s surface.
Best Outdoor Applications
-
Pool decks
-
Patios
-
Walkways and garden paths
-
Outdoor kitchens
-
Driveways (with thicker pavers)
Final Thoughts – Is travertine pavers ok outside?
Travertine pavers are more than just “ok” for outdoor use—they’re one of the best choices if you’re looking for a natural stone that combines elegance, functionality, and comfort. With proper sealing and maintenance, travertine can withstand outdoor conditions for decades, offering a luxurious look that never goes out of style.
Should I seal my travertine pavers every year?
Travertine pavers are a timeless choice for outdoor spaces, known for their natural beauty, durability, and ability to stay cool underfoot. But one of the most common questions homeowners ask is: “Should I seal my travertine pavers every year?”
The short answer is: not always—but regular sealing is important if you want to preserve the look and longevity of your pavers. Let’s break it down.
Why Sealing Matters for Travertine Pavers
Travertine is a natural stone with small pores that can absorb water, dirt, and spills. Over time, unsealed pavers may:
-
Stain from oils, food, or plant debris
-
Fade due to sun exposure
-
Accumulate mold, mildew, or efflorescence (white mineral deposits)
-
Lose their natural luster
A high-quality sealer helps protect against these issues by creating a barrier that makes cleaning easier and preserves the stone’s color.
How Often Should You Seal?
Whether or not you need to reseal every year depends on several factors:
1. Exposure to Elements
-
High-traffic or outdoor kitchens/pool areas: May need resealing annually because of heavy use, water, and spills.
-
Low-traffic patios or walkways: Can often go 2–3 years before resealing.
2. Type of Sealer Used
-
Topical sealers (glossy finish): Typically wear out faster and may require annual resealing.
-
Penetrating sealers (matte/natural look): Last longer—often 2–5 years depending on quality.
3. Local Climate
-
Wet, humid, or freeze-thaw regions put more stress on stone and sealer, shortening its lifespan.
-
In drier climates, pavers may last longer between treatments.
Signs Your Pavers Need Resealing
You don’t have to guess—here are some easy ways to tell:
-
Water no longer beads on the surface.
-
The stone looks dull or chalky.
-
Stains are appearing more easily than before.
-
You notice mold or mildew growth.
If you see these signs, it’s time to reseal, even if it hasn’t been a full year.
Tips for Proper Maintenance
-
Clean regularly: Sweep and rinse with mild soap and water to prevent buildup.
-
Spot clean spills: Wipe up oils, wine, or food quickly to avoid stains.
-
Use the right products: Avoid harsh cleaners that can etch or damage travertine.
-
Test first: Pour a small amount of water on the surface. If it soaks in quickly, resealing is due.
Final Verdict – Should I seal my travertine pavers every year?
You don’t necessarily need to seal your travertine pavers every year—but you should inspect them annually. Some high-traffic areas may require yearly sealing, while others can go longer. Investing in a good-quality sealer and staying on top of maintenance will keep your travertine looking beautiful for decades.
What not to use on travertine pavers?
Travertine pavers are a beautiful and durable choice for outdoor patios, walkways, and pool decks. Their natural charm comes from their porous surface and subtle variations in color. However, because travertine is a natural stone, it requires extra care when cleaning and maintaining it. Using the wrong products can damage the stone, discolor the surface, or even shorten the life of your investment.
Below are some things you should never use on travertine pavers:
1. Acidic Cleaners
Products that contain vinegar, lemon juice, or other acids will etch the surface of travertine. Acid reacts with the calcium carbonate in the stone, causing dull spots, rough patches, or permanent stains.
Avoid: Vinegar, citrus-based cleaners, bleach mixtures, or any “lime/rust removers.”
2. Harsh Chemicals and Solvents
Strong chemicals like ammonia or paint strippers can strip away the natural finish and weaken the stone. These products may also penetrate the pores of travertine, causing discoloration that’s nearly impossible to reverse.
Avoid: Ammonia, acetone, or solvent-based degreasers.
3. Abrasive Cleaning Tools
Because travertine is relatively soft compared to granite or quartzite, anything too abrasive can scratch the surface. While scrubbing might seem effective, it leaves behind permanent marks.
Avoid: Steel wool, wire brushes, or rough scouring pads. Stick with soft microfiber cloths, mops, or non-abrasive sponges instead.
4. High-Pressure Washing (Too Close)
Pressure washers are commonly used on outdoor surfaces, but when used too close or at very high PSI, they can erode the stone and widen pores. This makes the surface more vulnerable to stains and water damage.
Avoid: Direct blasting with pressure washers at close range. If needed, use a pressure washer with a wide fan tip at a safe distance.
5. Generic “All-Purpose” Outdoor Cleaners
Many store-bought outdoor cleaners contain harsh chemicals that are not stone-safe. What’s fine for concrete or tile could ruin natural stone. Always check that the product is labeled safe for natural stone.
The Right Approach to Travertine Care
Instead of harsh chemicals, stick to:
-
pH-neutral stone cleaners designed specifically for natural stone.
-
Warm water and mild soap (stone-safe dish soap works).
-
Sealing travertine pavers regularly to protect against stains and weathering.
By avoiding harmful cleaners and tools, you’ll keep your travertine pavers looking elegant for years to come.
✅ Key takeaway: Never use acidic, harsh, or abrasive products on travertine. Stick to gentle, stone-safe cleaning methods and your pavers will maintain their natural beauty.
Can you use Dawn dish soap on travertine pavers?
Travertine pavers are a timeless choice for patios, pool decks, and walkways. Their natural beauty and durability make them stand out—but like any natural stone, they require proper care. A common question homeowners have is whether Dawn dish soap, a popular household cleaner, can be safely used on travertine pavers.
The Short Answer
Yes, you can use Dawn dish soap on travertine pavers—as long as it is used correctly. Dawn is a gentle, pH-neutral soap that won’t etch or damage the surface of your stone the way acidic cleaners (like vinegar, lemon, or bleach) can. However, there are a few best practices to keep in mind.
Why Dawn Dish Soap Works on Travertine
-
pH-Neutral Formula – Travertine is sensitive to acidic and abrasive cleaners. Dawn’s neutral formula makes it safe for occasional cleaning.
-
Effective Degreaser – Outdoor pavers, especially around barbecues or dining areas, can accumulate grease. Dawn cuts through oily residues without damaging stone.
-
Gentle on Sealers – Most travertine pavers are sealed to protect against stains. Unlike harsh chemicals, Dawn won’t strip away your sealer with light use.
How to Clean Travertine Pavers with Dawn
-
Mix a Mild Solution – Combine a few drops of Dawn dish soap with a bucket of warm water. A little goes a long way.
-
Apply with a Soft Mop or Sponge – Avoid stiff brushes or scouring pads, which can scratch the surface.
-
Rinse Thoroughly – Soap residue can leave a film if not rinsed off completely. Use a garden hose with clean water.
-
Dry the Surface – Allow pavers to air-dry, or use a soft towel in smaller areas to prevent water spots.
Things to Avoid
-
Don’t use too much soap – Excess suds can leave streaks and attract dirt.
-
Never mix Dawn with other cleaners – Especially acidic or bleach-based products, as they can react and harm the stone.
-
Avoid pressure washing with soap – High-pressure sprayers can drive detergent deep into the stone or grout lines, causing buildup.
Alternatives to Dish Soap
For deeper cleaning or regular maintenance, consider:
-
Stone-specific cleaners – Formulated to protect natural stone.
-
Warm water rinses – For light dust and dirt.
-
Professional sealing – Resealing your travertine every 1–2 years helps keep it stain-resistant and easier to clean.
Final Thoughts – Can you use Dawn dish soap on travertine pavers?
Dawn dish soap can be a safe and effective option for cleaning travertine pavers, provided it’s diluted and rinsed thoroughly. Think of it as a “spot-cleaning” solution rather than an everyday cleaner. For routine maintenance, stick to stone-safe products and regular rinsing with water to keep your travertine looking beautiful for years to come.
How heavy is a travertine paver?
Travertine pavers are a popular choice for patios, walkways, pool decks, and driveways thanks to their natural beauty, durability, and slip-resistant surface. But if you’re planning a project, one of the most common questions is: how heavy are they? Understanding the weight is important for transportation, installation, and planning the right base material.
Average Weight of Travertine Pavers
The weight of a travertine paver depends on two main factors:
-
Thickness (the most important factor)
-
Paver size (length × width)
Here’s a breakdown:
-
1.25″ thick travertine pavers (common for patios and walkways):
-
Weigh about 15–17 lbs per square foot
-
A standard 6″×12″ paver weighs around 7–9 lbs
-
-
2″ thick travertine pavers (common for driveways and heavy-duty areas):
-
Weigh about 23–25 lbs per square foot
-
A 6″×12″ paver weighs around 11–13 lbs
-
-
French Pattern sets (mixed sizes, usually 1.25″ thick):
-
A full set covering ~8 sq. ft. typically weighs 120–140 lbs
-
Why Weight Matters
-
Transportation: A pallet of 1.25″ travertine pavers (approximately 120–130 sq. ft.) can weigh between 2,000–2,200 lbs. A pallet of 2″ pavers can weigh closer to 3,000 lbs. Make sure your delivery truck or trailer is rated for the load.
-
Installation: Heavier pavers require more effort to handle and may need two people for safe lifting, especially with larger sizes.
-
Base Preparation: The weight of travertine ensures stability, but you’ll want to prepare a solid base of compacted gravel and sand (or mortar for driveways).
Key Takeaways – How heavy is a travertine paver?
-
Travertine pavers typically weigh 15–25 lbs per sq. ft., depending on thickness.
-
A single paver can weigh anywhere from 7 lbs to 25 lbs, depending on size.
-
A full pallet can easily weigh over a ton, so plan for proper transportation and handling.
✅ Pro tip: Always confirm the thickness of your travertine pavers before purchasing, since that alone determines most of the weight difference.
Does sealing travertine pavers change the color?
Travertine pavers are a popular choice for patios, pool decks, and walkways because of their timeless beauty and durability. But many homeowners wonder: if I seal my travertine pavers, will the color change? The short answer is—it depends on the type of sealer you choose.
How Sealing Works
Travertine is a porous natural stone, meaning it has tiny holes and channels that can absorb water, dirt, and other substances. Sealers fill these pores and create a protective barrier. This not only helps prevent staining and weather damage but can also enhance the stone’s appearance.
Types of Sealers and Their Effect on Color
-
Penetrating Sealers (Natural Look)
-
These sealers soak into the stone without leaving a surface layer.
-
They protect against moisture and stains but leave the stone looking almost exactly the same as before.
-
Great for homeowners who want to maintain the original, matte look of travertine.
-
-
Enhancing Sealers (Color-Boosting)
-
These sealers not only protect the stone but also bring out deeper, richer tones.
-
They often give travertine a “wet look,” darkening the stone and highlighting its natural veining.
-
Ideal if you want a more vibrant and dramatic appearance.
-
-
Topical Sealers (Gloss or Satin Finish)
-
These sit on the surface of the paver, creating a sheen—ranging from satin to high gloss.
-
They can slightly darken the stone and add a reflective finish.
-
Typically used in decorative areas where appearance is the top priority.
-
Factors That Affect Color Change
Even with the same sealer, the final look can vary depending on:
-
Stone color: Lighter travertine will show more noticeable darkening than darker varieties.
-
Finish: Honed or tumbled travertine absorbs sealers differently than polished stone.
-
Application method: Applying multiple coats or uneven coverage can intensify or alter the color effect.
Should You Seal Travertine Pavers?
Yes—sealing is recommended for travertine, especially in outdoor areas exposed to weather, pool water, and foot traffic. If you want to maintain the original color, go with a natural penetrating sealer. If you’d like to enhance the look, choose an enhancing or topical option.
Final Thoughts – Does sealing travertine pavers change the color
Sealing travertine pavers doesn’t always change the color—it all depends on the type of sealer you choose. Homeowners looking for long-term protection without altering the stone’s natural look should use a penetrating sealer, while those who want to make the colors pop should go with an enhancing sealer. Either way, sealing ensures your travertine pavers remain beautiful and durable for years to come.
Should you seal travertine pavers before grouting?
Travertine pavers are a favorite choice for patios, pool decks, and walkways because of their natural beauty and durability. But when it comes to installation, one of the most common questions is: Should you seal travertine pavers before grouting?
The short answer: Yes—pre-sealing is highly recommended. Here’s why.
Why Pre-Sealing Is Important
1. Protects Against Stains
Travertine is porous, which means grout can seep into the surface and leave behind permanent stains. Sealing the stone first creates a protective barrier so the grout stays in the joints instead of the stone.
2. Reduces Grout Haze
Grout often leaves a thin film, called grout haze, on the surface of the pavers. Without sealing, that haze can be difficult to remove. Pre-sealing makes cleanup much easier.
3. Preserves the Stone’s Appearance
Whether you prefer a natural matte look or a richer, color-enhanced finish, pre-sealing helps maintain the paver’s beauty during installation and over time.
How to Pre-Seal Travertine Pavers
-
Clean thoroughly – Remove dirt and dust from the surface.
-
Select the right sealer – Use a penetrating sealer made for natural stone.
-
Apply evenly – Use a roller, brush, or sprayer, avoiding puddles.
-
Allow to dry – Let the sealer cure fully (usually 24 hours) before grouting.
-
Seal again afterward – Apply another coat after grouting for long-term protection.
When You Might Skip It
If you’re working in a low-traffic area or using a grout release product, you may decide pre-sealing isn’t necessary. However, for most outdoor projects—especially around pools and patios—pre-sealing offers significant benefits.
Final Takeaway – Should you seal travertine pavers before grouting
Sealing travertine pavers before grouting is one of the best ways to protect your investment. It helps prevent stains, simplifies cleanup, and keeps your stone looking beautiful for years to come.
If you’d like expert guidance on stone care and installation, reach out to us for product recommendations tailored to your project.
Does travertine pavers increase home value?
When homeowners invest in outdoor upgrades, one of the most common questions is: Will this actually boost my home’s value? Travertine pavers, known for their natural beauty and timeless elegance, are more than just a design choice—they can be a smart financial investment too.
Curb Appeal That Sells Homes
First impressions matter, and your outdoor spaces are often the first thing potential buyers see. Travertine pavers provide a high-end look that instantly elevates curb appeal. Whether used for driveways, walkways, or pool decks, their warm tones and natural textures make a property look more refined and well-maintained, which translates into higher perceived value.
Long-Term Durability
Travertine is a natural stone that has been used in architecture for centuries. Its durability means that patios, pool surrounds, or garden paths made with travertine will withstand heavy foot traffic and changing weather conditions. Buyers appreciate low-maintenance, long-lasting upgrades—an important factor that can set your property apart in a competitive market.
Luxury Outdoor Living
Today’s buyers are looking for homes that extend livable space outdoors. A backyard finished with travertine pavers feels like an extension of the interior, creating a luxurious, resort-style atmosphere. This not only enhances lifestyle value for current homeowners but also attracts higher offers from future buyers who envision entertaining or relaxing in a beautifully finished outdoor space.
Return on Investment
Hardscaping projects consistently rank among the top outdoor improvements for return on investment (ROI). Travertine pavers, in particular, are considered a premium material. While costs may be higher than concrete or brick, the payoff often comes in stronger resale value, faster selling times, and greater buyer interest.
Eco-Friendly and Timeless – Does travertine pavers increase home value?
Travertine is a natural, eco-friendly stone that never goes out of style. Unlike trendy finishes that can date a home, travertine has a classic appearance that appeals to a wide range of buyers—making it a safe, long-term investment in your property’s value.
✅ Conclusion: Yes—travertine pavers can increase home value. By improving curb appeal, offering long-term durability, and creating luxury outdoor living spaces, they provide both lifestyle benefits and financial returns. If you’re planning an upgrade, travertine is a material that pays off in more ways than one.
How thick should travertine pavers be?
Travertine pavers are a popular choice for patios, driveways, pool decks, and walkways thanks to their natural beauty, durability, and timeless appeal. But one of the most common questions homeowners and contractors have before starting a project is: how thick should travertine pavers be?
The answer depends on where and how you plan to use them.
Standard Travertine Paver Thicknesses
Travertine pavers typically come in two main thicknesses:
-
1.25 inches (3 cm): The most common thickness for outdoor projects such as patios, pool decks, and walkways. These pavers are strong enough to handle foot traffic and light use while maintaining a sleek, elegant profile.
-
2 inches (5 cm): A heavier-duty option designed for driveways, commercial spaces, or areas that will endure vehicle traffic. The added thickness provides extra strength and load-bearing capacity.
Choosing the Right Thickness for Your Project
-
Patios & Walkways: A 1.25-inch travertine paver is more than enough to handle everyday use. It’s also easier to install and keeps costs down.
-
Pool Decks: Again, 1.25 inches is perfect. Travertine naturally stays cool underfoot and resists slipping, making it ideal for pool areas.
-
Driveways: Always go with 2-inch pavers. Vehicle weight and repeated traffic require the durability that thinner stones can’t reliably provide.
-
Indoor Use: For interior flooring, many people choose travertine tiles (typically 0.5 inches thick) rather than pavers, since there’s no need to withstand outdoor conditions.
Installation Matters Too
The thickness of travertine is important, but so is the installation method. Pavers should always be laid on a properly prepared base of compacted gravel and sand, or set in mortar for added stability. A poor foundation can cause even the thickest stone to crack or shift over time.
Final Thoughts – How thick should travertine pavers be?
For most residential projects, 1.25-inch travertine pavers will be the right choice. If you’re planning a driveway or heavy-use area, opt for 2-inch pavers to ensure long-lasting performance.
By choosing the correct thickness and pairing it with professional installation, your travertine pavers will provide a stunning, durable surface for years to come.
What color goes well with travertine pavers?
Travertine pavers are one of the most versatile natural stone options for outdoor living spaces. With their timeless beauty, natural durability, and unique vein patterns, they instantly add character to patios, pool decks, and walkways. But one question homeowners often ask is: What colors go best with travertine pavers?
Because travertine comes in warm earthy tones—creams, tans, golds, and light beiges—selecting complementary colors for your design can enhance its natural elegance. Here are some ideas to help you pair colors perfectly with travertine pavers.
1. Neutral Pairings for a Classic Look
Neutral colors like white, beige, and gray always work beautifully with travertine.
-
White or off-white trim and walls create a clean, Mediterranean-style aesthetic.
-
Light gray furniture or accent rugs balance the warm undertones of the stone.
-
Taupe or sand-colored paint on exterior walls blends seamlessly with beige travertine for a natural, unified look.
This palette is timeless and works especially well for patios and pool decks.
2. Earth Tones for a Natural Flow
Since travertine itself is a natural stone, earth-inspired colors highlight its organic beauty.
-
Olive green landscaping accents (plants, pots, cushions) bring out the stone’s natural variation.
-
Terracotta or clay tones pair well with travertine’s golden hues, giving your space a Tuscan feel.
-
Chocolate brown wood furniture creates warmth and complements tan and walnut travertine shades.
Earth tones are ideal for creating a relaxing backyard retreat that blends into its surroundings.
3. Bold Accents for Contrast
Travertine’s light and neutral base allows you to add a pop of color without overwhelming the space.
-
Navy blue cushions or umbrellas provide a coastal contrast that feels crisp and modern.
-
Black metal railings or fixtures create striking definition and a touch of sophistication.
-
Deep red or burgundy accents add warmth and pair especially well with cream or gold travertine.
These bold accents work best in moderation, giving your space personality without taking away from the stone’s natural appeal.
4. Soft Pastels for a Calming Atmosphere
If you want a more tranquil, spa-like setting, pastels are the perfect match for travertine.
-
Light blue or aqua accessories enhance the relaxing feel around pools and water features.
-
Soft lavender or blush tones complement travertine’s beige undertones and add a gentle touch of color.
-
Mint green cushions or planters introduce freshness without overwhelming the space.
Pastels pair especially well with ivory or light-beige travertine.
5. Matching Travertine with Other Stones
Travertine also blends nicely with other natural materials.
-
Slate or bluestone accents provide a dramatic contrast against light travertine.
-
Granite countertops or fire pits in darker shades add texture and durability.
-
Porcelain tiles in complementary tones can create mixed-material designs for modern outdoor spaces.
Combining materials adds depth and gives your project a custom, high-end finish.
Final Thoughts
Travertine pavers are a design chameleon—adaptable to many color palettes. Neutrals keep things classic, earth tones make your space feel natural, bold accents create drama, and pastels evoke calm. By thoughtfully choosing your wall colors, furniture, and accents, you can bring out the best in your travertine pavers and design an outdoor space that reflects your style.
What colors do travertine pavers come in?
What colors do travertine pavers come in? Travertine has been used for centuries in some of the world’s most stunning architecture, and today it remains a top choice for patios, pool decks, walkways, and outdoor living spaces. One of the reasons homeowners and designers love travertine pavers is the wide range of natural colors they come in. Unlike manufactured alternatives, no two travertine stones are exactly alike, which means every project has a unique and timeless character.
Classic Travertine Colors
Beige & Ivory
Beige and ivory travertine are the most popular choices. Their light, neutral tones create a clean, elegant look that complements virtually any style of home. They also help keep outdoor surfaces cooler under the sun, making them perfect for pool decks and patios.
Walnut & Brown
Walnut and brown travertine pavers bring warmth and richness to outdoor areas. Their earthy tones pair beautifully with natural landscapes and rustic design styles, offering a timeless Mediterranean feel.
Silver & Grey
Silver travertine has a striking mix of greys, soft whites, and subtle blue undertones. Grey travertine works well in modern and contemporary spaces, giving outdoor areas a sleek, upscale look while remaining versatile enough to match many design palettes.
Gold & Cream
For homeowners looking for a touch of luxury, gold and cream travertine pavers provide soft, radiant hues that brighten outdoor spaces. These tones are especially popular in sunny climates where the natural light enhances their golden glow.
Noce (Dark Brown)
Noce travertine features deep chocolate and espresso shades. It’s an excellent choice for adding contrast or a dramatic focal point, especially when paired with lighter accent stones or landscaping features.
Blends & Mixed Colors
Travertine is often available in multi-color blends, combining beiges, golds, silvers, and browns. These blends create a natural variation across the surface, enhancing the organic feel and reducing the appearance of wear over time.
Why Color Choice Matters
-
Heat Absorption: Lighter colors (like ivory and beige) stay cooler under direct sunlight, ideal for pool decks.
-
Design Flexibility: Neutral tones blend with many home styles, while bold darker shades make a statement.
-
Maintenance: Multi-tone and veined pavers can disguise dirt, wear, and stains more effectively.
Final Thoughts – What colors do travertine pavers come in
Travertine pavers come in a beautiful spectrum of colors ranging from soft ivory and beige to bold walnut and silver. Whether you want a bright, airy patio or a dramatic, modern outdoor living space, there’s a travertine color that fits your vision.
At Marbellezza, we offer a curated selection of travertine pavers in classic and premium shades, available for direct online purchase with nationwide shipping. Browse our collection today and bring timeless natural beauty to your next project.
What is the best base for travertine pavers?
When planning a travertine paver installation, one of the most important steps is creating a strong foundation. The base you choose directly affects the durability, stability, and long-term beauty of your travertine surface. Whether you’re installing them around a pool, on a patio, or in a driveway, understanding the best base for travertine pavers is essential.
Why the Base Matters
Travertine is a natural stone that provides elegance and timeless appeal, but like all pavers, it relies on the surface beneath it for strength. Without a proper base, pavers can shift, crack, or become uneven over time. A well-prepared foundation ensures:
-
Stability – prevents shifting and settling
-
Drainage – reduces water pooling and erosion
-
Longevity – helps the installation last for decades
The Best Base Materials for Travertine Pavers
1. Compacted Gravel Base
The most common and effective base for travertine pavers is a layer of compacted gravel, typically 4–6 inches thick. Crushed stone such as limestone or granite provides excellent drainage while locking tightly in place once compacted.
2. Bedding Sand Layer
On top of the gravel, a thin 1-inch layer of coarse bedding sand helps level the surface and allows pavers to settle evenly. Polymeric sand can also be used later in the joints to lock pavers in place and reduce weed growth.
3. Concrete Slab (Optional in Certain Cases)
For areas with heavy traffic, driveways, or soil that shifts easily, some installers use a reinforced concrete slab as a base. Travertine pavers can then be laid over a sand-set or mortar-set system. While this option adds cost, it offers maximum strength.
Step-by-Step Base Preparation
-
Excavate the area – Remove soil to the required depth (usually 6–8 inches).
-
Install a geotextile fabric (optional) – Helps prevent weeds and soil mixing with gravel.
-
Add gravel base – Spread and compact crushed stone in 2–3 inch layers until reaching the desired depth.
-
Apply bedding sand – Spread a 1-inch layer of sand and screed it level.
-
Lay travertine pavers – Place pavers in your desired pattern.
-
Fill joints with sand – Sweep polymeric or jointing sand into gaps and compact.
Which Base is Best?
-
Patios & Walkways: Gravel + sand base is ideal for most residential uses.
-
Pool Decks: Same as patios, but ensure proper drainage to prevent water damage.
-
Driveways: Gravel + reinforced concrete slab for maximum strength.
Final Thoughts
The best base for travertine pavers depends on where you’re installing them and how much weight they’ll need to support. For most outdoor applications, a properly compacted gravel and sand base is the most reliable and cost-effective choice. Investing the time to prepare a strong foundation ensures your travertine pavers remain level, safe, and beautiful for years to come.