General Information

Pavers vs Tile for Backyard

Pavers vs Tile for Your Backyard

Pavers vs Tile for Backyard. When designing your backyard space, choosing the right surface material is key to creating an outdoor area that’s beautiful, durable, and functional. Two of the most common options people consider are natural stone pavers and tile. While both have their uses, pavers are usually the better choice for outdoor spaces like patios, walkways, and pool decks — especially if you want something long-lasting and weather-resistant.

Durability and Weather Resistance

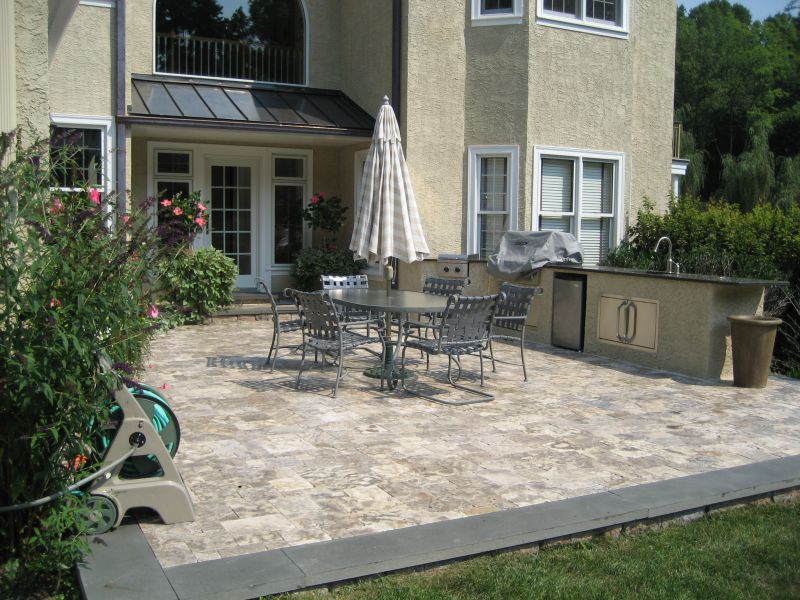
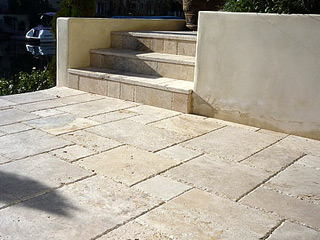
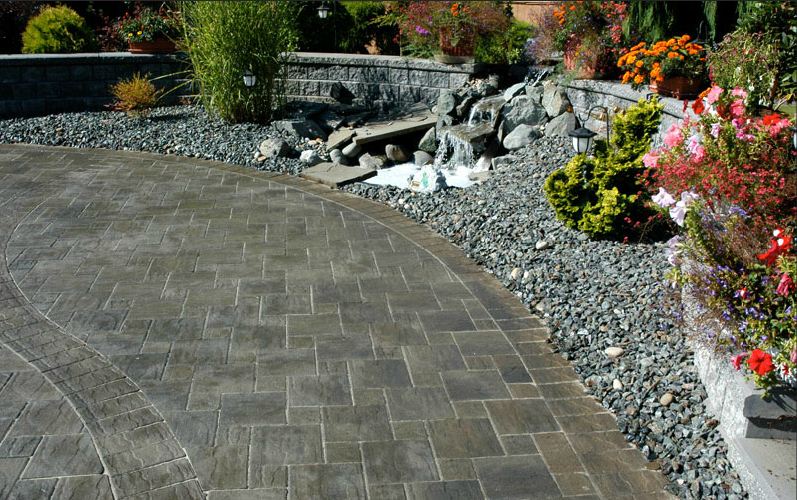
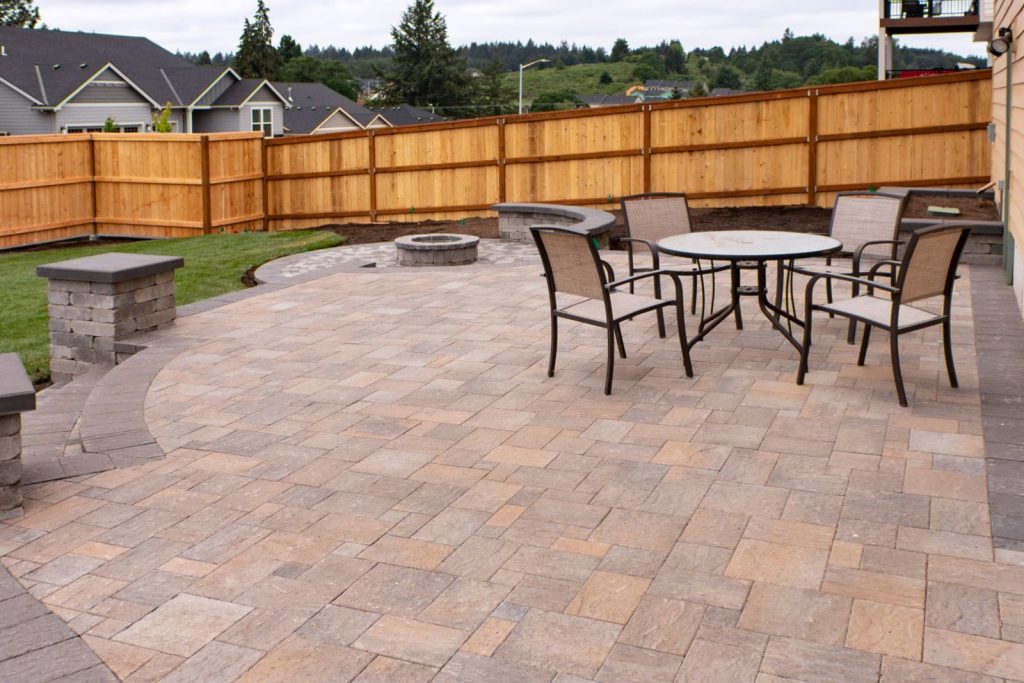
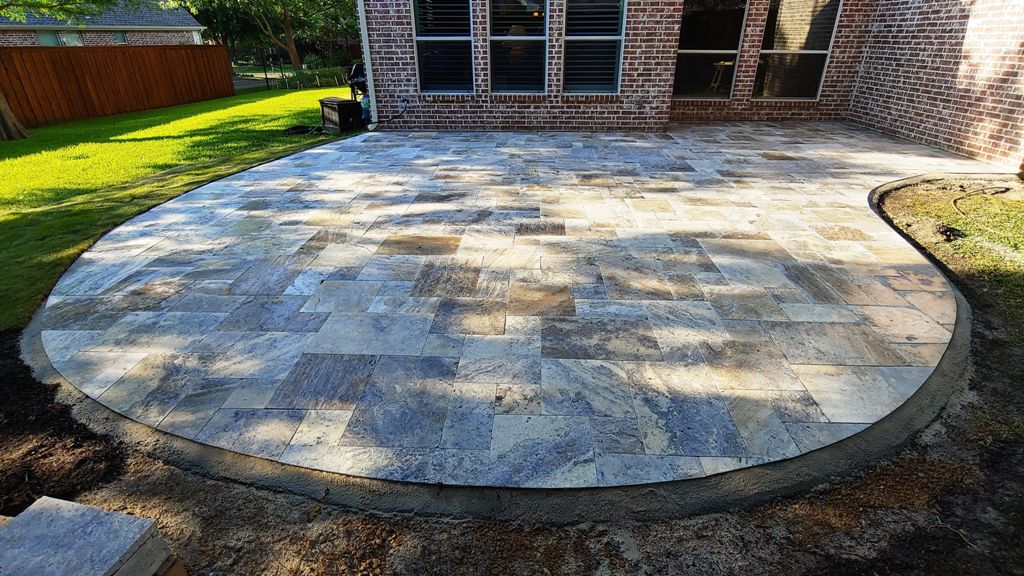
Pavers are made specifically to withstand the elements. Natural stone pavers like travertine, granite, or limestone are incredibly strong and built to handle temperature changes, rain, sun, and foot traffic without cracking or wearing down.

Tile, on the other hand, is often designed for indoor use. Many ceramic or porcelain tiles can crack when exposed to freeze-thaw cycles or shift over time when installed outdoors, especially if the ground isn’t perfectly level or compacted.

Slip Resistance

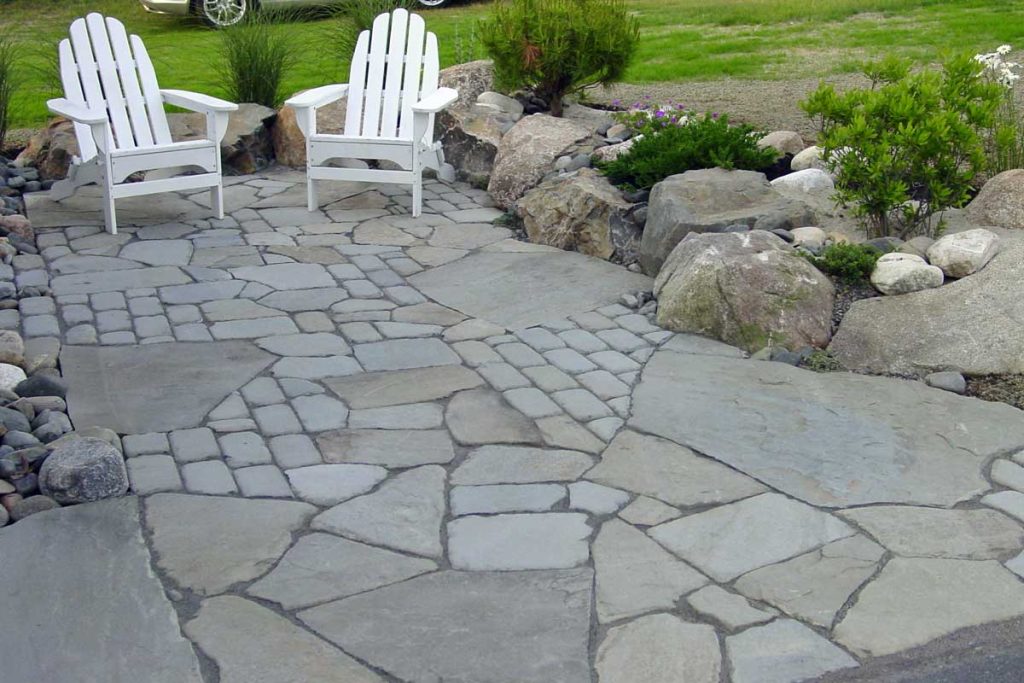
Outdoor areas like patios and pool decks need to be safe even when wet. Natural stone pavers often come with a textured or tumbled finish that provides better grip underfoot, making them less slippery and safer for all ages. Many tiles, especially glossy or polished ones, can become slippery when wet — a major concern for outdoor use.

Aesthetic Flexibility

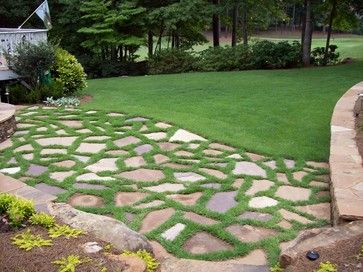
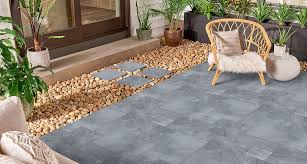
Natural stone pavers offer a timeless, earthy look that blends beautifully with outdoor surroundings. Whether you’re going for a rustic, modern, or traditional style, there’s a paver to match your vision. You can also mix shapes, sizes, and colors for a custom design.

Tiles can offer a sleek, uniform look, but they often lack the natural variation and organic charm that stone pavers provide.

Installation and Maintenance

Pavers are typically easier to repair. If something damages a piece, you can easily remove and replace it without disturbing the rest of your patio. In contrast, tile installations rely on grout and adhesive, which often crack and become difficult to maintain or repair over time when exposed to outdoor conditions.

Also, pavers often require less ongoing maintenance. Natural stone is tough, and when sealed properly, resists stains and buildup.


The Verdict: Go with Pavers for the Outdoors – Pavers vs Tile for Backyard

While tile may work well for indoor projects or covered outdoor spaces, natural stone pavers are the better overall option for backyards, patios, and outdoor walkways. They’re durable, weather-resistant, slip-safe, and beautifully complement natural landscapes.

We specialize in high-quality natural stone pavers that elevate your outdoor space with lasting beauty and strength. Whether you’re updating your backyard patio or designing a brand-new outdoor retreat, our selection of pavers can help you build something that lasts for years to come.

How to stop weeds from growing in-between pavers?

How to stop weeds from growing in-between pavers?

Natural stone pavers are a beautiful and durable option for patios, walkways, and driveways—but one common issue that can take away from their clean appearance is the growth of weeds between the joints. Fortunately, there are effective ways to prevent and control weed growth so your outdoor space stays as polished as the day it was installed. Here’s how to stop weeds from growing in-between pavers.


1. Start with a Solid Base

The best weed prevention starts before the pavers are even laid. A properly compacted base of crushed stone and sand creates a stable, well-draining foundation that discourages weed growth. Using a landscape fabric layer between the soil and the base material adds another barrier, helping to block weed roots from pushing through.


2. Use Polymeric Sand in the Joints

Instead of regular sand, opt for polymeric sand to fill the gaps between pavers. When activated with water, polymeric sand hardens and locks in place—making it much more difficult for weeds to grow through. It also helps prevent ant infestations and joint erosion, offering long-term benefits for your natural stone surface.


3. Apply a Joint Stabilizer or Sealant

After installation, applying a sealant or joint stabilizer not only protects the stone from stains and moisture damage but also helps bind the sand in the joints. This further reduces the chances of weeds taking root and improves the overall durability of your paver installation.


4. Stay on Top of Maintenance

Even with the best precautions, some wind-blown seeds can still find their way into small cracks. Regular maintenance helps keep weeds at bay:

  • Sweep regularly to remove dirt and organic debris where seeds can settle.

  • Pull small weeds by hand as soon as they appear to prevent them from spreading.

  • Use a natural weed killer, such as vinegar or boiling water, for spot treatments if needed.


5. Reapply Polymeric Sand as Needed

Over time, weather and foot traffic may cause joint sand to settle or wash away. Periodically inspect your paver joints and reapply polymeric sand if needed. Keeping joints full not only maintains the clean look of your pavers but also strengthens your weed defense.


Enjoy a Weed-Free Natural Stone Surface – How to stop weeds from growing in-between pavers

Natural stone pavers bring elegance and longevity to any outdoor area—but keeping weeds out is key to preserving that high-end look. By starting with the right materials, using polymeric sand, sealing the surface, and staying consistent with upkeep, you’ll enjoy a beautiful, low-maintenance patio or path for years to come.

Looking to upgrade your outdoor space with premium natural stone pavers? Contact us today to explore our wide selection and get expert advice for your next project.

Are pavers worth the money

Are pavers worth the money?

Are pavers worth the money? If you’re considering upgrading your outdoor space, you’ve probably asked yourself: Are pavers worth the money? The short answer—yes, absolutely. Especially when it comes to natural stone pavers, the investment pays off in both beauty and long-term value.

Here’s why choosing natural stone pavers is one of the smartest decisions you can make for your home:


1. Timeless Beauty

Natural stone offers a rich, organic look that manufactured materials simply can’t replicate. Each stone is unique, with variations in color, texture, and veining that create a luxurious and one-of-a-kind aesthetic. Whether you’re going for a rustic feel or a sleek, modern design, natural stone enhances curb appeal like no other material.


2. Durability That Lasts Decades

Natural stone pavers are incredibly durable. Unlike concrete or brick, which can crack, fade, or wear down over time, stone holds up to weather, weight, and time. With proper installation and minimal maintenance, natural stone pavers can last 50 years or more, making them a long-term solution rather than a short-term fix.


3. Low Maintenance

One of the biggest advantages of natural stone is how little upkeep it requires. Regular sweeping and occasional rinsing are usually enough to keep your pavers looking great. Plus, many types of natural stone are naturally resistant to mold, pests, and weather damage.


4. Boosts Property Value

Natural stone pavers not only enhance the appearance of your outdoor space—they also increase your home’s resale value. Buyers are drawn to quality, and professionally installed stonework adds a touch of luxury that sets your home apart.


5. Eco-Friendly Option

Unlike synthetic materials, natural stone is a sustainable choice. It doesn’t require chemical processing or manufacturing, and it’s recyclable and biodegradable. Choosing natural stone helps reduce your environmental footprint while still giving you a premium product.


6. Versatility in Design

From patios and walkways to pool decks and driveways, natural stone pavers come in a wide range of shapes, sizes, and colors. This versatility makes it easy to create a cohesive and customized outdoor design that fits your vision perfectly.


Final Thoughts: Worth Every Penny – Are pavers worth the money

While natural stone pavers may have a higher upfront cost compared to alternatives, their longevity, aesthetic value, and low maintenance needs make them a far better long-term investment. When you choose natural stone, you’re not just buying pavers—you’re adding lasting beauty, function, and value to your property.

Yes, pavers are worth the money—especially when they’re made of natural stone.


Ready to transform your space? Explore our selection of premium natural stone pavers and let’s build something beautiful together.

What do you put under pavers so they don't move

What do you put under pavers so they don’t move?

What do you put under pavers so they don’t move? When installing natural stone pavers, what you put underneath them is just as important as the pavers themselves. A solid foundation keeps your patio, walkway, or driveway from shifting, sinking, or becoming uneven over time. If you’re wondering what goes under pavers to keep them in place, here’s everything you need to know.


1. Start with a Solid Excavation

Before anything is laid down, the area needs to be properly excavated. The depth of the excavation depends on what the space will be used for. For example:

  • Pedestrian paths: About 4–6 inches deep

  • Driveways or high-traffic areas: 8–12 inches deep

This ensures there’s enough room for the base layers and the pavers themselves.


2. The Base Layer: Crushed Stone or Gravel

This is the most important layer for stability. Use a compacted base of crushed stone or gravel (commonly called road base or Class II base rock). This layer provides drainage and helps distribute weight evenly.

  • Thickness: Typically 4–6 inches

  • Compaction: Use a plate compactor to compact the base in layers to avoid settling later.


3. The Bedding Layer: Washed Sand or Stone Dust

On top of the compacted base, a thin layer of bedding material helps level the pavers and hold them in place. The two common options are:

  • Washed concrete sand: Ideal for flexibility and drainage

  • Stone dust (for natural stone): Sometimes preferred when installing natural stone pavers for tighter joints and a more stable setting

  • Thickness: Around 1 inch

  • Tip: Avoid overcompacting this layer; it should be smooth but not too firm.


4. Natural Stone Pavers

Now comes the main event—laying your natural stone pavers. Fit them closely together, especially with irregular stone shapes, and check for level and alignment as you go.


5. Jointing Material

Once pavers are set, the gaps between them need to be filled to lock everything in place. For natural stone pavers, your options include:

  • Polymeric sand: Hardens with water to resist weeds and movement

  • Regular sand: Can be swept in but may need more frequent maintenance

  • Stone dust: Blends well with natural stone and helps lock joints tightly


6. Edge Restraints

Edge restraints are essential to prevent your pavers from shifting over time. These can be made from concrete, metal, or plastic and are installed along the perimeter of the paver area.


Final Thoughts – What do you put under pavers so they don’t move?

At our company, we believe great results start with great preparation. Choosing high-quality natural stone pavers is only part of the process—laying them over a properly built foundation ensures they stay beautiful and secure for years to come.

Need help selecting the right stone or guidance on installation? Contact us today—we’re happy to help you build something that lasts.

How often should you power wash pavers

How often should you power wash pavers?

How often should you power wash pavers? Natural stone pavers add timeless beauty and durability to any outdoor space—whether it’s a patio, walkway, or driveway. But like anything exposed to the elements, they need a little TLC to stay looking their best. One of the most effective ways to maintain natural stone pavers is by power washing. But how often should you do it?

Why Power Wash Natural Stone Pavers?

Over time, natural stone pavers can collect dirt, grime, moss, algae, and even weeds in the joints. Not only does this make your outdoor space look worn and neglected, but it can also lead to more serious issues like slipping hazards or erosion of joint sand. Power washing helps remove buildup and restore the natural look of the stone without harsh chemicals.

General Recommendation: Once or Twice a Year

For most homeowners, power washing natural stone pavers once or twice a year is ideal. This is enough to keep them clean and vibrant while avoiding any unnecessary wear. Spring and fall are great times for a deep clean—right after winter weather or before the rainy season begins.

Factors That Might Require More Frequent Cleaning

While once or twice a year is a good rule of thumb, some factors could mean you’ll need to power wash more often:

  • High Traffic Areas: Walkways or patios that get heavy foot traffic may need cleaning more frequently.

  • Shady or Damp Areas: These spots are prone to moss and algae, which can be slippery and unsightly.

  • Nearby Trees or Plants: Falling leaves, pollen, and debris can speed up buildup.

  • Weather Conditions: If you live in a wet or humid climate, you may notice quicker growth of mold or mildew.

Tips for Safe Power Washing

Power washing natural stone is generally safe, but it should be done with care:

  • Use Low to Medium Pressure: Too much pressure can damage the surface or loosen the joint sand.

  • Test a Small Area First: Always test an inconspicuous spot to make sure the pressure and technique won’t harm the stone.

  • Consider Sealing: After power washing, applying a natural stone sealer can help protect the surface and reduce how often you’ll need to clean it.

Keep Your Pavers Looking Like New – How often should you power wash pavers?

Power washing is an easy and effective way to refresh your outdoor space. By cleaning your natural stone pavers once or twice a year—and adjusting based on local conditions—you’ll preserve their beauty and extend their life for many seasons to come.

Need help choosing the right natural stone pavers for your project? We offer a wide selection of high-quality stone, and our team is here to help you every step of the way.

What is the best low maintenance paver

What is the best low maintenance paver?

When it comes to outdoor spaces, choosing the right paver can make all the difference—not just in looks, but in long-term care. If you’re looking for something durable, stylish, and easy to maintain, natural stone pavers are hard to beat.

So, what is the best low-maintenance paver? The answer is simple: natural stone.

Why Natural Stone Pavers Are the Best for Low Maintenance

Natural stone pavers—like granite, slate, limestone, and travertine—offer a winning combination of beauty and resilience. Here’s why they’re the go-to option for anyone who wants a long-lasting surface without all the upkeep:

1. Durability That Lasts for Decades

Natural stone is formed by the Earth over millions of years, which means it’s incredibly strong. It can handle heavy foot traffic, fluctuating temperatures, and weather extremes without cracking, shifting, or fading. That means fewer repairs, replacements, and touch-ups over time.

2. Stain-Resistant & Easy to Clean

Unlike manufactured materials, many natural stones are naturally dense and less porous, especially when sealed properly. This makes them resistant to stains, mold, and mildew. A simple sweep and occasional rinse with water is usually all it takes to keep them looking great.

3. No Fading Over Time

Unlike some concrete or manufactured pavers that can fade under constant sun exposure, natural stone retains its color and texture. This means your patio, walkway, or driveway will stay beautiful for years with minimal effort.

4. Low Risk of Weed Growth

Properly installed natural stone pavers, especially when paired with polymeric sand or gravel bases, help block weed growth between joints. That means less time spent pulling weeds or spraying chemicals.

5. Minimal Upkeep, Maximum Curb Appeal

Natural stone’s timeless aesthetic doesn’t require paint, coatings, or artificial finishes to maintain its charm. It naturally weathers beautifully and can even gain character over time.


Best Low-Maintenance Natural Stone Options

  • Granite – Extremely hard and scratch-resistant. Perfect for high-traffic areas.

  • Slate – Naturally slip-resistant and great for wet climates.

  • Travertine – Cool underfoot and ideal for pool decks or patios.

  • Limestone – Smooth, consistent texture with a clean, modern look.


Final Thoughts – What is the best low maintenance paver

If you want a beautiful outdoor space without the constant upkeep, natural stone pavers are the smartest investment. Their long life, easy care, and timeless appeal make them the best low-maintenance paver option available.

Looking to upgrade your yard, driveway, or patio? Contact us today or stop by to explore our wide selection of premium natural stone pavers!

Should you put landscape fabric under pavers

Should you put landscape fabric under pavers?

When installing natural stone pavers for a patio, walkway, or driveway, one common question homeowners and contractors alike ask is: Should you put landscape fabric underneath the pavers? It’s a great question—and the answer depends on the purpose and long-term performance you’re aiming for.

What Is Landscape Fabric?

Gardeners and landscapers typically use landscape fabric—a permeable material—to suppress weeds while allowing water and air to pass through. They often place it under mulch, gravel, or other ground covers to help reduce weed growth and soil erosion.

The Purpose of Landscape Fabric Under Pavers

Some people consider using landscape fabric under pavers to:

  • Prevent weed growth between stones

  • Keep the base material (like gravel or crushed stone) from mixing with the soil

  • Improve drainage

But is it the right choice for a natural stone paver installation? Let’s break it down.

Why Landscape Fabric Isn’t Ideal Under Pavers

While landscape fabric sounds beneficial, it can actually interfere with a proper paver installation:

1. Poor Long-Term Drainage

Natural stone pavers are typically installed over a compacted base of crushed stone and sand. Landscape fabric can hinder water movement through these layers, leading to pooling or frost heaving over time—especially in climates with freeze/thaw cycles.

2. Shifting and Settling

The fabric can create a slippery barrier between the base and the soil, which can cause the entire structure to shift or settle unevenly. A properly compacted gravel base is far more stable without the fabric interfering.

3. Not Effective at Weed Prevention

Weeds don’t just grow from below—they can take root in the sand joints between pavers from windblown seeds. Fabric won’t stop this type of growth. The best defense? Proper jointing sand and occasional maintenance.

When Landscape Fabric Can Be Used

If you’re installing pavers over loose or expansive soil that might mix with your base material, place a geotextile fabric (stronger and more purpose-built than standard landscape fabric) between the subgrade and base layer. This can help stabilize the base and prevent contamination—especially for driveways or heavily trafficked areas.

Pro Tip: Always use a well-compacted, graded gravel base and sharp sand bedding for a long-lasting natural stone paver surface. Skip the fabric unless a soil engineer or professional installer specifically recommends it for your site conditions.

Final Verdict: Skip the Fabric

For most residential applications with natural stone pavers, you don’t need landscape fabric underneath. It can actually do more harm than good. Focus on a solid base, proper compaction, and quality stone for the best long-term results.


Ready to Build with Stone That Lasts?

We offer premium natural stone pavers perfect for patios, walkways, and driveways—built to stand the test of time. Contact us today to learn more about the best practices for your installation and get expert advice tailored to your project.

Is hand tamping enough for pavers

Is hand tamping enough for pavers?

When installing natural stone pavers, the quality of your base preparation can make or break your entire project. One of the most common questions we hear is: “Is hand tamping enough to set my pavers?” The short answer? It depends—but in most cases, especially with natural stone, hand tamping alone isn’t enough to ensure long-term durability and stability.

What Is Hand Tamping?

Hand tamping involves using a manual tamper—a flat, heavy tool with a handle—to compact the base materials (usually crushed stone or sand) before laying pavers. It’s a traditional method used for small-scale projects or tight spaces where machinery can’t reach.

Why Hand Tamping Falls Short for Most Projects

While hand tamping can be useful for touch-ups or very small patios and walkways, it has significant limitations:

  • Inconsistent Compaction: Manual tamping often leads to uneven pressure across the surface, increasing the risk of shifting and settling over time.

  • Limited Depth Penetration: Hand tampers only compact the top few inches of base material. For pavers to stay level and secure, the entire base—often 4 to 6 inches or more—needs to be compacted thoroughly.

  • Time and Labor Intensive: It takes significantly longer and more effort to hand tamp a large area, and the results often aren’t worth the extra labor.

Why Mechanical Compaction Is Better—Especially for Natural Stone

Natural stone pavers are generally heavier and more rigid than concrete alternatives, meaning they require a stronger, more stable foundation. A plate compactor (vibrating compactor) provides:

  • Even, Deep Compaction: Ensuring your base is uniform and stable.

  • Reduced Risk of Settling: Especially important for driveways and high-traffic areas.

  • Better Longevity: A well-compacted base prevents movement, reducing the chances of cracked or uneven stones.

When Can You Get Away with Hand Tamping?

There are a few exceptions where hand tamping might be acceptable:

  • Very small areas, such as stepping stone paths or garden accents.

  • Tight corners or hard-to-reach spots, where a mechanical compactor can’t fit.

  • Minor repairs, where only a few pavers are being reset.

Even in these cases, we recommend using a mechanical compactor for the rest of the installation to ensure the structural integrity of your project.

Final Verdict – Is hand tamping enough for pavers

If you’re investing in natural stone pavers, make sure you’re investing in a proper foundation too. While hand tamping may seem like an easier or more budget-friendly option, the long-term results often fall short. For the best performance and durability, mechanical compaction is highly recommended.

Need help choosing the right natural stone pavers or installation tools? Our team is here to help—contact us today or visit our showroom to explore our selection and get expert advice for your next project.

Does water drain between pavers

Does water drain between pavers?

When planning a new patio, walkway, or driveway using natural stone pavers, one common question we hear is: “Does water drain between pavers?” The short answer is yes—but the full story depends on the type of installation, materials used, and the condition of your base and joints.

In this post, we’ll explore how water drainage works with pavers, why it’s important, and how to ensure your natural stone paving project stays functional and beautiful for years to come.


How Water Drains Between Pavers

Installers typically place natural stone pavers with small gaps (called joints) between each piece. They often fill these joints with sand, polymeric sand, or gravel—materials that allow water to pass through and help prevent pooling or flooding on the surface.

Here’s how it works:

  • Rainwater hits the surface of the pavers

  • Water flows into the joints between pavers

  • From there, it filters down into the compacted base layer below (usually crushed stone or gravel)

  • Excess water continues draining into the soil beneath

Moreover this type of drainage system is often referred to as permeable or semi-permeable, depending on the materials used and how tightly the joints are packed.


Why Drainage Is Important

Proper drainage between pavers isn’t just about preventing puddles—it’s also essential for the long-term health of your hardscape. Without effective drainage:

  • Water can pool on the surface, creating slippery, unsightly conditions.

  • Moisture can weaken the base, leading to shifting, sinking, or cracking over time.

  • Freeze-thaw cycles can cause serious damage in colder climates if water gets trapped under the surface.

By allowing water to drain freely, a well-installed natural stone paver system reduces these risks while also promoting better soil health and reducing runoff.


Tips for Maximizing Drainage

To make sure your paver installation drains properly:

  1. Use a proper base layer – A compacted gravel base allows water to flow through easily and prevents settling.

  2. Choose jointing material carefully – Polymeric sand can harden and resist erosion, while open-graded gravel joints provide maximum permeability.

  3. Maintain joint integrity – Over time, wind and rain may displace joint filler. Refill as needed to preserve function and appearance.

  4. Ensure the right slope – Even permeable systems benefit from a gentle slope (1-2%) to guide water away from structures.


Natural Stone Pavers: A Beautiful, Functional Choice – Does water drain between pavers

Natural stone pavers not only bring timeless beauty and durability to outdoor spaces—they also offer excellent water drainage when installed correctly. Whether you’re building a rustic garden path or a modern patio, understanding how water moves through and around your pavers can help you create a space that stands up to the elements with elegance.

Need help choosing the right natural stone for your project? Contact us today to speak with our experts or browse our selection of high-quality pavers designed to elevate your outdoor living space.

Should you leave gaps between pavers

Should you leave gaps between pavers?

When planning a patio, walkway, or driveway using natural stone pavers, one of the most common questions we hear is: “Should I leave gaps between the pavers?” The short answer is: yes, and here’s why.

Why Gaps Matter

Natural stone pavers—like bluestone, travertine, limestone, or granite—are uniquely beautiful due to their organic shapes, textures, and natural variations. Unlike manufactured pavers, natural stone often has slight inconsistencies in size and shape. These natural characteristics are part of what gives them their timeless appeal—but they also make spacing important.

Here are a few key reasons why you should leave gaps between natural stone pavers:

1. Allows for Natural Expansion and Contraction

All materials expand and contract with temperature changes, and stone is no exception. Leaving a small gap allows each paver to shift slightly without cracking or putting pressure on surrounding stones.

2. Improves Drainage

Gaps between pavers promote proper drainage. Rainwater or irrigation can flow between the joints and into the ground below, reducing surface pooling and helping maintain the integrity of your hardscape.

3. Supports Joint Filling Materials

Whether you choose polymeric sand, gravel, or grass between your pavers, a small gap gives the filling material room to settle and stabilize the stones. This helps prevent shifting and keeps your surface even over time.

4. Aesthetic Versatility

Leaving intentional gaps allows you to customize the look of your project. Wide joints can create a rustic, relaxed feel, while tighter joints offer a more refined, formal appearance. Both styles can be achieved beautifully with natural stone.

How Much Space Should You Leave?

The ideal gap size depends on the type of stone and the overall look you want to achieve. Here are some general guidelines:

  • Tightly cut stones (like sawn or calibrated stone): ⅛” to ¼” gap

  • Irregular or tumbled stones: ½” to 1” or more

  • Dry-laid installations: larger gaps filled with gravel or ground cover

  • Mortared joints: typically smaller, depending on the application

Our team can help you determine the right spacing based on your project, stone type, and local conditions.

Expert Tip: Plan Ahead

The best time to decide on joint width is during the layout stage. Dry-lay your stones first to visualize spacing, adjust your pattern, and ensure even gaps throughout. Proper planning avoids costly rework and ensures a seamless final result.


Final Thoughts

Yes, leaving gaps between pavers is essential—especially when working with natural stone. It’s not only about aesthetics, but also about the long-term performance and stability of your installation.

If you’re planning a natural stone project and need advice on joint spacing, materials, or layout techniques, our experts are here to help. Reach out to us today or visit our showroom to explore our premium selection of natural stone pavers.