General Information

Are travertine pavers good for outdoor patios

Are travertine pavers good for outdoor patios?

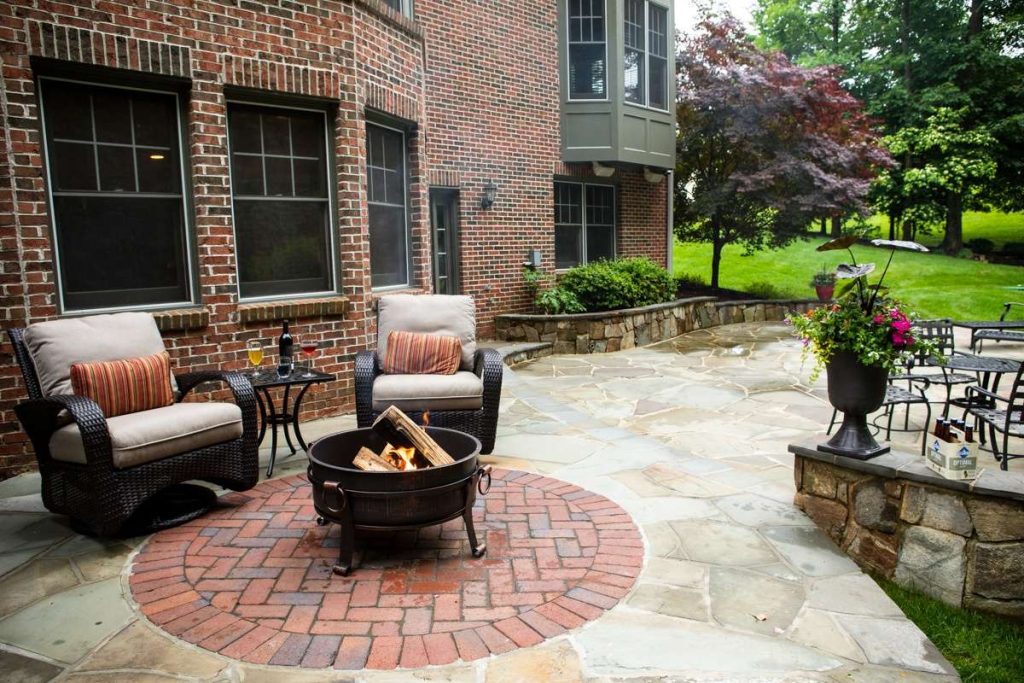
Are travertine pavers good for outdoor patios? If you’re planning a new patio or updating an existing one, you’ve probably come across travertine pavers as a popular option. But are they really a good choice for outdoor patios? In short—yes. Travertine pavers are not only beautiful but also durable, weather-resistant, and comfortable underfoot. Here’s why travertine might be the perfect fit for your outdoor space.

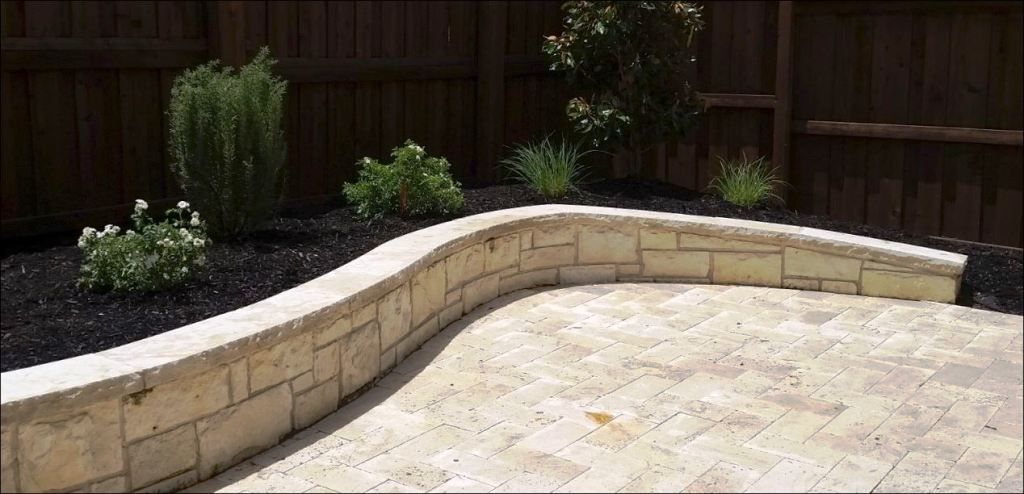
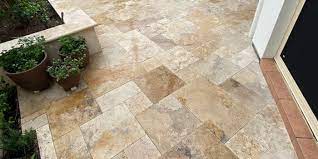
1. Naturally Beautiful

Travertine is a type of limestone formed by mineral springs, giving it a unique texture and natural variation in color. From warm beiges and silvers to bold golds and walnut tones, no two pieces are exactly alike. This organic look brings a timeless, high-end feel to any patio design.

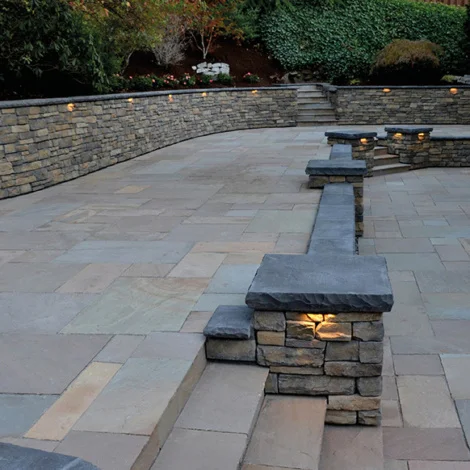
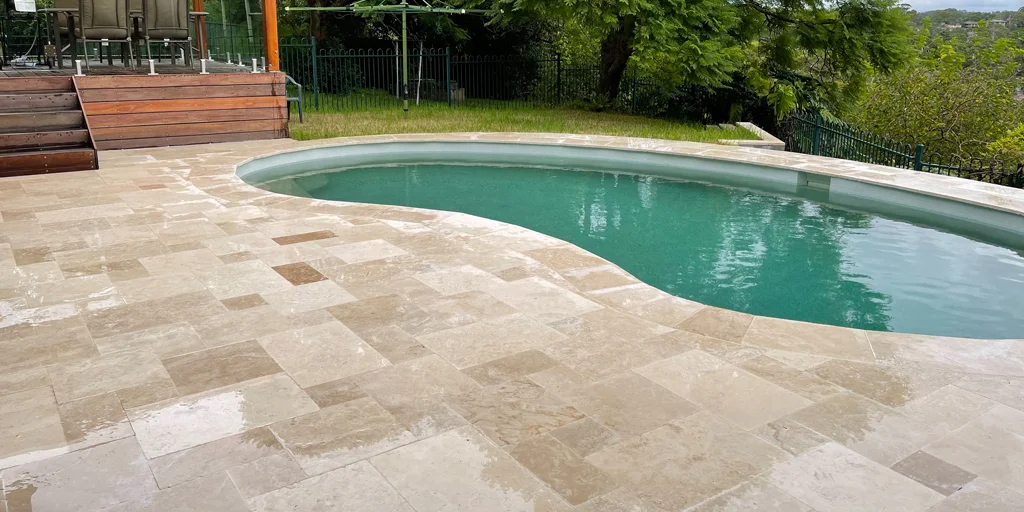
2. Slip-Resistant Surface

One of travertine’s biggest advantages for outdoor use is its textured, non-slip surface—especially important around pools, patios, and walkways. Even when wet, travertine provides great traction, helping to prevent slips and falls.

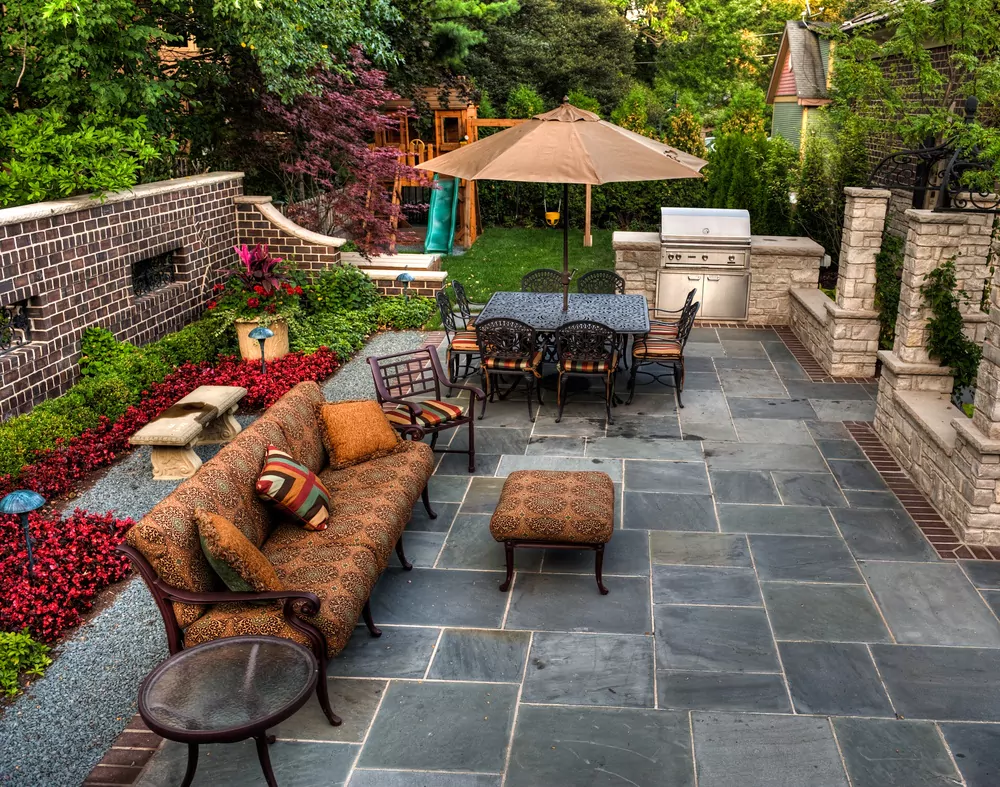
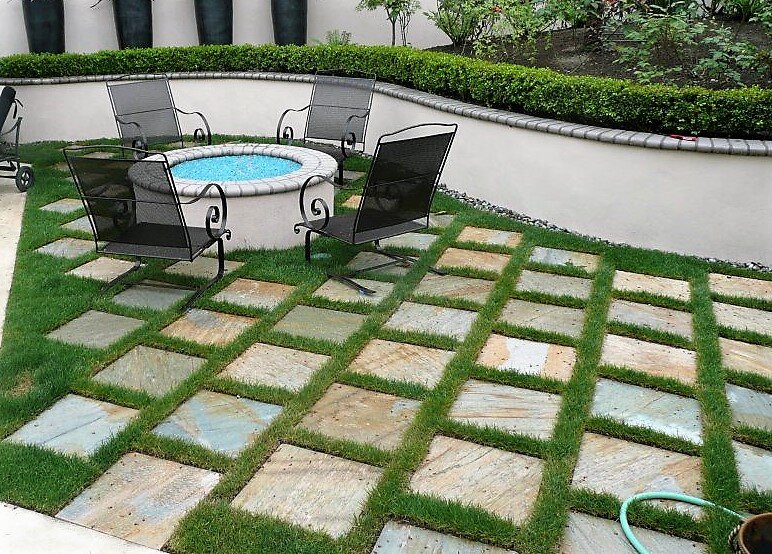
3. Comfortable in Any Climate

Travertine stays cool to the touch, even in hot summer weather. This makes it ideal for barefoot use on patios, pool decks, and garden paths. Unlike concrete or brick, which can get scorching hot under the sun, travertine remains pleasant and walkable.

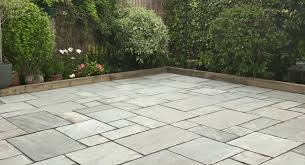
4. Long-Lasting Durability

Travertine is known for its strength and longevity. It holds up well under heavy foot traffic and is resistant to cracking, fading, and weather damage when properly sealed. Whether you’re hosting backyard barbecues or relaxing with family, travertine stands up to the elements year-round.
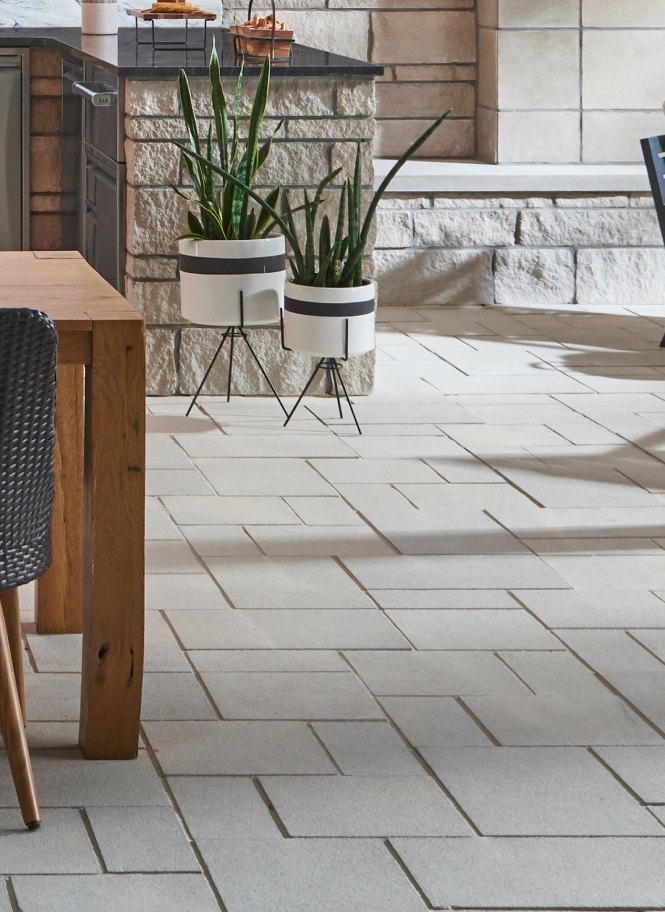
5. Easy Maintenance

Maintaining travertine is simple. Regular sweeping and occasional rinsing with water are usually enough to keep it looking clean. A sealant can help protect against stains and enhance the natural color of the stone, especially in high-traffic or spill-prone areas.

6. Environmentally Friendly

Because travertine is a natural material, it’s a sustainable and eco-friendly choice. Unlike synthetic materials, it doesn’t emit harmful chemicals and blends beautifully into outdoor environments.


Final Thoughts

So, are travertine pavers good for outdoor patios? Absolutely. Their combination of natural beauty, slip resistance, durability, and comfort make them one of the best options for creating a functional and elegant outdoor living space.

Looking to upgrade your patio with travertine pavers? Browse our selection of premium natural stone pavers and let us help you bring your dream patio to life.

Can you lay pavers without digging

Can you lay pavers without digging?

When it comes to installing a patio, walkway, or garden path, digging is often considered a necessary first step. But what if you want to skip the shovel entirely? Is it possible to lay pavers without digging?

The Short Answer: Yes, But With Caveats

Yes, you can lay pavers without digging—but it depends on your goals, the type of project, and the natural stone pavers you’re using. Skipping excavation might work for temporary or light-duty installations, but there are important limitations to keep in mind.


When You Can Lay Pavers Without Digging

1. Temporary or Decorative Installations
If you're creating a short-term solution—like a garden path or decorative area—laying natural stone pavers directly over grass or dirt may be acceptable. Just keep in mind they may shift over time due to weather or foot traffic.

2. On a Solid, Level Base
If you already have a level concrete pad or an old patio surface, you may be able to lay pavers on top without digging. This can be a great option for giving old spaces a facelift using premium natural stone.

3. Raised Paver Systems
There are raised pedestal systems or grid panels available that allow you to install pavers above ground without excavation. These are more common for rooftop patios or decks, and work especially well with consistent, flat natural stone pavers.


The Risks of Skipping the Digging Step

Even though it’s possible, laying pavers without digging comes with trade-offs:

  • Poor Drainage: Without a proper gravel and sand base, water may pool under or around the pavers.

  • Uneven Surfaces: Natural soil shifts over time. Without excavation and leveling, your pavers can become uneven or unstable.

  • Weed Growth: Grass, weeds, or roots can grow through gaps, especially if a weed barrier isn’t installed.

  • Shorter Lifespan: A paver installation without a solid base won’t last as long, especially in high-traffic areas.


Our Recommendation

At [Your Company Name], we always recommend starting with a proper base for any natural stone paver installation. Digging down just a few inches to create a compacted gravel and sand layer will dramatically improve the look, durability, and performance of your patio or path.

Need help choosing the right paver or installing it the right way?
We’re here to help—from premium natural stone options to step-by-step installation tips.


Final Thoughts - Can you lay pavers without digging?

Yes, you can lay pavers without digging, but it's important to know the limitations. If you're investing in high-quality natural stone, it’s worth doing the prep work to ensure a beautiful, long-lasting result.

Have more questions? Stop by our showroom or contact our team today—we’d be happy to help you get started.

Can plastic go under pavers

Can plastic go under pavers

When installing natural stone pavers, one of the most important steps happens beneath the surface—literally. The base and materials used underneath your pavers play a major role in the longevity, stability, and appearance of your finished patio, walkway, or driveway. One question that often comes up is: Can plastic go under pavers?

The Short Answer: It’s Not Recommended

While plastic sheeting might seem like a simple weed barrier or moisture block, placing plastic directly under pavers is generally not recommended. Here’s why:


1. Poor Drainage and Water Accumulation

Plastic is non-porous, meaning it doesn’t allow water to pass through. When installed under natural stone pavers, it can trap water rather than allowing it to drain properly through the base layers. This can lead to:

  • Pooling and puddles beneath the surface

  • Soil movement or erosion

  • Increased risk of frost heave in colder climates

Over time, this trapped moisture can compromise the integrity of your paver installation and lead to uneven settling.


2. Weed Barrier? There Are Better Options

Some homeowners consider using plastic as a weed barrier. While it may temporarily block weeds, plastic can also:

  • Tear easily under pressure

  • Create anaerobic (oxygen-starved) conditions that harm soil health

  • Cause pavers to shift due to trapped moisture and lack of flexibility

Instead, a professional-grade geotextile fabric is a better solution. It allows for proper drainage while still suppressing weed growth, making it ideal beneath paver base layers.


3. Natural Stone Needs a Stable, Breathable Base

Natural stone pavers are a premium, long-lasting material—and they deserve a base that matches their quality. A proper installation usually involves:

  • A compacted sub-base of crushed gravel or road base

  • A bedding layer of sand or stone dust

  • Optional geotextile fabric between layers (not plastic)

This system allows your pavers to “breathe,” drain correctly, and stay level over time.


Final Thoughts – Can plastic go under pavers?

While it might be tempting to lay plastic under pavers as a quick fix, doing so can actually lead to more issues in the long run. We recommend using proper materials—like geotextile fabric, crushed stone, and leveling sand—to get the most out of your natural stone paver installation.

Looking for expert advice or high-quality stone pavers for your next project? Contact us today or visit our showroom to explore our wide selection of natural stone options.

Natural Stone Pavers Weight Limit

Natural Stone Pavers Weight Limit

Natural Stone Pavers Weight Limit. Natural stone pavers are a popular choice for patios, driveways, walkways, and pool decks thanks to their beauty, durability, and timeless appeal. But one important factor to consider before installation—especially in high-traffic or load-bearing areas—is weight capacity. How much weight can natural stone pavers handle, and are they suitable for driveways or heavy vehicles? Here’s what you need to know.


What Determines the Weight Limit of Stone Pavers?

The weight limit of natural stone pavers depends on several factors:

1. Stone Type

Different types of stone have different compressive strengths:

  • Granite and quartzite are among the strongest, often used for driveways and commercial spaces.

  • Limestone, sandstone, and travertine are typically better suited for patios and walkways, though denser varieties can still handle moderate weight.

  • Marble and onyx, while visually stunning, are generally softer and more prone to cracking under heavy loads.

2. Thickness of the Paver

Thicker pavers naturally support more weight. Standard residential pavers are typically 1.25″ to 2″ thick, while heavy-duty applications may call for pavers 2.5″ or more.

3. Subbase and Installation

Even the strongest stone can crack if installed incorrectly. A well-compacted gravel or concrete base, combined with proper edge restraints and jointing sand, dramatically increases load-bearing capacity.


Typical Load Capacities

  • Pedestrian Areas (Walkways, Patios):
    Pavers 1.25″–2″ thick on a solid base can easily support foot traffic and lightweight furniture.

  • Driveways & Vehicle Access:
    For passenger vehicles, stone pavers at least 2″ thick, especially granite or quartzite, on a reinforced subbase can handle around 8,000–10,000 lbs of vehicle weight.
    For trucks or RVs, increase thickness and subbase depth or consider reinforcing with concrete.


Best Natural Stones for Heavy Loads

If you’re planning to use natural stone pavers in high-load areas like driveways, loading zones, or commercial spaces, these are your best options:

  • Granite: Extremely hard, weather-resistant, and ideal for driveways.

  • Quartzite: Strong and slip-resistant, great for heavy traffic.

  • Bluestone: Dense and durable, often used in both residential and municipal settings.


Tips to Maximize Weight Support

  • Use interlocking patterns for better weight distribution.

  • Compact the subbase properly to prevent shifting or settling.

  • Seal pavers to reduce water infiltration, which can weaken the base over time.

  • Don’t skimp on thickness—especially for vehicular use.


Final Thoughts – Natural Stone Pavers Weight Limit

Natural stone pavers are more than just a design choice—they’re an investment in durability and function. While the weight limit depends on stone type, thickness, and installation method, properly chosen and installed pavers can easily handle everything from patio furniture to parked cars.

If you’re unsure what type of stone or thickness is right for your project, it’s best to consult with a stone specialist or contractor. Choosing the right paver now can save you costly repairs later.

How soon can you walk on pavers after installation?

How soon can you walk on pavers after installation?

How Soon Can You Walk on Natural Stone Pavers After Installation?

🛠️ Step 1: Base & Bedding – The Foundation Phase

  • Compact your base: After laying the gravel sub-base, allow 24–48 hours for compaction and stabilization—weather and soil type may affect this. 

  • Set the bedding sand and stones: Once set, let the stone bedding settle with gentle tool vibration and tamping for another 24–48 hours.

Bottom line: ~2–4 days before anything heavy makes contact.


🚶 Step 2: First Footsteps – Light Usage

After the bedding sand has cured (typically within 2 days), light foot traffic—think careful walking without dragging items—is usually safe.


💤 Step 3: Moderate Use – Curing Continues

From day 3 to 7, you can gradually increase usage—walking more, stepping up furniture placement. But avoid running, heavy loads, or dragging equipment until stronger adhesion is confirmed. 


🔒 Step 4: Final Cure – Wait for Stability

By 28 days, both the stones and bedding material are fully set, paving the way for heavy usage like furniture setups, grills, or vehicle traffic. This timeline ensures optimal strength and longevity. 


✅ Quick Reference Table

Time After Installation Safe Usage Type Notes
0–2 Days No traffic Base and bedding settling
2–7 Days Light to moderate Walk; no heavy loads
8–28 Days Increased usage Gentle load placement
28+ Days Full usage Furniture, vehicles, heavy equipment


🌤️ Why These Timeframes Matter

  • Foundation strength: A well-compacted base holds stones securely, preventing shifting or settling issues.

  • Sand joint stability: Joint sand needs time to harden; early foot traffic can compromise this.

  • Longevity: Rushing use may cause uneven stones, joint erosion, or premature wear.


📝 Pro Tips for Best Results

  1. Weather-smart installation

    • Dry conditions boost curing; cold or rainy weather slows it down. 

  2. Mist-dry in hot, dry climates

    • A light mist during scorching days helps prevent quick drying which can crack bedding.

  3. Postpone sealing natural stone

    • Wait 4–8 weeks before applying sealant—further drying prevents trapped moisture or efflorescence.

  4. Hold off on high-impact cleaning

    • Avoid power-washing or heavy scrubbing for about 2 months to avoid destabilizing joints.


✅ Final Takeaway – How soon can you walk on pavers after installation? 

As a rule of thumb:

  • Stay off new pavers for 2–4 days to allow initial settling.

  • Light walking is fine by day 3, but avoid heavy use.

  • Full use, including furniture and vehicles, should begin around 28 days post-installation.

This staged approach ensures your natural stone pavers look stunning and perform flawlessly for years.

How to stick pavers to ground?

How to stick pavers to ground?

How to stick pavers to ground? Installing natural stone pavers is a great way to enhance the look and durability of your outdoor spaces. But to get the most out of your investment, they need to be installed properly — and that means making sure they stay firmly in place.

If you’re wondering how to stick pavers to the ground so they don’t shift, sink, or loosen over time, here’s a clear, professional guide to help you do it right.


Step 1: Choose the Right Base

Before anything gets “stuck” to the ground, you need a proper foundation.

Best option for natural stone pavers:

  • Compacted gravel base with a layer of bedding sand
    This flexible base allows water to drain while giving the pavers a solid surface to rest on.

For mortared installations:

  • If you’re planning a more permanent, rigid setup (like a patio or set of stairs), you’ll need a concrete slab base instead.


Step 2: Level and Compact the Base

A stable paver job starts with a level, compacted base.

  • Excavate the area about 6–8 inches deep.

  • Add 4–6 inches of crushed gravel and compact it thoroughly.

  • Add 1 inch of bedding sand (or mortar mix for stone on concrete) and level it out evenly.


Step 3: Apply Bonding Material

Depending on the type of project and surface, you’ll use one of the following methods to make your pavers stick:

Option 1: Dry-Laid (No Mortar)

  • After placing the pavers on the sand base, fill the joints with polymeric sand, which hardens slightly when watered and helps lock the stones in place.

  • Ideal for patios, walkways, or garden paths.

Option 2: Mortar-Set (For Concrete Bases)

  • Spread a thin layer of mortar or thin-set adhesive over the concrete slab using a notched trowel.

  • Press each stone firmly into place.

  • This method is best for steps, landings, or areas needing a permanent bond.

Option 3: Paver Bonding Adhesives

  • For adhering stone pavers directly to concrete (especially vertical surfaces like walls or steps), use a construction-grade landscape adhesive designed for stone.

  • Apply with a caulking gun, press the stone in place, and allow to cure.


Step 4: Lock It In

  • For dry-laid pavers: sweep polymeric sand into joints and water lightly to activate binding.

  • For mortar-set pavers: allow mortar to cure, then fill joints with grout or more mortar as needed.

  • For adhesive installs: check manufacturer’s dry time and avoid shifting while it cures.


Final Tips for Long-Lasting Paver Installs

  • Edge restraints are essential. They prevent pavers from spreading or shifting over time.

  • Drainage matters. Always ensure water can flow away from the installation to prevent erosion or freeze-thaw damage.

  • Seal your pavers (optional, but recommended for natural stone) to protect from stains and weathering.


Need Help Choosing the Right Materials? – How to stick pavers to ground?

We offer a wide variety of natural stone pavers, as well as the adhesives, mortar, and base materials you need for a successful install. Whether you’re a DIYer or working with a contractor, our team is here to help you get the job done right.

Does vinegar ruin pavers

Does vinegar ruin pavers?

Does vinegar ruin pavers? Vinegar is a common household cleaner praised for being natural, non-toxic, and budget-friendly. But when it comes to cleaning outdoor surfaces like pavers, especially natural stone pavers, vinegar can do more harm than good.

The Problem with Vinegar on Pavers

Vinegar is an acid—acetic acid, to be exact. While it’s great for cutting through grease and grime, acidic solutions can react negatively with many types of natural stone. This reaction can lead to:

  • Etching – A dull, uneven surface caused by the acid eating away at the stone’s top layer.

  • Discoloration – Natural stone can change color or develop white spots when exposed to acid.

  • Weakened Structure – Repeated exposure may slowly deteriorate the stone, especially softer varieties like travertine, limestone, or marble.

  • Damaged Joint Sand – Vinegar can also break down the polymeric sand between pavers, leading to loose joints and weed growth.

What About Concrete Pavers?

While concrete pavers are a bit more durable, vinegar can still cause surface damage, especially with frequent use. It can also stain or lighten the color unevenly.

Safe Alternatives for Cleaning Pavers

If your natural stone or concrete pavers need a refresh, try these safer options:

  • Mild dish soap and water – A simple solution with a soft-bristle brush is often all you need.

  • Specialty paver cleaners – Designed specifically for stone or concrete, these products clean effectively without causing damage.

  • Pressure washing (carefully) – Great for removing surface dirt and algae, but avoid high pressure on softer stone.

Final Thoughts – Does vinegar ruin pavers?

Vinegar might seem like a harmless cleaner, but for pavers—especially natural stone—it can cause lasting damage. Always choose cleaning methods that preserve the beauty and integrity of your outdoor space.

Need help choosing or maintaining your natural stone pavers? Contact us today for expert advice and top-quality materials that are built to last.

Can I just put pavers on grass

Can I just put pavers on grass?

If you’re looking to quickly spruce up your yard or create a charming garden path, you may be wondering: Can I just put pavers on grass? While it might seem like a simple shortcut, placing pavers directly on grass is rarely the best long-term solution—especially when using natural stone.

The Short Answer: You Can, But You Shouldn’t

Technically, you can lay pavers directly on grass. But doing so can lead to a range of issues:

  • Uneven surfaces as the grass dies and soil settles

  • Poor drainage, which can make pavers slippery or sink

  • Weed growth between stones

  • Shorter lifespan of your installation due to instability

Natural stone is a premium product, and it deserves a solid, well-prepared base to truly shine.

The Right Way to Install Natural Stone Pavers

To ensure durability and a professional look, here’s how we recommend preparing the ground before laying your pavers:

  1. Remove the Grass: Dig down at least 3–6 inches to remove grass, roots, and loose soil.

  2. Lay a Base Layer: Fill the area with a compacted layer of gravel (typically 3–4 inches).

  3. Add Sand or Stone Dust: A 1-inch layer of sand or stone dust helps level the surface and lock pavers in place.

  4. Lay Your Pavers: Place your natural stone pavers carefully, using a rubber mallet to set them evenly.

  5. Fill the Gaps: Sweep sand or stone dust into the joints to secure the pavers and prevent shifting.

Looking for a More Casual Option?

If you’re aiming for a temporary solution—say, for a garden party or a lightweight pathway—laying pavers over grass may be fine for the short term. But even then, consider using stepping stones with a gap between each one. This lets grass grow naturally between the stones and minimizes disturbance.

Final Thoughts – Can I just put pavers on grass?

While it might be tempting to skip the prep work, proper installation makes all the difference. A stable foundation ensures that your natural stone pavers stay level, look beautiful, and last for years.

At Tez Marble, we offer a wide selection of high-quality natural stone pavers—and we’re happy to guide you through installation best practices. Whether you’re creating a patio, walkway, or garden feature, we’re here to help you build it right.

Need help choosing the right stone for your project?
Contact us today or stop by our showroom!

Do pavers get hot

Do pavers get hot?

Do pavers get hot? When planning your outdoor space—whether it’s a patio, pool deck, walkway, or driveway—comfort matters just as much as durability and design. A common concern many homeowners have, especially in warmer climates, is whether pavers get hot under the sun.

Let’s break it down.


Do Pavers Really Get Hot?

The short answer: yes, some pavers can get hot, especially when exposed to direct sunlight for hours. However, the degree to which they heat up depends heavily on the material, color, and surface texture.


Why Natural Stone Stays Cooler

If heat is a concern for your space, natural stone pavers are an excellent choice. Here’s why:

Lower Heat Retention

Compared to concrete or brick, many types of natural stone—like travertine, limestone, and sandstone—naturally retain less heat. This makes them significantly more comfortable to walk on barefoot, even during the summer months.

Light Colors Stay Cooler

Stones in lighter shades reflect more sunlight and absorb less heat. For example, light beige or ivory travertine tends to stay noticeably cooler than darker pavers or poured concrete.

Porous Surface Advantage

Some natural stones, like travertine, have a porous structure that allows for air circulation and natural cooling, even after prolonged sun exposure.


What Affects Paver Temperature?

Several factors influence how hot your pavers will feel:

  • Material – Natural stone generally stays cooler than concrete or porcelain.

  • Color – Lighter colors reflect sunlight; darker colors absorb more heat.

  • Finish – Textured or tumbled surfaces often stay cooler than smooth, polished finishes.

  • Installation Location – Pavers in shaded or partially shaded areas will naturally stay cooler.


Ideal Pavers for Hot Climates

If you live in a warmer region, consider these natural stone options:

  • Travertine – One of the coolest-to-the-touch pavers available, especially in light finishes.

  • Limestone – A durable and cooler alternative with a soft, elegant look.

  • Sandstone – Porous and light in color, perfect for sun-drenched areas.


Tips to Keep Pavers Cool

Even if you choose heat-resistant materials, you can further reduce surface temperature with a few smart strategies:

  • Incorporate shade – Use pergolas, umbrellas, or landscaping to provide natural shade.

  • Mist the surface – A quick spray of water can cool pavers down immediately.

  • Install during off-peak sunlight – Orient patios or pool decks to minimize direct sun exposure.


Final Thoughts – Do pavers get hot?

Yes, pavers can get hot—but natural stone pavers offer a cooler, more comfortable alternative to other materials. If you’re designing an outdoor space where heat is a factor, investing in quality natural stone like travertine or limestone can make a noticeable difference in comfort and style.


Looking for the best pavers for hot weather?
Browse our in-stock collection of natural stone pavers, including cool-touch options perfect for patios, pools, and pathways.

Have questions? Contact our team today to find the perfect stone for your project.

How do you prepare the ground for pavers

How do you prepare the ground for pavers?

How do you prepare the ground for pavers? Installing natural stone pavers is a great way to elevate the look of your outdoor space—but the key to a long-lasting, stable, and beautiful result lies in what happens before the pavers are laid. Proper ground preparation ensures your pavers won’t shift, sink, or crack over time. Here’s a step-by-step guide to preparing the ground the right way:


1. Plan and Mark the Area

Start by measuring and marking the space where you plan to install your pavers. Use stakes and string lines to outline the exact area. This helps guide excavation and ensures clean, straight edges.


2. Excavate the Area

Dig out the marked space to the proper depth. This will depend on the type of natural stone, the intended use (walkway, driveway, patio), and your local climate. A general rule of thumb is:

  • Walkways & Patios: 6–8 inches deep

  • Driveways: 10–12 inches deep

This depth includes space for the gravel base, sand layer, and the paver thickness.


3. Add a Gravel Base

Lay down a base layer of crushed stone or gravel, typically 4–6 inches deep. This base supports drainage and keeps your pavers from shifting.

  • Use ¾-inch crushed stone or similar material

  • Spread evenly, then compact thoroughly using a plate compactor

  • Mist with water between compaction passes for best results


4. Add a Layer of Sand

On top of the compacted gravel base, add a 1-inch layer of coarse bedding sand. This layer helps you level the pavers precisely and acts as a cushion.

  • Use screed boards to level the sand evenly

  • Avoid walking on the sand after leveling to prevent dips


5. Lay the Pavers

Carefully place your natural stone pavers onto the sand bed in your desired pattern. Work from one corner and move outward. Use spacers if needed to maintain consistent joints.


6. Compact and Fill the Joints

Once all the pavers are in place:

  • Use the plate compactor again to press them firmly into the base

  • Sweep polymeric sand or jointing sand into the gaps between stones

  • Lightly mist with water to set the sand and prevent weed growth


Why Proper Ground Prep Matters – How do you prepare the ground for pavers?

Without a well-prepared base, even the most beautiful stone pavers can become uneven, cracked, or unstable. A solid foundation ensures your natural stone installation will look great and last for decades.


Need Help Choosing the Right Pavers? 
We specialize in high-quality natural stone pavers and can guide you on everything from material selection to installation tips. Contact us today or visit our showroom to get started on your next project!